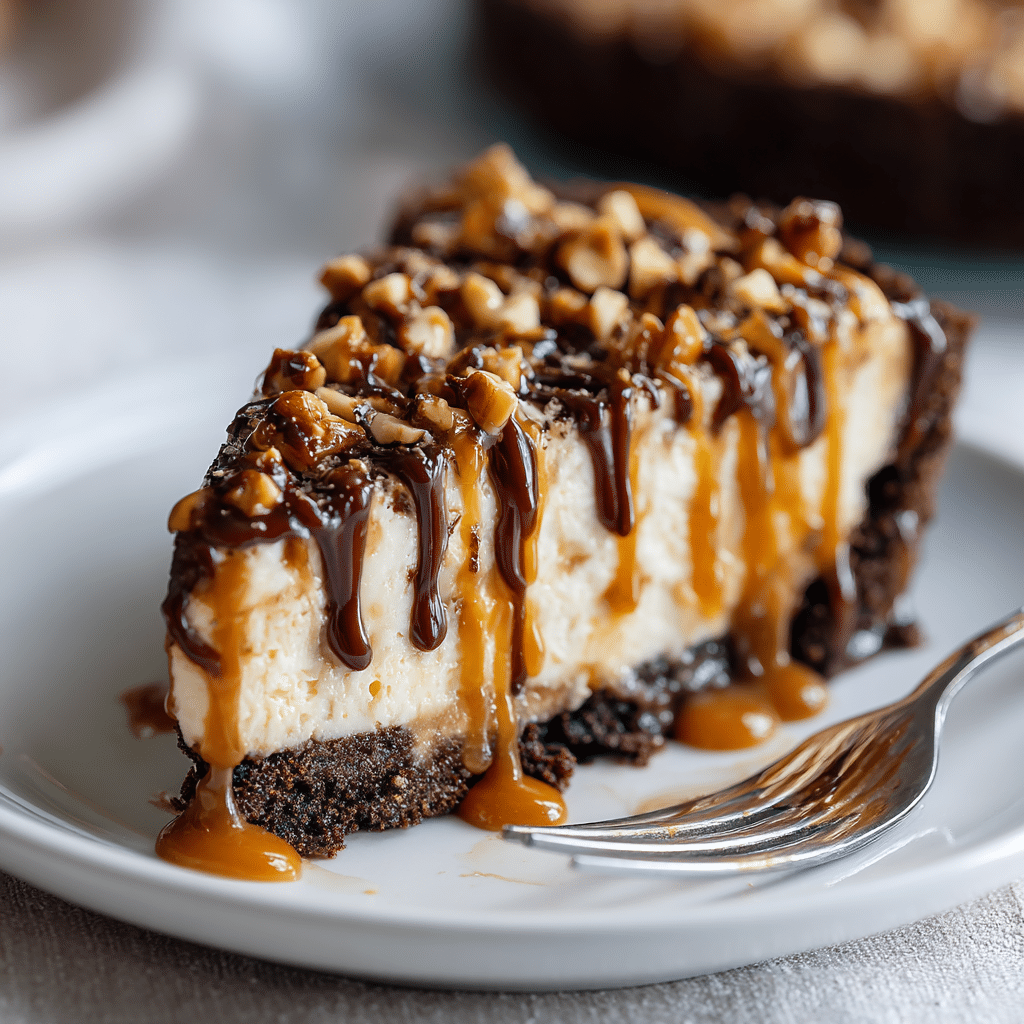
If you’re craving a dessert that’s rich, creamy, and outrageously satisfying without requiring hours in the kitchen, this Peanut Butter Pie is the answer. It’s the perfect combination of velvety peanut butter filling and a buttery, crunchy crust—no baking required! Whether you’re hosting guests or just want to treat yourself after a long day, this pie delivers that wow factor with minimal effort. It’s chilled, luscious, and dangerously good.
Why You’ll Love This Recipe
- No-Bake Wonder: Skip the oven—this pie sets beautifully in the fridge. Great for summer or when you don’t want to heat up the kitchen.
- Creamy & Dreamy: The filling is smooth, fluffy, and packed with peanut butter flavor. It’s like a peanut butter cloud in pie form.
- Quick to Make: Just 15 minutes of active prep, and the fridge does the rest. Ideal for busy weeknights or last-minute gatherings.
- Crowd-Pleaser: It hits the sweet spot for adults and kids alike. If you love peanut butter, this one’s a slam dunk.
Ingredients You’ll Need

This pie is incredibly easy to make, and you might already have most of the ingredients on hand:
- Creamy Peanut Butter: The heart of the pie—use a smooth, shelf-stable brand for best consistency and flavor.
- Cream Cheese: Adds richness and a slight tang that balances the sweetness beautifully.
- Powdered Sugar: Sweetens the filling without making it gritty. Helps keep the texture ultra-smooth.
- Whipped Topping (like Cool Whip): Folds into the peanut butter mixture to create that light, airy texture. You can use homemade whipped cream if you prefer.
- Graham Cracker Crust: Buttery and crunchy—perfect contrast to the creamy filling. Store-bought works great, but homemade is even better if you have time.
- Vanilla Extract: Enhances the flavor and adds depth to the filling.
- Chocolate Chips or Shavings (optional): For garnish or a drizzle on top. Adds richness and makes the pie even more irresistible.
Variations
Want to switch things up a bit? Here are a few fun twists:
- Chocolate Crust: Swap the graham cracker crust for an Oreo or chocolate cookie crust for an extra indulgent experience.
- Crunchy Peanut Butter: Use crunchy instead of smooth peanut butter for added texture in every bite.
- Banana Layer: Add a thin layer of sliced bananas over the crust before pouring in the filling for a peanut butter–banana pie vibe.
- Mini Pies: Use a muffin tin to make individual portions—great for parties or lunchbox treats.
How to Make Peanut Butter Pie
Step 1: Make the Filling
In a large mixing bowl, beat the cream cheese until smooth. Add the peanut butter and powdered sugar, and mix until creamy and well-combined.
Step 2: Fold in the Whipped Topping
Gently fold the whipped topping into the peanut butter mixture until it’s smooth and fluffy. Be careful not to deflate the mixture—use a spatula and take your time.
Step 3: Fill the Crust
Spoon the filling into the graham cracker crust and smooth the top with a spatula or the back of a spoon.
Step 4: Chill
Cover and refrigerate for at least 4 hours, or until the pie is set and firm to the touch. Overnight chilling is even better if you can wait!
Step 5: Garnish and Serve
Just before serving, top with chocolate shavings, mini chocolate chips, or even a drizzle of melted chocolate. Slice and serve chilled.
Pro Tips for Making the Recipe
- Let Cream Cheese Soften: Make sure the cream cheese is at room temperature for a smooth filling with no lumps.
- Use a Deep-Dish Crust: This filling is generous, so a standard crust may overflow. A deep dish is best to hold all that creamy goodness.
- Don’t Skip the Chill Time: It’s crucial for setting the pie. If it’s not fully chilled, the texture won’t hold when sliced.
- Make It Your Own: Don’t be afraid to tweak the sweetness or add a pinch of sea salt for contrast.
How to Serve
This pie is best served cold, straight from the fridge. It pairs beautifully with:
Toppings:
Whipped cream, chocolate syrup, chopped peanuts, or even a dusting of cocoa powder.
Drinks:
Coffee or iced espresso for contrast, or a cold glass of milk for classic comfort.
Plating:
Serve each slice with a few fresh berries or a dollop of extra whipped cream for a touch of elegance.
Make Ahead and Storage
Storing Leftovers
Store leftovers covered in the fridge for up to 4–5 days. The crust may soften a bit over time but the flavor stays amazing.
Freezing
This pie freezes beautifully! Wrap it tightly and store in the freezer for up to 2 months. Thaw in the fridge for several hours before serving.
Reheating
No reheating needed! This is a chilled dessert, so serve it cold for the best texture and flavor.
FAQs
Can I use natural peanut butter?
It’s best to use shelf-stable peanut butter for this recipe, as natural peanut butter tends to separate and can affect the texture of the filling.
Is homemade whipped cream okay to use?
Absolutely! Just make sure it’s whipped to stiff peaks and gently folded in to maintain the airy texture.
Can I make this pie ahead of time?
Yes! It’s a great make-ahead dessert. You can make it a day or even two in advance and keep it chilled until ready to serve.
What if I don’t have a graham cracker crust?
You can make one by combining crushed graham crackers with melted butter and pressing it into a pie dish. Or try a cookie crust like Oreos or digestive biscuits for a twist.
Final Thoughts
This Peanut Butter Pie is everything a no-bake dessert should be—simple, indulgent, and totally satisfying. With its creamy filling and buttery crust, it’s a true crowd-pleaser that requires very little effort. Make it once, and you’ll find yourself coming back to it again and again. Give it a try—you deserve a slice of this heaven!
Print
Peanut Butter Pie Recipe
- Prep Time: 20 minutes
- Cook Time: 0 minutes
- Total Time: 4 hours 20 minutes (including chilling time)
- Yield: 8 servings
- Category: Dessert
- Method: No-Bake
- Cuisine: American
- Diet: Vegetarian
Description
A creamy, no-bake peanut butter pie with a chocolatey crust and rich peanut butter filling, perfect for any dessert lover.
Ingredients
- 1 1/2 cups graham cracker crumbs
- 1/4 cup granulated sugar
- 1/2 cup unsalted butter, melted
- 1 cup creamy peanut butter
- 8 oz cream cheese, softened
- 1 cup powdered sugar
- 1 tsp vanilla extract
- 1 1/2 cups whipped topping (like Cool Whip)
- Chocolate syrup or shaved chocolate for topping (optional)
Instructions
- In a medium bowl, mix graham cracker crumbs, sugar, and melted butter until well combined. Press into a 9-inch pie dish to form the crust. Chill in the refrigerator for at least 30 minutes.
- In a large bowl, beat together the peanut butter and cream cheese until smooth.
- Add powdered sugar and vanilla extract; mix until fully incorporated.
- Fold in the whipped topping gently until evenly mixed.
- Pour the peanut butter filling into the prepared crust and smooth the top.
- Refrigerate the pie for at least 4 hours or until set.
- Before serving, drizzle with chocolate syrup or garnish with shaved chocolate if desired.
Notes
- Use a chocolate cookie crust for a richer flavor.
- You can make this pie ahead and freeze it for up to a month.
- Ensure the cream cheese is fully softened for a smooth filling.