
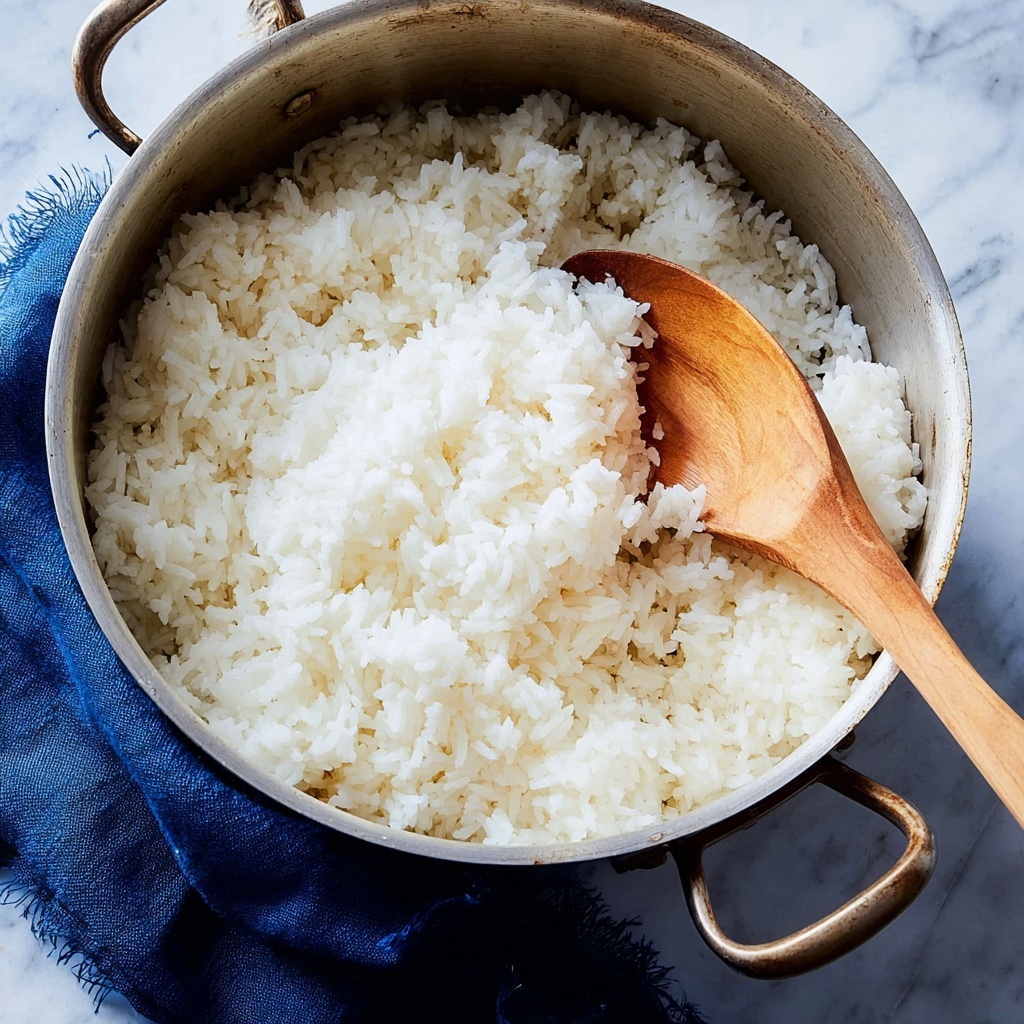
If you’ve ever wondered how to get that perfect, slightly sticky but wonderfully fluffy rice that makes sushi truly shine, this Homemade Sushi Rice Recipe is exactly what you need. It’s a deceptively simple yet magical process where everyday ingredients come together to create a foundation essential for sushi, transforming each bite into a celebration of texture and subtle tang. Whether you’re rolling maki for a dinner party or preparing a colorful donburi bowl, mastering this recipe turns your kitchen into a sushi haven.

Ingredients You’ll Need
Getting the perfect sushi rice starts with just a handful of simple, thoughtful ingredients. Each one plays a crucial role in building the right balance of flavor, moisture, and texture to bring authentic sushi rice to life.
- 2 cups sushi rice: The star of the dish, sushi rice has a unique short grain that gives the rice its sticky, yet tender bite.
- 2 ½ cups water: Proper water ratio is key to perfectly cooked rice that isn’t mushy or dry.
- ¼ cup rice vinegar: This adds the signature tangy flavor and shiny finish sushi rice is known for.
- 1-2 tablespoons sugar: Balances the vinegar’s acidity with a gentle sweetness that rounds out the taste.
- 1 teaspoon salt (to taste): Enhances all the flavors and keeps the rice tasting bright and well-seasoned.
How to Make Homemade Sushi Rice Recipe
Step 1: Rinse the Rice Thoroughly
Start by placing your sushi rice in a fine mesh strainer and rinsing it under cold running water for 2 to 3 minutes. This step may seem tedious, but trust me, it removes excess starch that would otherwise make the rice gummy. You’ll notice the water turn cloudy at first, clearing up as you rinse. This simple but crucial step sets the stage for perfectly textured rice.
Step 2: Boil and Simmer the Rice
Transfer the rinsed rice to a pot and add 2 ½ cups of water. Bring it to a vigorous boil over high heat, then immediately reduce to a low simmer and cover the pot with a tight-fitting lid. Let it cook gently for 20 minutes without lifting the lid—that’s the secret to letting each grain absorb moisture evenly. When the time is up, remove it from heat but keep the lid on, letting it rest for a few minutes to steam itself fluffy.
Step 3: Prepare the Seasoning Mixture
While the rice is cooking, whisk together rice vinegar, sugar, and salt in a small saucepan over medium heat. Stir continuously and gently until the sugar and salt are fully dissolved—this usually takes about 2 to 3 minutes. The warming helps meld these flavors so your rice will be perfectly seasoned without any grainy spots.
Step 4: Gently Season the Rice
Once the rice is cooked and still warm, transfer it into a wide, shallow bowl (ideally wooden or non-metal for the best results). Evenly pour the vinegar mixture over the rice. Using a rice paddle or a silicone spatula, fold the rice carefully; think of gently cutting through the grains rather than stirring aggressively. This technique helps keep the individual grains intact and creates that sought-after sushi rice texture.
Step 5: Cover and Cool Properly
After seasoning, cover the rice with a damp paper towel to retain moisture and prevent drying out. Allow the rice to cool to room temperature before using it in your sushi rolls or bowls. This resting period lets the rice develop a slight stickiness while maintaining a fluffy bite—exactly what sushi rice should feel like.
How to Serve Homemade Sushi Rice Recipe
Garnishes
To really elevate your sushi rice, garnish with toasted sesame seeds for that delightful nutty crunch or sprinkle a bit of finely chopped nori for a touch of ocean freshness. Pickled ginger or a few slices of fresh cucumber can add refreshing contrast to the rich sushi rice base, enhancing every bite.
Side Dishes
Serve your perfectly cooked sushi rice alongside light miso soup, a refreshing seaweed salad, or vibrant edamame for healthy pops of flavor and texture. These traditional accompaniments create a balanced meal around the Homade Sushi Rice Recipe, making your dining experience feel authentic and satisfying.
Creative Ways to Present
If you’re feeling adventurous, try layering this sushi rice in a clear glass with colorful sashimi, avocado, and crisp vegetables to create a beautiful sushi parfait. Or press the rice into molds for fun-shaped nigiri bites that can wow guests at your next dinner party. The creamy yet firm nature of this rice means it holds together beautifully for countless creative presentations.
Make Ahead and Storage
Storing Leftovers
If you find yourself with extra sushi rice, store it in an airtight container at room temperature for up to 8 hours, ideally covered with a damp cloth to keep moisture in. For longer storage, move it to the refrigerator—but be mindful this can dry out the rice, so reheat properly to restore softness.
Freezing
Freezing homemade sushi rice isn’t typically recommended as it can change the texture, making it mushy upon thawing. If you must freeze, portion it in airtight containers, and thaw slowly in the fridge before reheating gently with added moisture.
Reheating
To reheat leftover sushi rice, sprinkle a few drops of water over the rice, cover it with a damp paper towel, and warm it in the microwave for short intervals. This technique helps retain moisture, restoring the rice’s tender, sticky texture without drying out.
FAQs
Can I use regular white rice instead of sushi rice?
Regular long-grain rice won’t deliver the same sticky texture sushi rice requires. Short-grain sushi rice is unique for holding together just right, which is why it’s the best choice for this recipe.
Why do I need to rinse the rice so thoroughly?
Rinsing removes excess surface starch that causes rice to become overly sticky and gummy. Clear water after rinsing signals your rice is clean and ready to cook perfectly.
Can I adjust the vinegar-sugar ratio in the seasoning?
Yes! Depending on your preference for sweetness or tang, you can tweak the sugar amount slightly, but keep the balance gentle so you don’t overpower the rice’s natural flavor.
Is it okay to use distilled vinegar instead of rice vinegar?
Rice vinegar is milder and sweeter, lending the rice its characteristic flavor. Distilled vinegar is more acidic and sharp, so it’s better to stick with rice vinegar for authentic results.
How do I store sushi rice if I’m not using it immediately?
Cover your sushi rice with a damp towel and keep it at room temperature if using within a few hours. For longer storage, refrigerate but be sure to reheat gently to prevent dryness.
Final Thoughts
There’s something truly special about making your own sushi rice at home. This Homemade Sushi Rice Recipe is more than just a way to cook rice; it’s a gateway to crafting beautiful sushi experiences filled with love and authenticity. Take your time with each step, savor the aromas and textures, and you’ll discover a new favorite that turns your meals into little celebrations. Dive in and enjoy every perfectly seasoned, tender bite!
Print
Homemade Sushi Rice Recipe
- Prep Time: 5 minutes
- Cook Time: 25 minutes
- Total Time: 30 minutes
- Yield: 8 servings
- Category: Side Dish
- Method: Stovetop
- Cuisine: Japanese
- Diet: Gluten Free
Description
This homemade sushi rice recipe guides you through preparing perfectly seasoned, fluffy sushi rice with a delicate balance of vinegar, sugar, and salt. Easy to follow and essential for crafting authentic sushi rolls or bowls, this recipe ensures your rice is neither too sticky nor gummy, offering the ideal texture to complement your favorite fillings.
Ingredients
Sushi Rice
- 2 cups sushi rice
- 2 ½ cups water
Vinegar Mixture
- ¼ cup rice vinegar
- 1–2 tablespoons sugar
- 1 teaspoon salt (to taste)
Instructions
- Rinse rice: Place the sushi rice in a fine mesh strainer and rinse under running water for 2-3 minutes until the water runs clear to remove excess starch and prevent stickiness.
- Boil rice: Combine the rinsed rice with 2 ½ cups of water in a pot. Bring to a boil over high heat, then reduce heat to low, cover with a lid, and simmer gently for 20 minutes until the water is fully absorbed.
- Prepare vinegar mixture: While the rice cooks, combine rice vinegar, sugar, and salt in a small saucepan over medium heat. Whisk continuously for 2-3 minutes until the sugar and salt dissolve completely, then remove from heat and set aside.
- Season rice: Transfer the cooked rice immediately into a large bowl. Evenly pour the vinegar mixture over the warm rice. Using a rice paddle or silicone spatula, gently fold and toss the rice to evenly coat without smashing the grains.
- Cover and cool: Cover the rice with a damp paper towel to maintain moisture and prevent drying. Allow the rice to cool to room temperature before using it for sushi rolls or bowls.
Notes
- Use a fine mesh strainer to thoroughly rinse the rice for best texture.
- Adjust sugar and salt levels in the vinegar mixture to taste for balance.
- Do not skip the cooling step; it helps the rice achieve the perfect texture.
- Use a wooden or silicone utensil to fold the rice gently to avoid crushing the grains.
- Serve the sushi rice immediately or cover and keep at room temperature; refrigerating may harden the rice.


