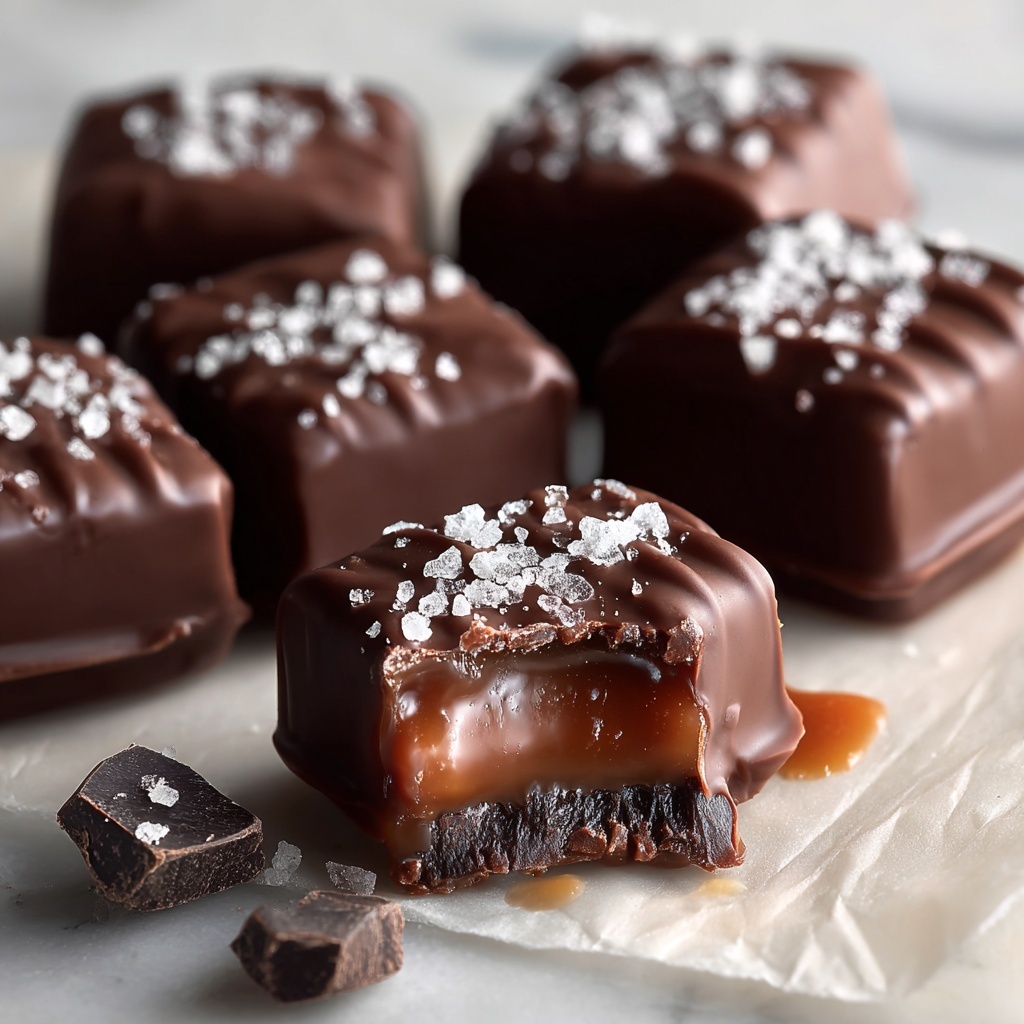
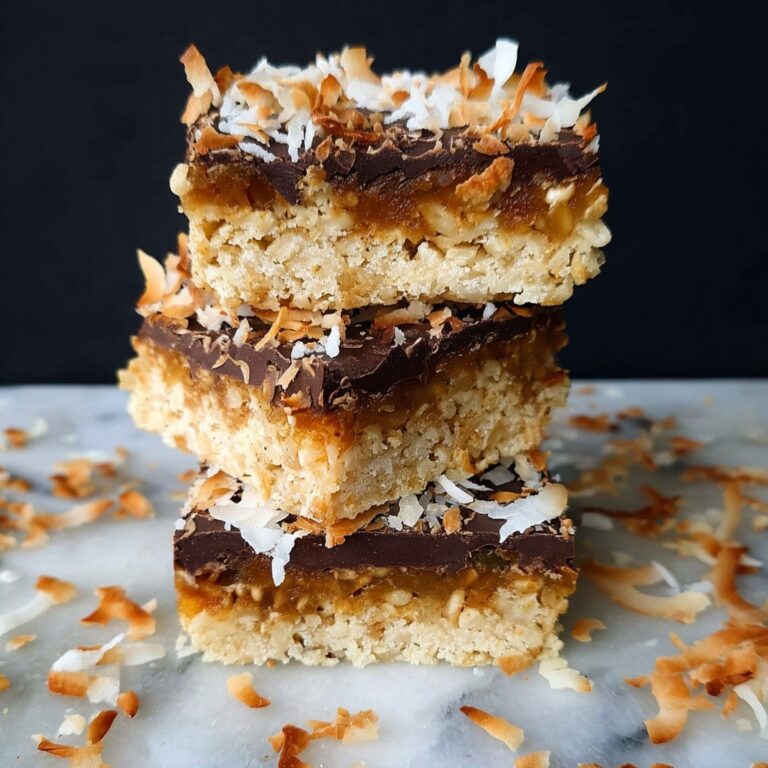
If you have a sweet tooth and love the rich, buttery goodness of caramel combined with luscious milk chocolate, you are in for a real treat with this Homemade Chocolate Caramels Recipe. It’s a delightful fusion of creamy textures and deep chocolate flavor that melts in your mouth and leaves you craving just one more bite. Making these caramels at home not only fills your kitchen with an irresistible aroma but also gives you the joy of creating a handmade confection that’s perfect as a gift or a special indulgence. Trust me, once you try this recipe, it will quickly become a cherished favorite to whip up for family and friends.
Ingredients You’ll Need
All the magic of this Homemade Chocolate Caramels Recipe comes from a handful of simple, high-quality ingredients. Each one plays a crucial role—from the smooth, rich butter that adds creamy depth, to the sweetened condensed milk which brings a luscious, velvety texture, and of course, the milk chocolate chips that crown the caramel with irresistible sweetness.
- ¼ cup butter: Use unsalted for better control over the flavor balance in your caramels.
- ½ cup sugar: Granulated sugar helps achieve that classic caramel chewiness and color.
- ½ cup brown sugar: Adds a rich, molasses undertone essential for depth in caramel flavor.
- ½ cup light corn syrup: Keeps the caramel smooth and prevents crystallization for perfect texture.
- ½ cup sweetened condensed milk: Boosts creaminess and gives the caramel a melt-in-your-mouth softness.
- 3 cups milk chocolate chips: For dipping, choose good-quality chocolate that melts silky and coats beautifully.
- 2 teaspoons vegetable oil: Keeps the melted chocolate glossy and easy to dip your caramels into.
- 1 teaspoon coarse sea salt: A sprinkle on top to perfectly contrast with the sweetness and elevate flavors.
How to Make Homemade Chocolate Caramels Recipe
Step 1: Combine the Ingredients
Start by placing the butter, granulated sugar, brown sugar, light corn syrup, and sweetened condensed milk in a microwave-safe bowl. Stir them together until smooth. This blend is the heart of your caramel, where the sugars and fats combine for that signature chew and creamy sweetness.
Step 2: Cook the Caramel
Microwave the mixture for 6 minutes, stopping to stir every 2 minutes. This step allows the sugars to dissolve and the mixture to thicken to that perfect, luscious caramel consistency. Stirring often is important here to prevent burning and ensure even cooking.
Step 3: Let the Caramel Set
Pour your hot caramel into a 9 x 9 inch baking pan. Use a spatula to smooth the surface, then let it cool completely at room temperature. Cooling lets the caramels firm up so they can be sliced into neat little squares that hold their shape when dipped.
Step 4: Dip the Caramel Squares
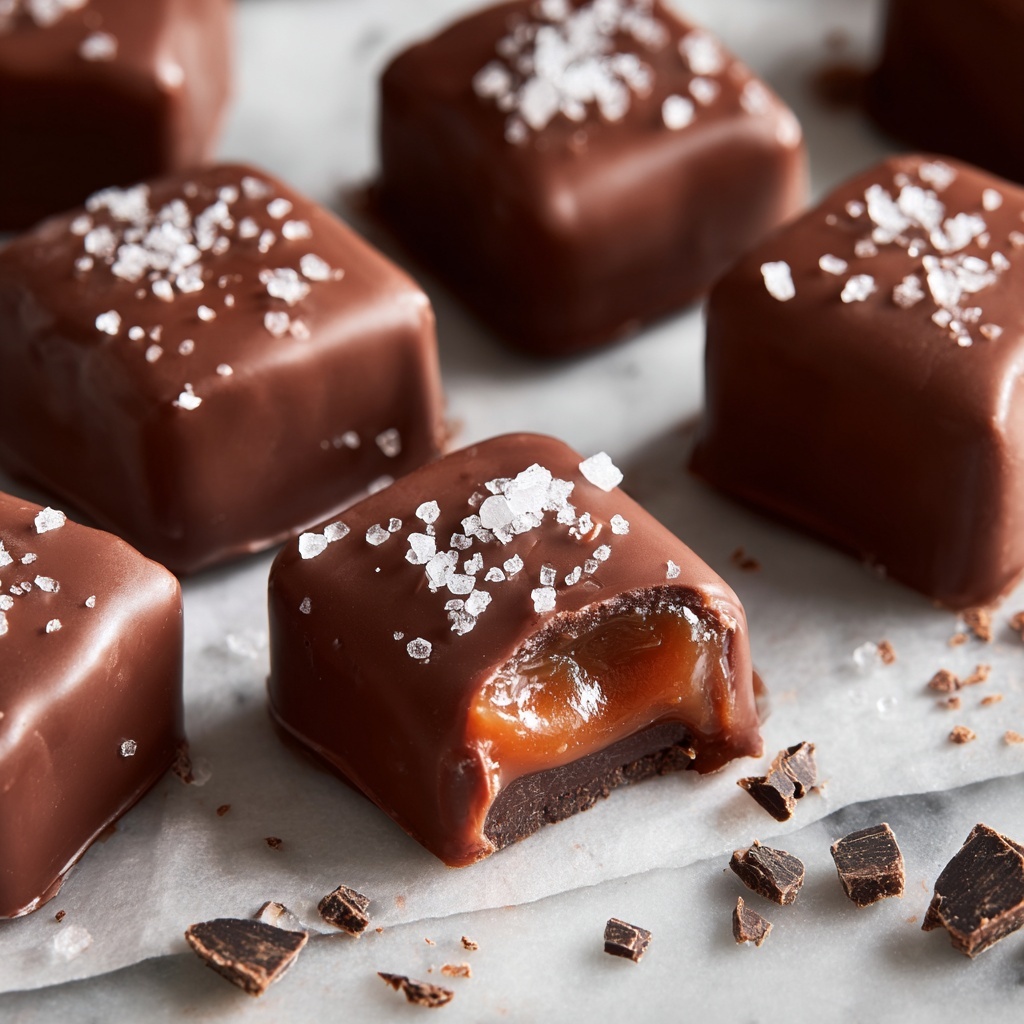
Once the caramel has set, cut it into bite-sized squares. Melt the milk chocolate chips with the vegetable oil for a glossy finish, then carefully dip each caramel piece into the chocolate. This creates a smooth, indulgent coating that perfectly complements the rich caramel center.
Step 5: Add a Finishing Touch
Place the dipped caramels on a wax paper-lined baking sheet and immediately sprinkle them with coarse sea salt. The salt adds a delightful brightness and texture contrast, enhancing the sweet and creamy flavors. Let the chocolate harden completely before serving.
How to Serve Homemade Chocolate Caramels Recipe

Garnishes
A light sprinkle of flaky sea salt or even a dusting of cocoa powder can elevate your Homemade Chocolate Caramels Recipe to next-level sophistication. Consider adding finely chopped nuts or edible gold flakes for a stunning presentation that will wow guests.
Side Dishes
Pairing these caramels with a cup of robust coffee, spiced chai, or a chilled glass of creamy milk creates a perfect balance of flavors. They also make an excellent sweet companion to a cheese board featuring mild cheeses like brie or mascarpone.
Creative Ways to Present
Wrap individual caramels in wax paper tied with colorful twine for charming gifts. Alternatively, place them in decorative boxes or jars layered with parchment paper for beautiful display at parties or holiday gatherings.
Make Ahead and Storage
Storing Leftovers
Your Homemade Chocolate Caramels Recipe treats can be stored neatly in an airtight container at room temperature for up to two weeks. This keeps them soft yet firm and beautifully ripe for snacking whenever a craving hits.
Freezing
If you want to make these caramels well in advance, they freeze wonderfully. Keep them in a freezer-safe container separated by wax paper to prevent sticking, and thaw at room temperature before enjoying to maintain the perfect texture.
Reheating
Since these are best enjoyed at room temperature, avoid microwaving. If your caramels need softening, leave them out for a short while to gently warm. This helps preserve their silky chocolate coating and chewy caramel center.
FAQs
Can I use dark chocolate instead of milk chocolate for dipping?
Absolutely! Dark chocolate offers a richer, slightly bitter contrast that pairs wonderfully with the sweet caramel. Just make sure to choose a high-quality chocolate for the best melt and shine.
Why do I need to stir the caramel every two minutes while microwaving?
Stirring prevents the sugars from burning and helps the heat distribute evenly, which is key to achieving that perfect chewy yet smooth caramel texture without any graininess.
Can I substitute corn syrup with honey or maple syrup?
Corn syrup helps inhibit crystallization and keeps the texture smooth. Using honey or maple syrup might affect the texture and flavor, making the caramel more granular or altering its classic taste. For best results, stick to corn syrup.
How long does it take for the chocolate coating to set?
Depending on room temperature, it usually takes about 20 to 30 minutes for the chocolate to harden completely. You can speed this up by placing the dipped caramels in the fridge for 10 to 15 minutes.
Can these caramels be made vegan or dairy-free?
This version isn’t vegan or dairy-free due to butter, sweetened condensed milk, and milk chocolate. However, with some ingredient swaps like coconut milk condensed milk and dairy-free chocolate, you could experiment towards a vegan version.
Final Thoughts
This Homemade Chocolate Caramels Recipe is a true crowd-pleaser that combines simple ingredients with a little bit of patience to create something truly special. Whether you’re making them for a holiday treat, a thoughtful gift, or your own indulgence, the creamy caramel and silky chocolate pairing is sure to win hearts. Give it a try—you’ll find that homemade caramels are not only delicious but also a joyful project that fills your home with warmth and sweet anticipation.
Print
Homemade Chocolate Caramels Recipe
- Prep Time: 15 minutes
- Cook Time: 6 minutes
- Total Time: 1 hour 21 minutes
- Yield: 24 servings
- Category: Candy
- Method: Microwave
- Cuisine: American
Description
These Homemade Chocolate Caramels are a delightful treat combining creamy caramel with rich milk chocolate and a sprinkle of coarse sea salt for the perfect balance of sweet and salty. Made easily in the microwave, this recipe yields soft, chewy caramels coated with silky chocolate, perfect for gifting or indulging yourself.
Ingredients
Caramel
- ¼ cup butter
- ½ cup sugar
- ½ cup brown sugar
- ½ cup light corn syrup
- ½ cup sweetened condensed milk
Chocolate Coating
- 3 cups milk chocolate chips
- 2 teaspoons vegetable oil
Topping
- 1 teaspoon coarse sea salt
Instructions
- Prepare Caramel Mixture: In a microwave-safe bowl, combine butter, sugar, brown sugar, corn syrup, and sweetened condensed milk. Stir the mixture until smooth to make sure all ingredients are well blended for even cooking.
- Cook Caramel: Microwave the mixture for 6 minutes total, stopping every 2 minutes to stir thoroughly. This process evenly cooks the caramel and prevents burning, resulting in a silky texture.
- Set Caramel: Pour the hot caramel mixture into a 9 x 9 inch baking pan. Let it cool completely at room temperature, allowing it to solidify so it can be handled and cut into squares.
- Prepare Chocolate Coating: In a microwave-safe bowl, melt the milk chocolate chips with vegetable oil until smooth and glossy. This oil helps the chocolate to be more fluid for easy dipping.
- Dip Caramels in Chocolate: Cut the set caramel into squares. Dip each square into the melted chocolate, ensuring it is evenly coated, then place on a wax paper-lined baking sheet to set.
- Add Sea Salt Topping: While the chocolate is still wet, sprinkle coarse sea salt over each chocolate-dipped caramel to add a contrasting texture and enhance the flavor.
- Cool and Harden Chocolate: Allow the chocolate coating to cool completely and harden before serving or storing. This ensures the caramels hold their shape and have a satisfying snap.
Notes
- Use a microwave-safe bowl for cooking caramel and melting chocolate to avoid damage or hazards.
- Stirring often during caramel cooking prevents burning and helps achieve a smooth texture.
- Coarse sea salt can be substituted with flaky salt for a different texture.
- Store caramels in an airtight container at room temperature for up to two weeks.
- If chocolate sets too hard, allow caramels to warm slightly at room temperature before eating.


