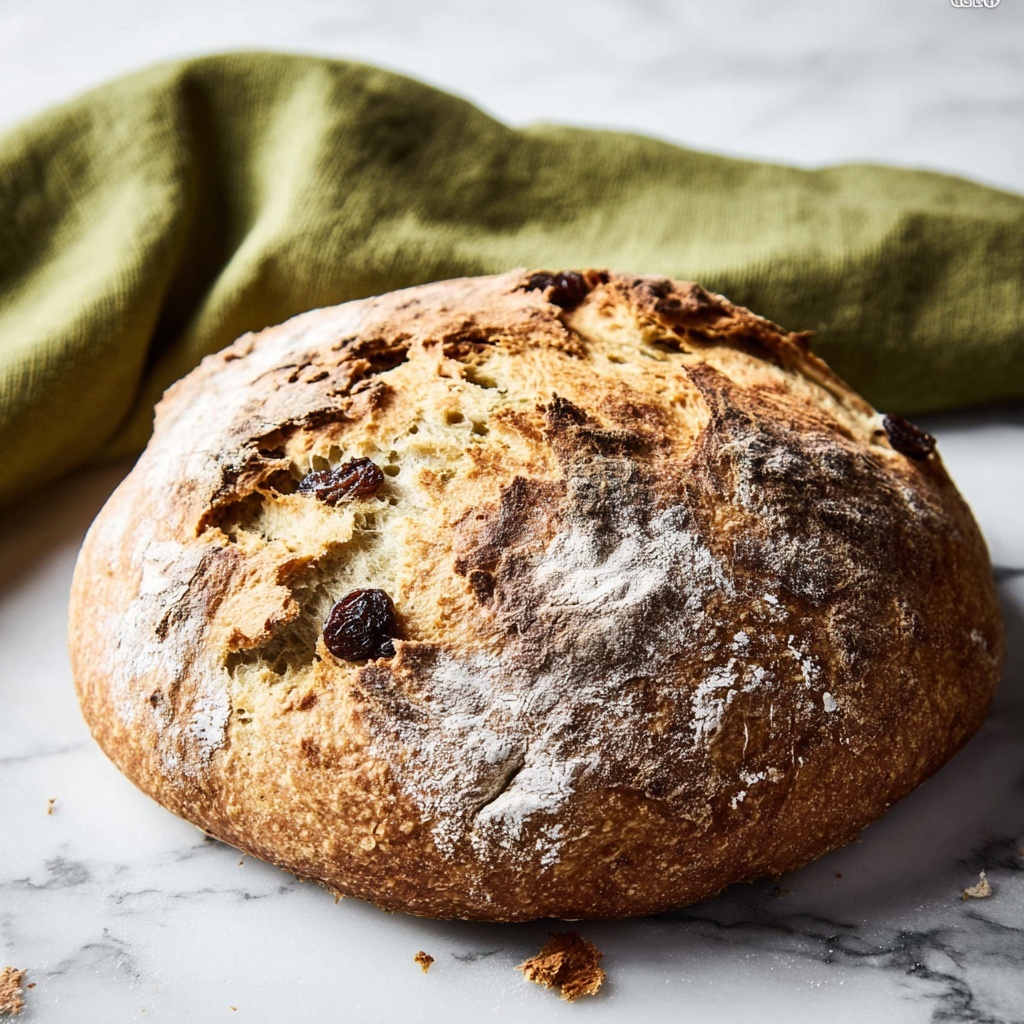
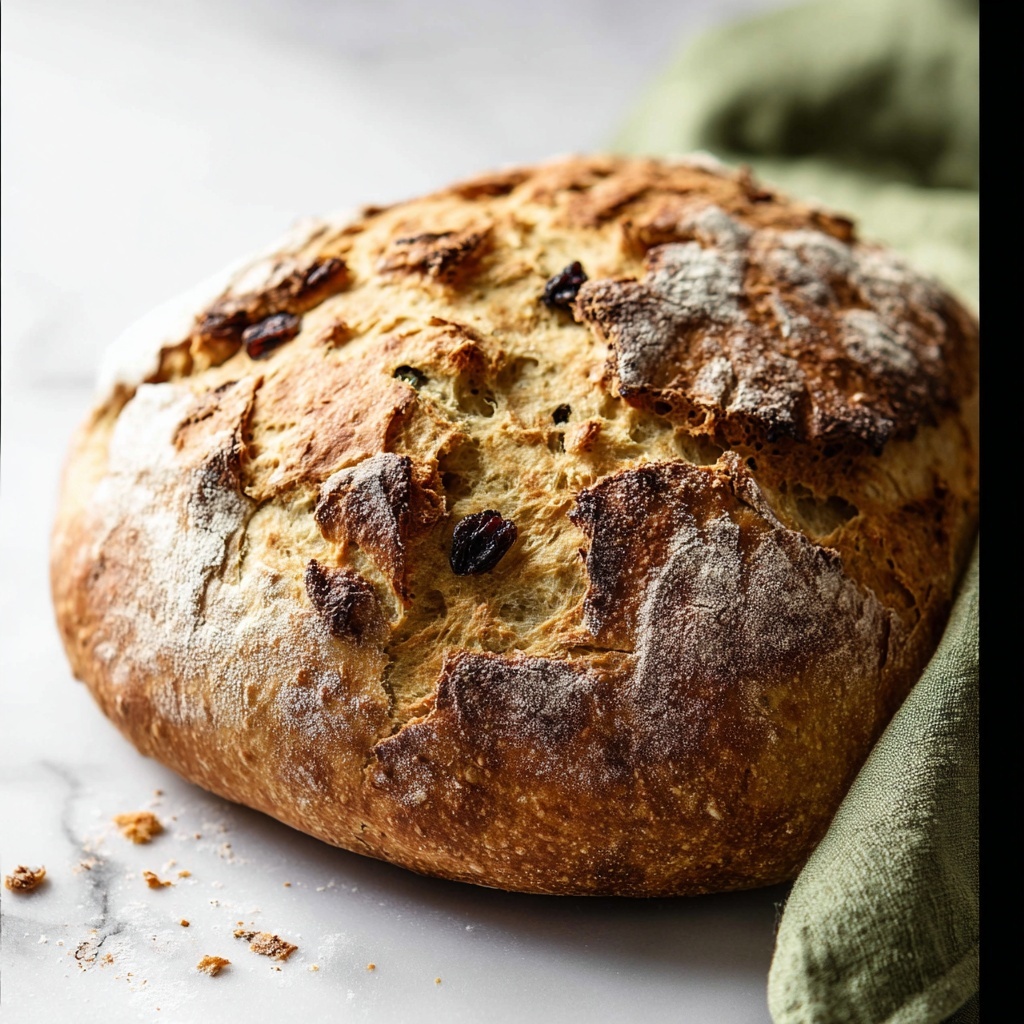
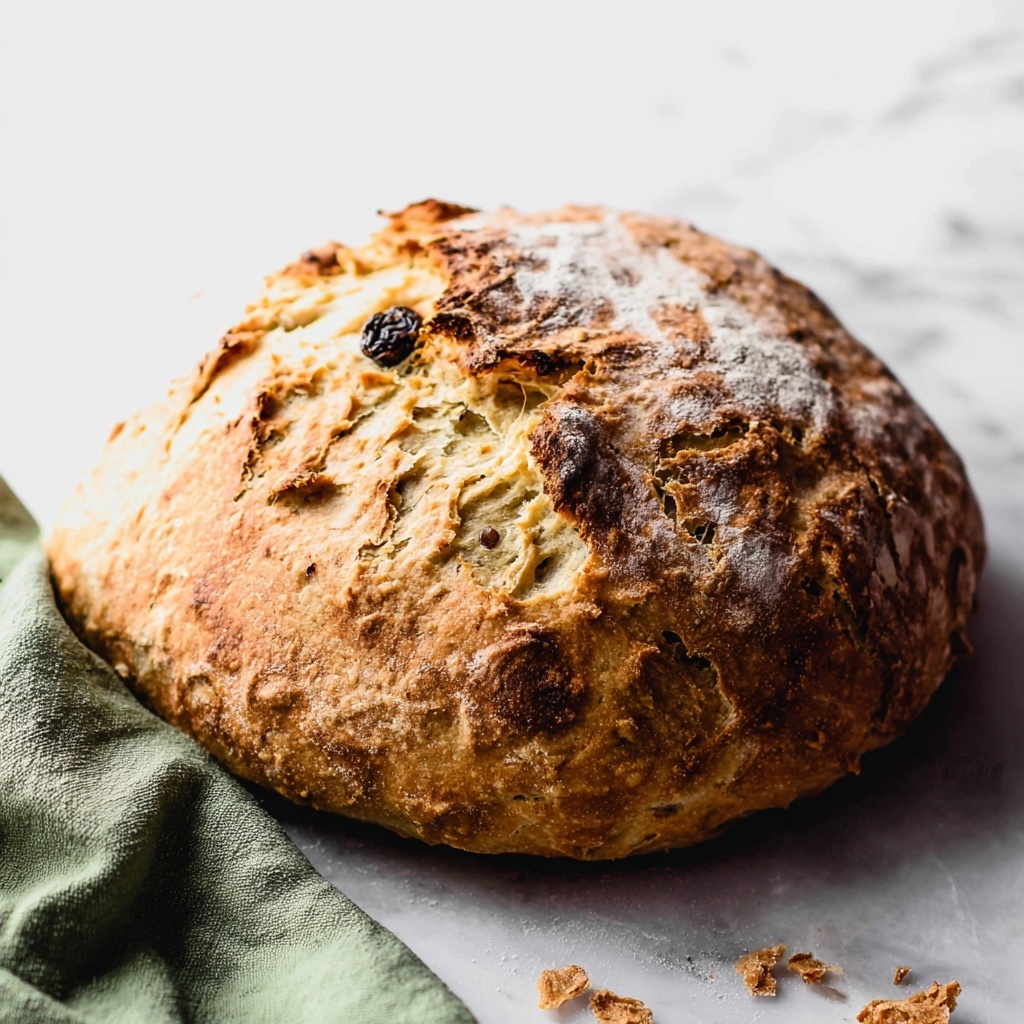
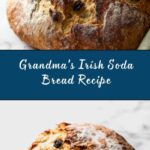
There is something truly comforting about sinking your teeth into a slice of traditional homemade bread, and Grandma’s Irish Soda Bread Recipe is one of those timeless treasures that brings warmth and nostalgia with every bite. This rustic bread, with its perfectly golden crust and tender crumb, uses simple pantry staples to create a loaf that’s quick to prepare but rich in flavor. The magic happens with the delightful tang of buttermilk meeting the fluffiness created by baking soda, making this recipe a must-have for anyone longing for an authentic taste of Ireland in their kitchen.
Ingredients You’ll Need
The beauty of this recipe lies in its simplicity. Each ingredient plays a crucial role — from the tangy buttermilk that activates the baking soda, to the cold butter that creates a tender crumb, and the subtle sweetness of sugar that enhances every nuance of flavor.
- Buttermilk (1 and 3/4 cups): The star liquid that reacts with the baking soda to help the bread rise and adds a subtle tang.
- Large egg (optional): Adds richness and helps bind the dough but can be skipped for a more traditional, dairy-forward flavor.
- All-purpose flour (4 and 1/4 cups): The bread’s sturdy base — spooned and leveled to ensure the perfect dough consistency.
- Granulated sugar (3 tablespoons): Just a touch for balance and to slightly caramelize the crust.
- Baking soda (1 teaspoon): The essential leavening agent that makes the bread rise quickly without yeast.
- Salt (1 teaspoon): Enhances the flavor and balances the sweetness.
- Unsalted butter, cold and cubed (5 tablespoons): Creates a flaky, tender texture within the bread.
- Raisins (optional, 1 cup): Adds bursts of natural sweetness throughout the loaf.
How to Make Grandma’s Irish Soda Bread Recipe
Step 1: Preheat Your Oven and Choose Your Pan
Start by setting your oven to 400°F (204°C). The choice of baking vessel can influence the shape and crust of your bread. A lined baking sheet lets the loaf spread out more, while a cast iron skillet or greased cake pan keeps it round and sturdy. You can also opt for a dutch oven for a rustic, hearth-baked feel — just remember to bake with the lid off.
Step 2: Mix Wet Ingredients
In a separate bowl, whisk the buttermilk and egg together until combined. This combo will soon mingle with the dry ingredients to create the perfect dough consistency with a slight richness from the egg.
Step 3: Combine Dry Ingredients and Incorporate Butter
In a large mixing bowl, whisk together the flour, sugar, baking soda, and salt. Next, add the cold, cubed butter. Use a pastry cutter, two forks, or even your fingers to cut the butter into the flour until the mixture resembles pea-sized crumbs. This step is key for a tender texture and flaky crumb, so don’t rush it! Stir in the optional raisins if using.
Step 4: Bring the Dough Together
Pour the buttermilk and egg mixture over the flour and butter crumbs. Gently fold everything together until the dough starts to come together but remains crumbly. Then, turn the dough onto a floured surface and knead briefly—about 30 seconds—just enough to moisten all the flour and form a cohesive ball. If the dough feels sticky, dust with a touch more flour.
Step 5: Shape and Score the Dough
Transfer your dough ball to the prepared skillet or pan. Using a very sharp knife or bread lame, score a deep slash or an X about half an inch deep on the top. This helps control the bread’s expansion and gives it that iconic look that’s so beautifully rustic.
Step 6: Bake Until Golden and Cooked Through
Pop the bread in the oven and bake for 45 to 55 minutes. Keep an eye on the top; if it’s browning too quickly, tent it loosely with aluminum foil. To be sure it’s done, the internal temperature should reach 195°F (90°C). The crust will be beautifully golden and crisp, and the loaf will sound hollow when tapped.
Step 7: Cool and Enjoy
Allow the bread to cool in the pan for about 10 minutes before transferring it to a wire rack. This short rest lets it finish cooking and sets the crumb. Enjoy it warm, at room temperature, or lightly toasted — the versatility is part of its charm.
How to Serve Grandma’s Irish Soda Bread Recipe
Garnishes
A simple pat of creamy butter that melts into the warm bread is a classic choice, but don’t stop there. Try a drizzle of honey, a smear of fruit preserves, or even a sprinkling of flaky sea salt for an extra layer of flavor.
Side Dishes
This bread pairs beautifully with hearty soups like Irish stew or vegetable chowders, providing a perfect vehicle to soak up rich broths. It also complements cheese plates nicely — think sharp cheddar or creamy brie for a satisfying snack or appetizer.
Creative Ways to Present
For a festive table, slice the loaf into thick wedges and arrange them around a wooden board with bowls of butter, jam, or smoked salmon spread. You can also turn it into a savory sandwich base, layering with corned beef and mustard for an Irish-inspired treat.
Make Ahead and Storage
Storing Leftovers
Keep your leftover soda bread fresh by wrapping it tightly in aluminum foil and storing it at room temperature for up to two days. If you want it to last longer, stashing it in the refrigerator can extend its life up to a week, though it may dry out a bit.
Freezing
You can freeze Grandma’s Irish Soda Bread Recipe by wrapping it well in plastic wrap and then foil to prevent freezer burn. When frozen properly, it stays delicious for up to three months, ready to thaw whenever a craving strikes.
Reheating
To bring that fresh-baked warmth back, toast slices directly or heat the whole loaf in a 350°F oven for 10 to 15 minutes. This revives the crust’s crispness and softens the interior for maximum enjoyment.
FAQs
Can I skip the egg in Grandma’s Irish Soda Bread Recipe?
Yes! The egg is optional and mostly adds richness. Traditional versions often omit it, relying solely on buttermilk and baking soda for rise and texture.
Why does Grandma’s Irish Soda Bread Recipe use baking soda instead of yeast?
Baking soda is a chemical leavening agent that reacts immediately with acidic buttermilk, allowing the bread to rise quickly without the need for proofing time, making the recipe fast and easy.
Can I add other ingredients besides raisins?
Absolutely! Some people love adding caraway seeds, dried cranberries, or walnuts for variety, but keep extras to about one cup total so the dough maintains the right texture.
What is the best way to cut this bread?
Soda bread is best sliced with a serrated knife, using a gentle sawing motion to avoid crushing the crumb and to keep those beautiful crust edges intact.
How do I know when the bread is fully baked?
Look for a golden crust and a hollow sound when you gently tap the bottom of the loaf. Using an instant-read thermometer is even better — the internal temperature should be around 195°F (90°C).
Final Thoughts
There is something magical about making Grandma’s Irish Soda Bread Recipe from scratch — it’s not just baking, it’s creating a connection to traditions and memories that warm the heart. Whether you’re new to baking or an old hand, this recipe brings such joy and simplicity to your kitchen, inviting you to share great food and stories with loved ones. Give it a try and let each slice remind you of home, family, and the comfort of a well-loved loaf.
Print
Grandma’s Irish Soda Bread Recipe
- Prep Time: 10 minutes
- Cook Time: 45-55 minutes
- Total Time: 55-65 minutes
- Yield: 1 loaf (approximately 10-12 slices)
- Category: Bread
- Method: Baking
- Cuisine: Irish
Description
This traditional Grandma’s Irish Soda Bread recipe is a simple, rustic quick bread that combines the tangy flavor of buttermilk with a soft crumb and a golden crust. Perfect for breakfast or alongside your favorite meal, this bread is easy to prepare with pantry staples and requires no yeast or rising time, making it a delightful and quick homemade treat.
Ingredients
Wet Ingredients
- 1 and 3/4 cups (420ml) buttermilk
- 1 large egg (optional)
Dry Ingredients
- 4 and 1/4 cups (531g) all-purpose flour (spooned & leveled), plus more for dusting
- 3 Tablespoons (38g) granulated sugar
- 1 teaspoon baking soda
- 1 teaspoon salt
Fat
- 5 Tablespoons (71g) unsalted butter, cold and cubed
Optional Add-ins
- 1 cup (150g) raisins
Instructions
- Preheat oven and prepare pan: Preheat your oven to 400°F (204°C). Choose your baking vessel—a lined baking sheet with parchment or a silicone mat, a seasoned 10-12 inch cast iron skillet, a greased 9-10 inch cake pan or pie dish, or a greased or parchment-lined 5 quart or larger Dutch oven (baking with lid off if using Dutch oven).
- Mix wet ingredients: In a small bowl, whisk together the buttermilk and egg (if using) until combined. Set aside.
- Combine dry ingredients and cut in butter: In a large mixing bowl, whisk together the flour, granulated sugar, baking soda, and salt. Using a pastry cutter, fork, or your fingers, cut the cold, cubed butter into the dry ingredients until the mixture resembles pea-sized crumbs.
- Add raisins and incorporate liquids: Stir in the optional raisins. Pour the buttermilk and egg mixture into the flour mixture, folding gently until the dough becomes too stiff to stir.
- Form the dough: Turn the crumbly dough onto a lightly floured surface. Using floured hands, shape into a ball and knead gently for about 30 seconds until all flour is moistened. If dough is sticky, sprinkle additional flour cautiously.
- Score the dough: Transfer the dough ball to your prepared baking pan or skillet. Using a very sharp knife or bread lame, make a shallow cut or an ‘X’ about 1/2 inch deep across the dough’s top to help it bake evenly.
- Bake the bread: Place the dough in the preheated oven and bake for 45-55 minutes until the bread turns golden brown and the center registers 195°F (90°C) on an instant-read thermometer. If the top browns too quickly, loosely tent with aluminum foil.
- Cool and serve: Remove from oven and let cool on a wire rack for about 10 minutes. Serve warm, at room temperature, or toasted with your favorite spreads.
- Store leftovers: Wrap leftover bread tightly in aluminum foil. Store at room temperature for up to 2 days or refrigerate for up to 1 week.
Notes
- The egg is optional and adds richness; omit it for traditional soda bread or to make it egg-free.
- Use cold, unsalted butter for best texture when cutting into the flour mixture.
- Adding raisins is optional to add sweetness and texture.
- Checking doneness with an instant-read thermometer ensures the bread is perfectly cooked inside.
- If dough feels sticky, add flour sparingly; too much flour can dry out the bread.
