
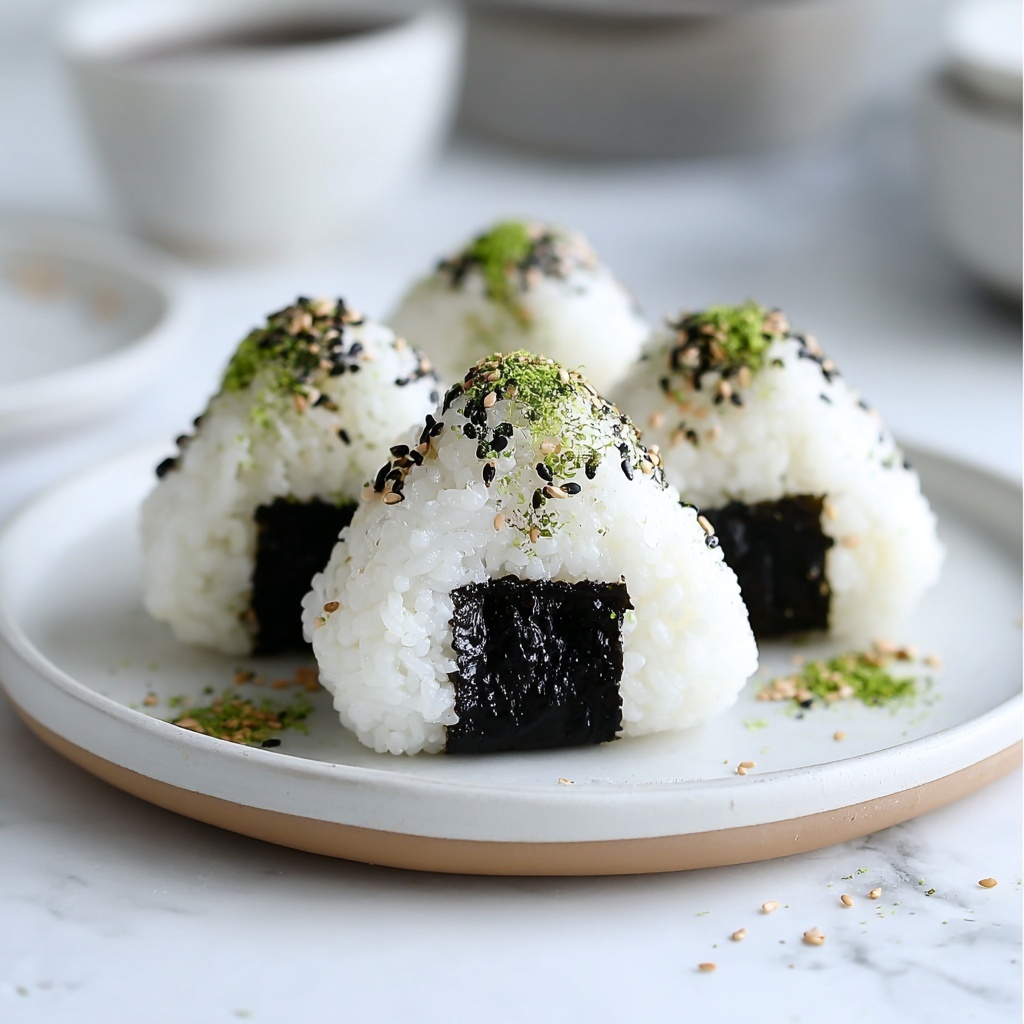
There is something incredibly satisfying about bite-sized, flavorful snacks that you can easily mold and customize to your liking, which is exactly why this Delicious Onigiri: Japanese Rice Balls You Can Customize Today Recipe has captured my heart. These Japanese rice balls are not only wonderfully simple but also versatile, allowing you to add your favorite fillings or toppings. Whether you want a quick lunch, a portable snack, or an impressive addition to your next gathering, this recipe combines fluffy, seasoned rice with crispy nori and subtle salty accents to deliver a comforting yet fresh bite every time.
Ingredients You’ll Need
The beauty of this recipe lies in its simplicity: just a handful of thoughtfully chosen ingredients that balance texture and flavor perfectly. Each component plays a crucial role — the rice forms the hearty base, furikake brings an umami-packed punch, and the nori adds a contrasting crunch and a touch of savory sea essence. Here’s everything you need to get started:
- 2 cups Cooked Rice: Use freshly cooked medium-grain rice for the perfect sticky texture that holds the shape well.
- 2 tablespoons Furikake: This Japanese seasoning blend enhances the rice with layers of savory umami and subtle hints of sesame and seaweed.
- 1 cup Water: Keep your hands wet to prevent the rice from sticking when shaping the onigiri.
- 1 teaspoon Kosher Salt: Adds essential flavor and helps balance the seasoning in each bite.
- 4 sheets Roasted Nori: Cut into strips, these bring a delicious crispiness and classic onigiri flavor.
- 2 tablespoons Sesame Seeds (optional): Sprinkle on top for a nutty, toasty finish and a little extra crunch.
How to Make Delicious Onigiri: Japanese Rice Balls You Can Customize Today Recipe
Step 1: Season the Rice
Start by placing your freshly cooked medium-grain rice in a mixing bowl. Gently fold in the furikake seasoning blend, ensuring each grain is lightly coated. This step is key to infusing the rice with that signature savory flavor that will make your Onigiri truly irresistible.
Step 2: Prepare Your Hands
Wet your hands with the water and sprinkle a pinch of kosher salt over them. This wet-salting technique prevents the rice from sticking while also adding a touch of seasoning that flavors the outside of your rice balls just perfectly.
Step 3: Shape the Onigiri
Scoop about half a cup of the seasoned rice into your salted hands and gently press it into a compact triangle shape. If you prefer, press the sides of the rice triangle against a flat surface for sharper edges, but this step is optional. The goal is to create cohesive rice balls that hold together without being overly packed.
Step 4: Add the Nori Wrap
Take a strip of roasted nori and wrap it snugly around the base of each Onigiri. The nori lends a delightful contrast in texture and flavor, making each bite even more enjoyable. If you want to add an extra touch, sprinkle some toasted sesame seeds on top for that rich, nutty aroma.
Step 5: Enjoy or Store
These Delicous Onigiri are best enjoyed fresh but can be wrapped individually in plastic wrap to take on the go or save for later. Their portability makes them a fantastic choice for lunches, hikes, or any time you crave a tasty, fuss-free treat.
How to Serve Delicious Onigiri: Japanese Rice Balls You Can Customize Today Recipe
Garnishes
Adding garnishes to your Onigiri can turn a simple snack into a delightful treat. Classic choices include pickled plums (umeboshi), a sprinkle of toasted sesame seeds, or a light brush of soy sauce. These finishing touches brighten the flavors and bring an authentic touch to your creation.
Side Dishes
Onigiri pairs wonderfully with light Japanese sides such as miso soup, steamed edamame, or a simple cucumber salad. These dishes balance your rice balls’ richness with freshness and complement the overall meal experience beautifully.
Creative Ways to Present
Feel like getting a bit creative? Try arranging your Onigiri on a wooden sushi board with small bowls of dipping sauces like spicy mayo or ponzu. You can also top some with thin slices of avocado or a dab of wasabi mayo for extra flair that will wow your guests.
Make Ahead and Storage
Storing Leftovers
If you find yourself with leftover Onigiri, wrap each rice ball tightly in plastic wrap and place them in an airtight container. Store them in the refrigerator for up to one day, as the texture begins to change the longer they sit.
Freezing
These rice balls freeze surprisingly well. Wrap them individually in plastic wrap and place them in a freezer-safe bag. They can be frozen for up to one month. This makes it super convenient to enjoy your favorite snack anytime without starting from scratch.
Reheating
When you’re ready to eat your frozen or refrigerated Onigiri, microwave them briefly to warm through. For crispy freshness, unwrap the nori before heating and reapply it afterward or enjoy it separately to keep its crisp texture.
FAQs
Can I use different types of rice for Onigiri?
Medium-grain rice is best because it sticks just enough to hold shape but isn’t too mushy. Short-grain rice also works well, but avoid long-grain rice as it lacks the necessary stickiness.
What fillings can I add inside my Onigiri?
Feel free to get creative! Popular fillings include salted salmon, tuna mayo, pickled plum, or cooked vegetables. Just place a small amount in the center before shaping the rice around it.
Is the furikake seasoning essential?
While furikake adds delicious umami and makes seasoning quick and easy, you can omit it and simply season the rice with a bit of salt or incorporate your favorite herbs and spices for a personalized twist.
How long will homemade Onigiri stay fresh?
Onigiri are best eaten the day they’re made for optimal texture and flavor. If refrigerated, consume within 24 hours to avoid drying out or becoming too hard.
Can I make Onigiri vegan or gluten-free?
Absolutely! Use gluten-free furikake and plant-based fillings like pickled vegetables or seaweed. Onigiri is naturally gluten-free as long as you check your seasonings and fillings.
Final Thoughts
If you’re looking for a warm, customizable, and utterly satisfying snack, the Delicious Onigiri: Japanese Rice Balls You Can Customize Today Recipe should be your go-to. They’re quick to make, endlessly adaptable, and bring a little bit of Japanese comfort to your kitchen. Give it a try, and I promise these rice balls will become one of your favorite simple pleasures.
Print
Delicious Onigiri: Japanese Rice Balls You Can Customize Today Recipe
- Prep Time: 10 minutes
- Cook Time: 25 minutes
- Total Time: 35 minutes
- Yield: 4 servings (4 Onigiri)
- Category: Snack
- Method: No-Cook
- Cuisine: Japanese
- Diet: Gluten Free
Description
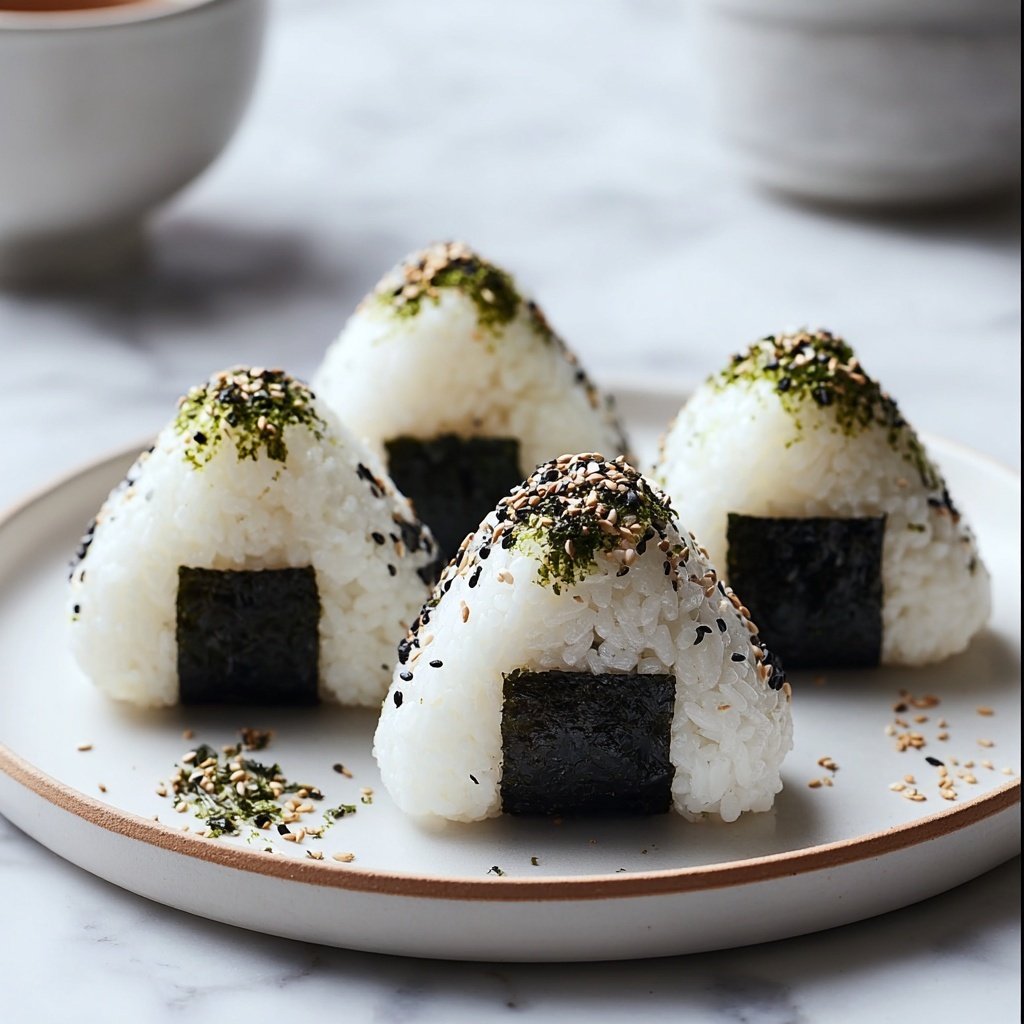
Delicious Onigiri are traditional Japanese rice balls that are easy to make and fully customizable with your favorite seasonings and fillings. These handheld treats are perfect for a snack or light meal and feature seasoned medium-grain rice shaped into triangles, wrapped with crispy nori seaweed, and optionally topped with toasted sesame seeds for an extra nutty flavor.
Ingredients
Rice Base
- 2 cups Cooked Rice (Use freshly cooked medium-grain rice.)
- 1 teaspoon Kosher Salt (Enhances the rice’s taste.)
- 1 cup Water (For wetting hands while shaping.)
Seasoning & Toppings
- 2 tablespoons Furikake (Seasoning blend that adds umami.)
- 4 sheets Roasted Nori (Cut into strips for easy handling.)
- 2 tablespoons Sesame Seeds (Optional for a nutty finish.)
Instructions
- Prepare the Rice and Seasoning: In a mixing bowl, blend the freshly cooked medium-grain rice with 2 tablespoons of furikake seasoning until evenly combined to infuse the rice with delicious umami flavors.
- Wet and Salt Your Hands: Pour 1 cup of water into a small bowl to wet your hands, which prevents the rice from sticking. Sprinkle a pinch of kosher salt onto your wet hands to subtly season the outside of the rice balls during shaping.
- Shape the Onigiri: Scoop about 1/2 cup of the seasoned rice and gently press it into a firm triangle shape using your hands, being careful not to compress it too tightly to maintain a light texture.
- Optional Triangular Side Pressing: For a cleaner shape, press the sides of the formed rice triangle against a flat surface to sharpen the edges.
- Wrap with Nori: Take a strip of roasted nori and wrap it around the base of each rice triangle to add a savory seaweed flavor and provide a handy grip.
- Add Sesame Seeds (Optional): Sprinkle toasted sesame seeds on top of the nori-wrapped Onigiri for a nutty finish and attractive appearance.
- Serve or Store: Enjoy your Onigiri fresh for the best taste, or wrap each rice ball tightly in plastic wrap to keep moisture in and serve later as a convenient snack or lunch item.
Notes
- Use freshly cooked medium-grain rice for the best texture—day-old rice is too firm for shaping.
- Wet hands prevent rice from sticking and make shaping easier.
- Adjust the amount of furikake seasoning according to taste or substitute with other flavorings like umeboshi or cooked salmon flakes.
- Onigiri can be made with various fillings, such as pickled plum, tuna mayonnaise, or grilled chicken, added in the center if desired.
- Consume Onigiri within a day when kept at room temperature to ensure freshness, or refrigerate and consume within 24 hours.


