
The Creamy Burnt Basque Cheesecake Recipe is an absolute game-changer for anyone who loves the perfect marriage of rich creaminess and caramelized flavors in a dessert. This cheesecake features a beautifully burnt top that adds a subtle bitterness balancing the luscious, silky interior that practically melts in your mouth. With minimal ingredients and straightforward steps, this recipe delivers bakery-quality results right from your own kitchen, making it a must-try for cheesecake enthusiasts and curious bakers alike.
Ingredients You’ll Need
For this Creamy Burnt Basque Cheesecake Recipe, the ingredients are wonderfully simple yet essential—they each play a crucial role in creating the cake’s iconic texture and flavor. From the tangy cream cheese to the rich heavy cream, every component works harmoniously to ensure that perfect custard-like center and the signature burnt top.
- Cream cheese (2 pounds, softened): The foundation of the cheesecake providing that luscious, creamy texture.
- Granulated sugar (1 1/4 cups): Adds sweetness while helping the top caramelize beautifully.
- Vanilla extract (1 teaspoon): Enhances the flavor with a warm, aromatic note.
- Salt (1/4 teaspoon): Balances the sweetness and heightens all the other flavors.
- Large eggs (6): Essential for structure and giving the cheesecake that delicate, custard-like consistency.
- Heavy cream (1 cup): Boosts creaminess and richness to the batter.
- All-purpose flour (1/4 cup): Helps bind the batter while keeping it light and tender.
How to Make Creamy Burnt Basque Cheesecake Recipe
Step 1: Preheat and Prepare Your Pan
Start by heating your oven to 400°F (200°C), creating the ideal environment for that signature burnt top. Meanwhile, line a 9-inch springform pan with parchment paper, making sure to leave the paper hanging over the edges—it will make releasing the cheesecake a breeze later on.
Step 2: Beat the Cream Cheese Until Smooth
In a large mixing bowl, beat the softened cream cheese until it’s completely smooth and free of lumps. This step is critical for a silky final texture.
Step 3: Mix in the Sugar, Vanilla, and Salt
Add the granulated sugar, vanilla extract, and salt to the cream cheese. Blend everything until fully combined to ensure your cheesecake tastes balanced and rich.
Step 4: Add the Eggs One at a Time
Incorporate the eggs slowly, beating well after each addition. This slow incorporation helps the batter become smooth and prevents it from curdling.
Step 5: Stir in Heavy Cream and Flour
Fold in the heavy cream and all-purpose flour until the batter is velvety smooth. These ingredients contribute to the cheesecake’s luxurious texture without weighing it down.
Step 6: Bake Until Deeply Golden
Pour the batter into your prepared pan and bake for 50 to 60 minutes. You’ll know it’s done when the top is a deep golden brown color and the center still jiggles slightly—this look promises that creamy interior we all crave.
Step 7: Cool and Chill
Remove the cheesecake from the oven and let it cool at room temperature briefly. Then, refrigerate it for at least 4 hours or overnight to help it set perfectly.
Step 8: Serve with Confidence
After chilling, carefully release the cheesecake from the springform pan using the parchment paper edges. Slice and get ready to impress everyone with this incredible Creamy Burnt Basque Cheesecake Recipe.
How to Serve Creamy Burnt Basque Cheesecake Recipe
Garnishes
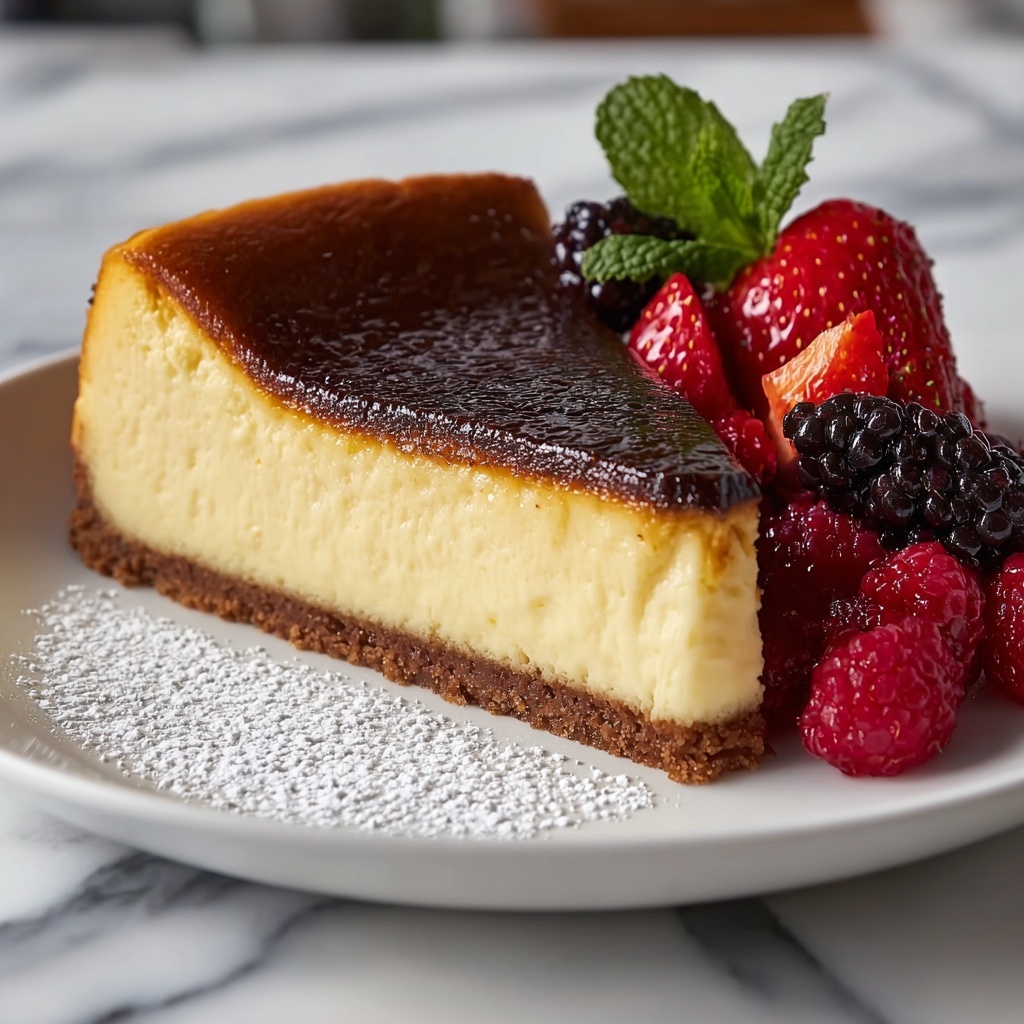
This cheesecake shines best when kept simple, but a few thoughtfully chosen garnishes can elevate it even more. A dusting of powdered sugar, fresh berries like raspberries or strawberries, or a drizzle of honey or caramel sauce add color and subtle sweetness that complement the cheesecake’s toasty top beautifully.
Side Dishes
Pair your slice with a scoop of vanilla ice cream or a dollop of lightly whipped cream for an extra touch of indulgence. If you want to contrast the richness, a citrusy fruit compote or a tart berry sauce can brighten the palate wonderfully.
Creative Ways to Present
For special occasions, serve individual portions in clear glasses layered with fresh fruit or crushed nuts for texture contrast. For a rustic charm, plate slices on wooden boards alongside edible flowers or fresh mint sprigs. The Creamy Burnt Basque Cheesecake Recipe adapts beautifully to both simple and fancy presentations.
Make Ahead and Storage
Storing Leftovers
Leftover cheesecake should be wrapped tightly with plastic wrap or stored in an airtight container in the refrigerator. It will stay fresh and creamy for up to 4-5 days—perfect if you want to savor it slowly or share with friends.
Freezing
To keep it longer, you can freeze the cheesecake. Wrap it well with plastic wrap and then aluminum foil before popping it into the freezer. It will maintain its flavor and texture for up to 2 months. When ready, thaw overnight in the refrigerator for the best results.
Reheating
This cheesecake is typically enjoyed chilled, but if you prefer it slightly warmed, let it come to room temperature or gently warm it in the microwave for 10-15 seconds. Just avoid overheating to keep that silky texture intact.
FAQs
What makes Burnt Basque Cheesecake different from regular cheesecake?
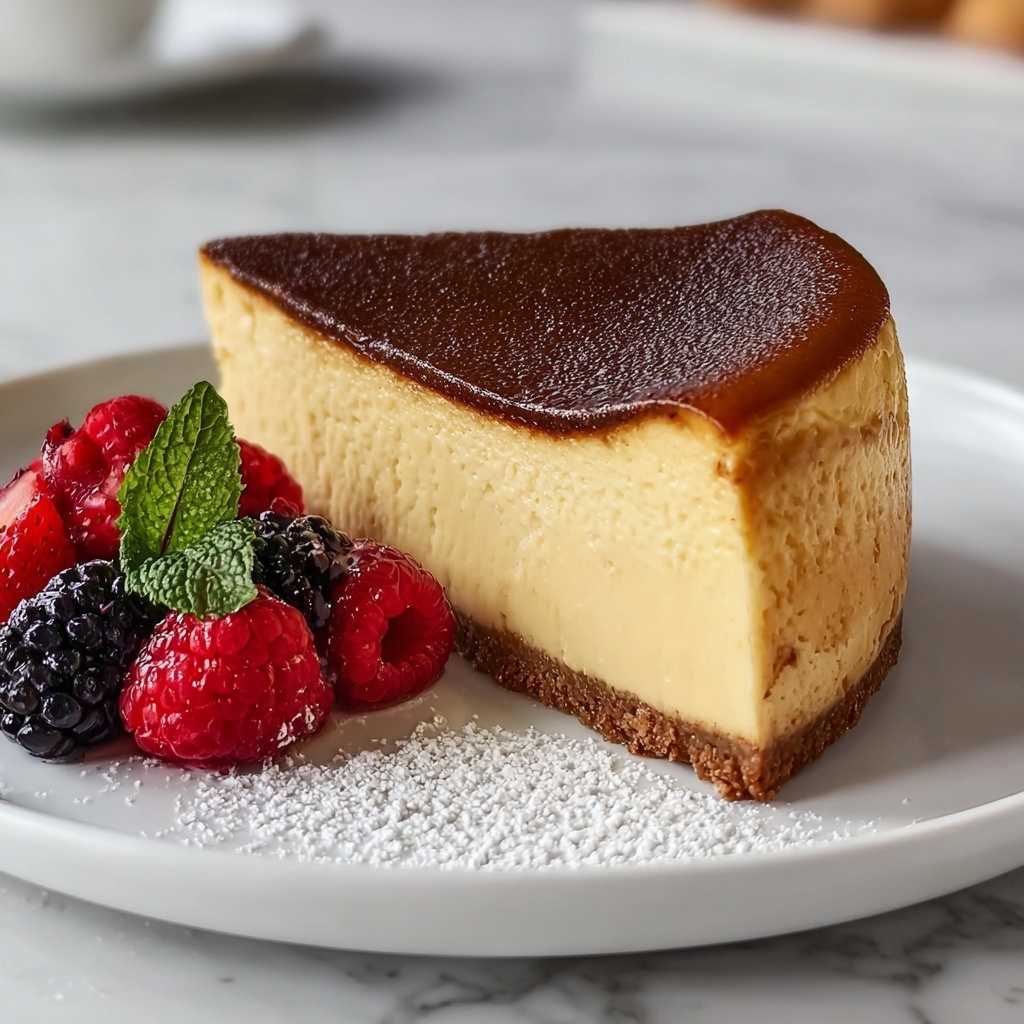
The Burnt Basque cheesecake is known for its deeply caramelized top and a creamy, custard-like interior. Unlike regular cheesecakes, it is baked at a higher temperature without a crust, which creates that distinct burnt appearance and unique texture.
Can I use a different type of cream cheese?
While full-fat cream cheese is recommended for its richness and texture, you can use other types, but the final cheesecake may be less creamy or dense. Avoid low-fat versions, as they may not set properly.
How do I prevent the cheesecake from cracking?
Cracking is less common with this recipe due to the high baking temperature and lack of crust. However, make sure not to overbeat the eggs and avoid opening the oven door during baking to keep the temperature steady.
Is it necessary to chill the cheesecake overnight?
Yes, chilling is essential to allow the cheesecake to set and develop its signature creamy texture. While 4 hours is the minimum, overnight chilling yields the best sliceability and flavor.
Can I make this cheesecake gluten-free?
Absolutely! Simply substitute the all-purpose flour with a gluten-free flour blend of equal measure. This will keep the cheesecake tender without compromising its creamy texture.
Final Thoughts
If you’ve been searching for a cheesecake recipe that’s as impressive as it is simple, the Creamy Burnt Basque Cheesecake Recipe is exactly what you need. Its glamor comes from humble ingredients and an effortless technique that yields a breathtaking, crowd-pleasing dessert every time. So go ahead, bake one for your next gathering or indulgent weekend treat—you’ll fall in love with its golden, creamy perfection just like I did!
Print
Creamy Burnt Basque Cheesecake Recipe
- Prep Time: 20 minutes
- Cook Time: 50-60 minutes
- Total Time: 1 hour 20 minutes plus at least 4 hours chilling
- Yield: 8 servings
- Category: Dessert
- Method: Baking
- Cuisine: Basque, Spanish
Description
This Creamy Burnt Basque Cheesecake is a rich and decadent dessert known for its deeply caramelized top and creamy, custardy interior. Originating from the Basque region of Spain, this cheesecake is baked at a high temperature to create a signature burnt surface that contrasts beautifully with its smooth, luscious body.
Ingredients
Cheesecake Batter
- 2 pounds cream cheese, softened
- 1 1/4 cups granulated sugar
- 1 teaspoon vanilla extract
- 1/4 teaspoon salt
- 6 large eggs
- 1 cup heavy cream
- 1/4 cup all-purpose flour
Instructions
- Preheat Oven: Preheat your oven to 400°F (200°C) to ensure it’s hot enough to create the characteristic burnt top on the cheesecake.
- Prepare Pan: Line a 9-inch springform pan with parchment paper, letting it overhang the sides. This helps with easy removal of the cake later.
- Beat Cream Cheese: In a large mixing bowl, beat the softened cream cheese until completely smooth and creamy for a lump-free texture.
- Add Sugar, Vanilla, and Salt: Mix in the granulated sugar, vanilla extract, and salt until all ingredients are well combined and the mixture is smooth.
- Incorporate Eggs: Add the eggs one at a time, beating well after each addition to ensure even distribution and a consistent batter.
- Mix Cream and Flour: Gently stir in the heavy cream and all-purpose flour until the batter becomes smooth and fully blended.
- Pour Batter: Pour the prepared batter into the lined springform pan, spreading it evenly.
- Bake: Bake the cheesecake for 50-60 minutes. The top should be a deep golden brown with a slightly jiggly center, indicating it is perfectly baked yet creamy inside.
- Cool Down: Remove the cheesecake from the oven and let it cool at room temperature for a short while before refrigerating.
- Chill: Refrigerate the cheesecake for at least 4 hours or overnight to allow it to set completely and develop its rich flavor.
- Serve: Carefully remove the cheesecake from the springform pan using the parchment overhang, slice, and serve chilled for the best texture and taste.
Notes
- Ensure the cream cheese is fully softened before mixing to avoid lumps in the batter.
- The burnt top is essential to this cheesecake’s authentic flavor and texture, so do not reduce the baking temperature.
- Allow the cheesecake to chill thoroughly; this improves the texture and flavor complexity.
- Use a high-quality cream cheese for the creamiest result.
- Line the pan with parchment paper extending above the edges to make removing the cake easier.


