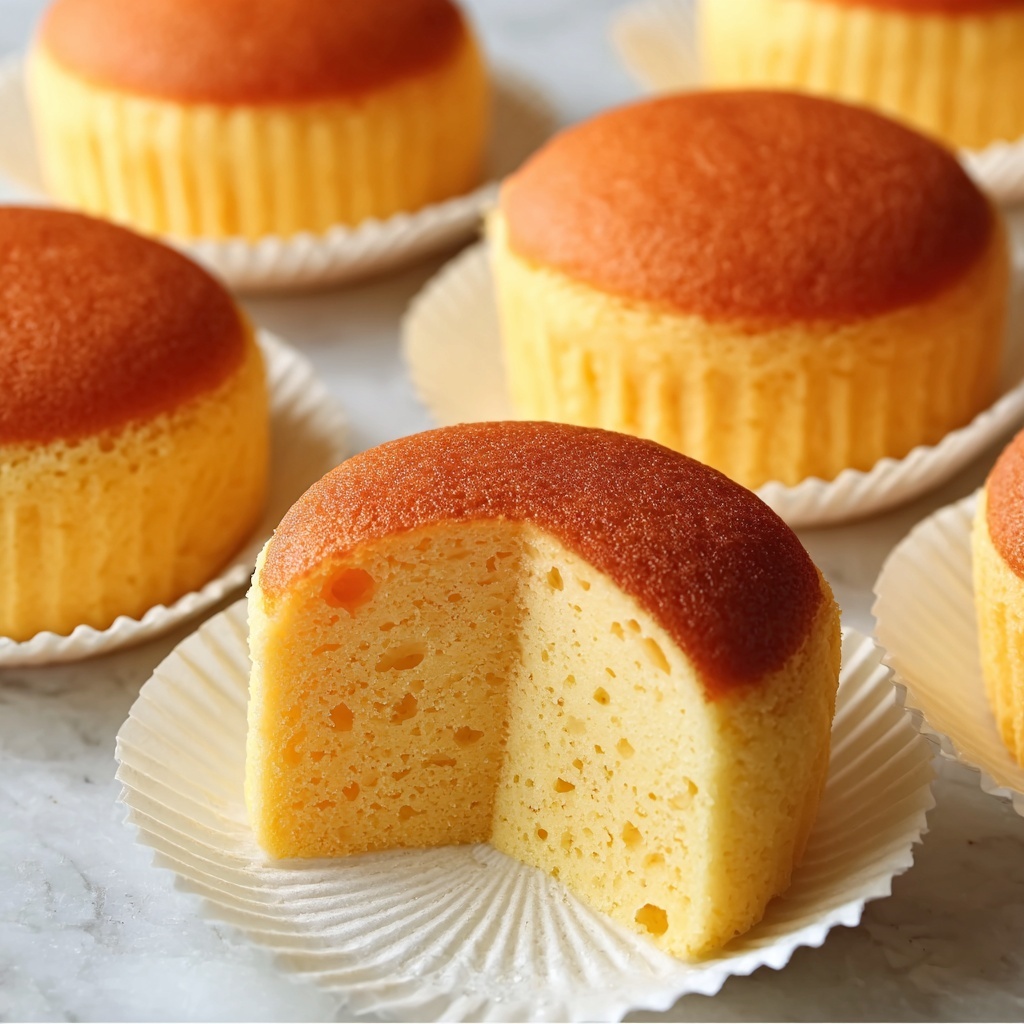
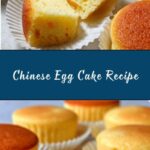
If you are looking to create a light, airy, and utterly delightful dessert that has a special place in Chinese culinary tradition, this Chinese Egg Cake Recipe is going to be your new favorite. Known for its delicate fluffiness and subtle sweetness, this cake is remarkably simple yet magical, relying on just a few key ingredients and techniques to achieve its signature texture. Whether you are baking it for a festive occasion or a cozy afternoon treat, the soft, spongy layers will melt in your mouth and make every bite a little moment of joy. Let me take you through this beloved recipe that’s as comforting as it is beautiful.
Ingredients You’ll Need
The magic of this Chinese Egg Cake Recipe comes from its simple but carefully chosen ingredients. Each one plays a crucial role: the eggs create a fluffy structure, sugar adds sweetness and tenderness, and the flour brings everything together with a light crumb. Optional additions like vanilla, milk, and oil help enhance moisture and flavor without weighing down the cake.
- 4 large eggs, room temperature: Eggs are the star of the show, giving the cake its airy lift and rich texture.
- 100 grams (1/2 cup) granulated sugar: Adds sweetness and helps stabilize the egg foam during beating.
- 120 grams (1 cup) cake flour (or sifted all-purpose flour): Cake flour ensures a tender crumb, while all-purpose needs sifting to keep the cake light.
- 1/4 teaspoon salt: Enhances the flavor profile without making the cake salty.
- 1/2 teaspoon vanilla extract (optional): Provides a gentle aromatic note that complements the cake’s sweetness.
- 2 tablespoons milk (optional): Adds softness and a bit of moisture to the cake.
- 1 tablespoon neutral oil (optional): Keeps the cake moist without altering the taste or color.
How to Make Chinese Egg Cake Recipe
Step 1: Prepare Your Pan and Oven
Start by preheating your oven to 350°F (175°C). Line an 8-inch round or square cake pan with parchment paper, making sure not to grease the sides. This helps the cake stick slightly to the edges and rise perfectly with support. Getting this setup ready will make your baking seamless and help your cake bake evenly.
Step 2: Beat the Eggs and Sugar
Using a hand or stand mixer, beat the eggs at high speed for about 5 to 7 minutes until they quadruple in volume and turn a pale yellow. Gradually add the granulated sugar during this process and continue to beat. A good indicator of readiness is when the batter forms thick ribbon-like strands that fall slowly from the beaters. This aeration is absolutely crucial as it creates the light structure typical of the Chinese Egg Cake Recipe.
Step 3: Incorporate Vanilla Extract
If you choose to use vanilla extract, add it now to the egg and sugar mixture. This subtle addition works wonders in enhancing the aroma and flavor without overpowering the simplicity of your cake.
Step 4: Fold in the Flour and Salt
Sift together the cake flour and salt, then gently fold them into your fluffy egg mixture in small batches. Use a spatula and a careful folding motion—this keeps as much air as possible in the batter, which is key to that dreamy texture. Avoid overmixing to prevent deflating your beautifully whipped eggs.
Step 5: Add Milk and Oil (If Using)
Mix the milk and neutral oil in a small bowl before gently folding them into the batter. These optional ingredients add a touch more moisture and softness to the cake, creating a balance between lightness and richness.
Step 6: Bake to Perfection
Pour the batter into your prepared pan, then gently tap it on the countertop to release any trapped air bubbles. Bake for 25 to 30 minutes until the surface turns a golden hue and a toothpick inserted in the center comes out clean. Let your cake rest in the pan for five minutes before transferring it to a wire rack to cool completely. This gentle cooling helps retain moisture and prevents cracking.
How to Serve Chinese Egg Cake Recipe
Garnishes
This cake shines in its pure form, but a light dusting of powdered sugar can add an elegant touch without detracting from the cake’s airy essence. Fresh berries or a drizzle of honey complement the subtle sweetness beautifully for a simple yet charming presentation.
Side Dishes
The soft texture and gentle flavor of this Chinese Egg Cake Recipe pairs wonderfully with a cup of jasmine tea or green tea, balancing sweetness with a refreshing, floral note. You can also serve it alongside fruit preserves or a scoop of light vanilla ice cream for an indulgent twist.
Creative Ways to Present
For a festive gathering, cut the cake into small squares or rectangles and layer them with whipped cream and fresh fruits for a deconstructed trifle. Alternatively, decorate with edible flowers or a light sprinkle of toasted coconut flakes to elevate its visual appeal while keeping things simple and elegant.
Make Ahead and Storage
Storing Leftovers
Store any leftover cake in an airtight container at room temperature for up to two days to maintain its softness. If your kitchen is particularly warm or humid, it’s better to refrigerate the cake but allow it to come to room temperature before enjoying to enhance the texture.
Freezing
This Chinese Egg Cake Recipe freezes well. Wrap slices tightly in plastic wrap and place them in a sealed freezer bag for up to two months. When ready to enjoy, thaw slices in the refrigerator overnight and bring to room temperature before serving for the best experience.
Reheating
To refresh the cake’s softness, gently warm slices in a microwave for 10 to 15 seconds or heat briefly in a low oven at 300°F (150°C) for 5 to 8 minutes. Avoid overheating as the cake can dry out quickly.
FAQs
What makes this Chinese Egg Cake Recipe different from regular sponge cakes?
This recipe relies heavily on expertly beaten eggs without any chemical leavening like baking powder, resulting in an ultra-light texture that is both moist and fluffy, which is unique compared to many Western sponge cakes.
Can I use all-purpose flour instead of cake flour?
Yes, you can. Just make sure to sift the all-purpose flour several times to aerate it, which helps keep the cake light. The texture might be slightly less tender but still delicious.
Why is it important to beat the eggs so well?
Beating the eggs until pale and fluffy incorporates air that acts as the natural leavening agent. This step is crucial for the cake to rise properly and to create its characteristic airy texture.
Can I add flavors other than vanilla?
Absolutely. You can experiment with citrus zest, almond extract, or even a hint of matcha powder to personalize the cake, keeping in mind these additions should be subtle to preserve the delicate nature of the cake.
Is this cake suitable for vegetarians?
Yes, this Chinese Egg Cake Recipe is vegetarian-friendly as it contains no meat or gelatin. However, it does contain eggs, so it is not suitable for vegans.
Final Thoughts
This Chinese Egg Cake Recipe is a fantastic way to experience a classic Asian dessert that’s both simple to make and immensely rewarding. Its light, fluffy texture and subtle sweetness make it a versatile treat for any occasion. If you love baking and discovering new flavors, I hope you give this recipe a try—you’ll quickly see why it holds a special place in so many hearts!
Print
Chinese Egg Cake Recipe
- Prep Time: 15 minutes
- Cook Time: 30 minutes
- Total Time: 45 minutes
- Yield: 8 slices
- Category: Dessert
- Method: Baking
- Cuisine: Chinese
- Diet: Vegetarian
Description
Chinese Egg Cake, or Ji Dan Gao, is a traditional light and fluffy sponge cake known for its airy texture without the use of butter or baking powder. This simple yet elegant dessert relies on well-beaten eggs for its rise and is perfect served plain or dusted with powdered sugar.
Ingredients
Main Ingredients
- 4 large eggs, room temperature
- 100 grams (1/2 cup) granulated sugar
- 120 grams (1 cup) cake flour (or all-purpose flour sifted)
- 1/4 teaspoon salt
Optional Ingredients
- 1/2 teaspoon vanilla extract (optional)
- 2 tablespoons milk (optional, for a softer texture)
- 1 tablespoon neutral oil (optional, for added moisture)
Instructions
- Preheat Oven: Preheat the oven to 350°F (175°C) and line an 8-inch round or square cake pan with parchment paper, ensuring not to grease the sides.
- Beat Eggs and Sugar: In a large mixing bowl, beat the eggs on high speed for 5–7 minutes until pale, thick, and tripled in volume. Gradually add granulated sugar while mixing until the mixture forms ribbons when the beaters are lifted. Add vanilla extract if using.
- Prepare Dry Ingredients: Sift together cake flour and salt to ensure an even mixture and aeration.
- Fold Flour into Eggs: Gently fold the sifted flour and salt into the egg mixture in batches using a spatula, taking care not to deflate the batter and preserving airiness.
- Add Milk and Oil (Optional): If using, mix milk and neutral oil in a small bowl, then fold gently into the batter at the end to add moisture and softness.
- Pour Batter and Tap Pan: Pour the prepared batter into the lined pan and gently tap the pan on the countertop to release trapped air bubbles.
- Bake: Bake in the preheated oven for 25–30 minutes until the cake top is golden and a toothpick inserted into the center comes out clean.
- Cool: Let the cake cool in the pan for 5 minutes, then remove the cake from the pan and transfer to a wire rack to cool completely.
Notes
- The key to the cake’s rise and fluffy texture is beating the eggs thoroughly until tripled in volume.
- Traditional Ji Dan Gao contains no butter or baking powder, resulting in a very light and delicate sponge.
- Serve the cake plain or with a dusting of powdered sugar for a simple, elegant treat.


