
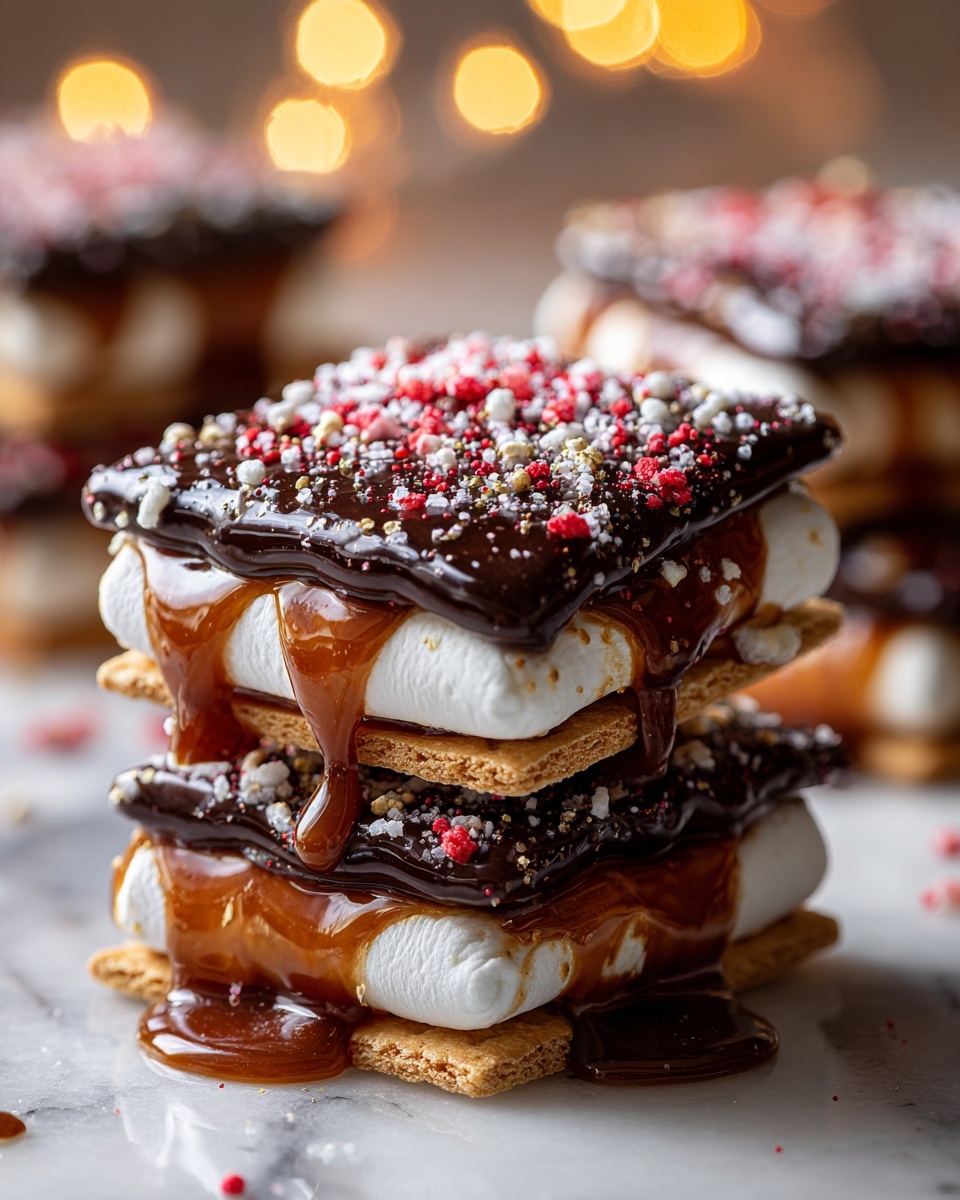
If you’ve ever dreamed of biting into a nostalgic treat that combines the warm, caramel-like goodness of brown sugar with the flaky charm of a classic pop tart, then you are in for a serious delight. These Brown Sugar Pop Tart Cookies: The Ultimate Recipe & Baking Guide Recipe take everything you love about pop tarts and cookies and blend them into one unforgettable dessert. With a luscious brown sugar filling nestled between buttery, tender cookies and topped with a sweet vanilla glaze and a sprinkle of festive sprinkles, this recipe is a guaranteed crowd-pleaser. Whether you’re making them for a cozy afternoon treat or a special occasion, these cookies bring joy in every single bite!
Ingredients You’ll Need
Ingredients You’ll Need
Getting started with this recipe means gathering some simple but crucial ingredients. Each one plays a special role, from providing structure and flavor to creating that perfect chewy texture and a visually inviting finish.
- All-purpose flour (2 1/4 cups plus more for dusting): The foundation for the cookie dough that ensures the right balance of structure and softness.
- Baking powder (1 teaspoon): Helps the cookies rise just enough for a tender crumb.
- Baking soda (1/2 teaspoon): Works with the brown sugar to tenderize and aid in browning.
- Salt (1/4 teaspoon): Enhances all the sweet flavors and balances the dough perfectly.
- Unsalted butter (1 cup plus 1/4 cup, softened): Brings rich, creamy flavor and keeps the cookies tender and flaky.
- Granulated sugar (3/4 cup): Provides sweetness and helps with the cookie’s texture.
- Packed light brown sugar (3/4 cup plus 1 cup for filling): Gives a deep, molasses-like flavor and moist texture to both dough and filling.
- Large eggs (2): Bind everything together and add tenderness.
- Vanilla extract (1 teaspoon for dough and 1/2 teaspoon for filling): Adds a lovely aromatic note that ties the flavors together beautifully.
- Milk (1 tablespoon for filling and 2-3 tablespoons for glaze): Introduces moisture for the filling’s consistency and the glaze’s silky smoothness.
- Ground cinnamon (1/4 teaspoon): Infuses a subtle warmth and spice, perfectly complementing the brown sugar.
- Powdered sugar (1 cup): The key to a luscious, sweet glaze that finishes the cookies with a touch of elegance.
- Your favorite sprinkles: Optional, but highly recommended to add a playful and colorful touch!
How to Make Brown Sugar Pop Tart Cookies: The Ultimate Recipe & Baking Guide Recipe
Step 1: Combine the Dry Ingredients
Start by whisking together the flour, baking powder, baking soda, and salt in a medium bowl. This blend of dry ingredients creates the base where flavors and textures meet, ensuring your cookies come out perfectly tender with a nice rise.
Step 2: Cream Butter and Sugars
In a large bowl or stand mixer, cream the softened butter with granulated sugar and light brown sugar until fluffy and light, usually about 3 to 5 minutes. This step is crucial because it introduces air that makes the cookies soft and gives them a beautiful texture.
Step 3: Add Eggs and Vanilla
Beat in the eggs one at a time, mixing thoroughly after each addition. Then stir in the vanilla extract. The eggs enhance structure and moisture, while vanilla deepens the cookie’s flavor profile.
Step 4: Incorporate Dry Ingredients Gradually
Add the dry ingredient mixture gradually to the wet ingredients and mix on low speed just until combined. Overmixing here can make the cookies tough, so stop as soon as the flour disappears.
Step 5: Chill the Dough
Divide the dough into two halves, shape into discs, wrap in plastic wrap, and refrigerate for at least one hour, preferably two. Chilling firms up the dough and makes it easier to roll without losing the beautiful texture.
Step 6: Prepare the Brown Sugar Filling
Mix together brown sugar, softened butter, flour, milk, vanilla extract, cinnamon, and a pinch of salt until you get a smooth, paste-like consistency. This filling is the luscious surprise that makes these cookies extraordinary!
Step 7: Preheat Oven and Prepare Baking Sheets
Set your oven to 375°F (190°C) and line two baking sheets with parchment paper. The parchment makes for easy cleanup and helps the cookies bake evenly.
Step 8: Roll Out and Cut Cookies
On a lightly floured surface, roll out one disc of chilled dough to about 1/8 inch thickness. Use a 3-inch cookie cutter to cut out circles. Don’t forget to reroll scraps to get the most cookies possible!
Step 9: Assemble the Cookies
Arrange half of the cut-out cookies on the prepared sheets. Spoon about 1 tablespoon of the brown sugar filling onto each cookie, leaving a small edge to help seal.
Step 10: Top and Seal Each Cookie
Roll out the second dough disc and cut out matching circles. Place each top cookie over the filling and gently press the edges together. Use a fork to crimp and seal decoratively while ensuring the filling stays inside during baking.
Step 11: Bake to Perfection
Bake the cookies for 8 to 10 minutes or until the edges just turn a lovely light golden brown—this slight color change means they’re perfectly baked for that tender crunch without bitterness.
Step 12: Cool Cookies Completely
Let the cookies cool on baking sheets for a few minutes before transferring to a wire rack. Cooling completely is key before you add the glaze; otherwise, it will melt and not set properly.
Step 13: Whisk Together the Glaze
In a small bowl, combine powdered sugar, milk, and vanilla extract, whisking until silky smooth. Add milk gradually until the glaze reaches a thick but pourable consistency.
Step 14: Glaze and Decorate
Drizzle the glaze over each cookie generously. While still wet, sprinkle your favorite colorful sprinkles on top for an extra festive touch that’s as fun to look at as it is to eat.
Step 15: Let the Glaze Set
Allow the glaze to firm up for 30 minutes to an hour before serving or storing. This step guarantees a beautiful finish that won’t be sticky or runny when you bite in.
How to Serve Brown Sugar Pop Tart Cookies: The Ultimate Recipe & Baking Guide Recipe
Garnishes
Sometimes, all you need is a little extra sparkle to make your cookies shine. White chocolate shavings, a light dusting of cinnamon, or edible gold dust can elevate these treats to next-level decadence, especially for celebrations.
Side Dishes
Serve these cookies alongside a warm cup of spiced chai, a creamy latte, or even a scoop of vanilla bean ice cream for dessert. The combination brings out the cookies’ buttery sweetness in the most comforting way.
Creative Ways to Present
Stack these sandwich cookies in clear glass jars tied with rustic twine for gift-giving, or arrange them on a colorful platter with fresh berries and mint for an eye-catching dessert table centerpiece. The possibilities to impress are endless!
Make Ahead and Storage
Storing Leftovers
Store leftover cookies in an airtight container at room temperature. They’ll stay fresh and chewy for up to 4 days, perfect for snacking throughout the week without losing their charm.
Freezing
If you want to prepare these cookies in advance, freeze the unbaked sandwiches by assembling them and placing them on a baking sheet to freeze individually before transferring to a freezer-safe bag. Bake straight from frozen, adding an extra minute or two to the bake time, for fresh-tasting cookies anytime.
Reheating
To revive the nostalgic warmth, gently microwave a cookie for 10 to 15 seconds or warm in a low oven for a few minutes. This will soften the filling and melt the glaze slightly for an irresistible treat.
FAQs
Can I use salted butter instead of unsalted?
Absolutely! Just remember to reduce the added salt in the recipe slightly to avoid oversalting your cookies. The balance is key to achieving that perfect sweet flavor.
How long should I chill the dough for best results?
Chilling for about 2 hours is ideal as it helps the dough firm up, making it easier to roll and cut. It also helps the flavors develop deeper, giving you a tastier cookie.
Can I substitute the brown sugar filling for a different flavor?
Definitely! Feel free to experiment by adding bits of chopped nuts, a splash of bourbon, or even swapping cinnamon for nutmeg to personalize your filling and create new favorites.
Are these cookies suitable for freezing after baking?
Yes! Once completely cooled and glazed, you can freeze these cookies. Just make sure to separate layers with parchment paper to prevent sticking, and thaw at room temperature before enjoying.
What kind of sprinkles work best?
You can use any sprinkles that you love—jimmies, nonpareils, or even seasonal themed sprinkles all add personality and fun to your cookies. Just pick one that complements the look and taste you’re going for.
Final Thoughts
I genuinely can’t recommend the Brown Sugar Pop Tart Cookies: The Ultimate Recipe & Baking Guide Recipe enough if you want to indulge in a moment of sweet nostalgia paired with lavish homemade charm. They’re fun to make, even more fun to share, and every bite feels like a warm hug from your oven straight to your heart. So why wait? Grab your ingredients and start baking—these cookies will quickly become one of your all-time favorites!
Print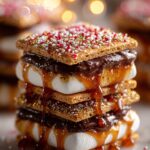
Brown Sugar Pop Tart Cookies: The Ultimate Recipe & Baking Guide Recipe
- Prep Time: 30 minutes
- Cook Time: 10 minutes
- Total Time: 2 hours 40 minutes
- Yield: 24 sandwich cookies
- Category: Dessert
- Method: Baking
- Cuisine: American
Description
These Brown Sugar Pop Tart Cookies are a delightful twist on the classic breakfast treat, featuring a buttery cookie crust filled with a sweet brown sugar cinnamon filling and topped with a smooth vanilla glaze and colorful sprinkles. Perfectly soft and chewy with a caramelized filling, these cookies bring nostalgic pop tart flavors in a homemade, bakery-style cookie form.
Ingredients
Cookie Dough
- 2 1/4 cups (281g) all-purpose flour, plus more for dusting
- 1 teaspoon baking powder
- 1/2 teaspoon baking soda
- 1/4 teaspoon salt
- 1 cup (2 sticks, 226g) unsalted butter, softened
- 3/4 cup (150g) granulated sugar
- 3/4 cup (165g) packed light brown sugar
- 2 large eggs
- 1 teaspoon vanilla extract
Filling
- 1 cup (200g) packed light brown sugar
- 1/4 cup (57g) unsalted butter, softened
- 2 tablespoons all-purpose flour
- 1 tablespoon milk
- 1/2 teaspoon vanilla extract
- 1/4 teaspoon ground cinnamon
- Pinch of salt
Glaze
- 1 cup (120g) powdered sugar
- 2–3 tablespoons milk, or more as needed
- 1/2 teaspoon vanilla extract
Topping
- Your favorite sprinkles for decorating
Instructions
- Combine Dry Ingredients: In a medium bowl, whisk together the flour, baking powder, baking soda, and salt until well mixed. Set aside for assembling the dough.
- Cream Butter and Sugars: Using a stand mixer or large bowl, beat the softened butter with granulated sugar and light brown sugar for about 3-5 minutes until the mixture is light and fluffy. Be sure to scrape down the bowl sides to mix evenly.
- Add Eggs and Vanilla: Incorporate the eggs one at a time into the butter-sugar mix, beating thoroughly after each addition. Stir in the vanilla extract to add flavor depth.
- Gradually Add Dry Ingredients: On low speed, slowly add the dry ingredient mixture into the wet ingredients just until combined. Avoid overmixing to keep cookies tender.
- Chill the Dough: Divide the dough into two equal portions, flatten each into disc shapes, wrap tightly with plastic wrap, and refrigerate for at least 1 hour, preferably 2 hours, to firm up for easy rolling.
- Combine Filling Ingredients: In a separate medium bowl, mix together softened butter, brown sugar, flour, milk, vanilla extract, cinnamon, and a pinch of salt until smooth and paste-like. This will be the luscious filling.
- Preheat Oven and Prepare Baking Sheets: Set your oven to 375°F (190°C) and line two baking sheets with parchment paper to prevent sticking.
- Roll Out the Dough: On a lightly floured surface, roll one chilled dough disc to about 1/8 inch thickness. Use a 3-inch cookie cutter to cut out circular cookies. Gather scraps, re-roll gently, and cut additional shapes.
- Assemble the Cookies: Arrange half of the cookie cut-outs on the prepared baking sheets. Spoon approximately 1 tablespoon of the brown sugar filling into the center of each cookie, leaving a border around the edge to seal the cookies well.
- Top with Second Cookie: Roll out the second dough disc similarly and cut cookies. Place these on top of the filling, pressing edges gently to seal. For a decorative touch and secure seal, crimp edges with a fork.
- Bake the Cookies: Bake in the preheated oven for 8-10 minutes until the edges turn a light golden brown, ensuring a tender but cooked cookie with a soft filling.
- Cool the Cookies: Let the cookies cool for a few minutes on the baking sheet before transferring to a wire rack to cool completely to room temperature, which prevents the glaze from melting.
- Prepare the Glaze: In a small bowl, whisk together powdered sugar, milk, and vanilla extract until smooth. Adjust consistency by adding milk one teaspoon at a time until glaze is pourable but thick enough to coat the cookies.
- Glaze the Cookies: Once cookies are fully cooled, drizzle the vanilla glaze over each cookie evenly for a sweet finish.
- Add Sprinkles (Optional): While the glaze is still wet, sprinkle your favorite colorful sprinkles on top to add festive texture and fun.
- Let the Glaze Set: Allow the glazed cookies to set for 30 minutes to an hour until the icing hardens slightly before serving or storing to retain the perfect texture.
Notes
- Chilling the dough is essential for easier rolling and prevents the cookies from spreading too much during baking.
- Use unsalted butter to control the salt levels in the recipe, balancing sweetness.
- Apply glaze only when cookies are completely cooled to avoid melting.
- Store cookies in an airtight container at room temperature for up to 5 days or freeze for longer storage.
- Feel free to substitute different sprinkles or leave them off for a simpler look.
- Ensure edges are well sealed to prevent filling leakage during baking.
