If you’re looking for a dish that is both comforting and full of vibrant flavors, this Baked Chicken Rissoles Recipe is destined to become your new favorite. Juicy, tender chicken rissoles coated in a crispy, golden crust bake up beautifully in the oven – no frying required. Their irresistible texture and the subtle blend of herbs and spices make them perfect for weeknight dinners or casual entertaining. Plus, they’re easy to whip up with simple pantry staples, making this recipe a true winner in both taste and convenience.
Ingredients You’ll Need
Gathering just the right ingredients is key for making delicious rissoles that have the perfect balance of moisture, flavor, and crunch. Each element plays its part, from the minced chicken that delivers protein and juiciness, to the breadcrumbs and parmesan that lock in crispness and savory aroma.
- Olive oil spray: Helps achieve a perfectly golden and crispy finish during baking without excess fat.
- 500 g minced chicken: The lean protein base that keeps the rissoles tender and juicy; turkey or pork mince can also be used.
- 1 small onion, grated: Adds a subtle sweetness and moisture to the mixture.
- 1 tsp freshly minced garlic: Infuses a mild spicy depth that wakes up the flavor.
- 1 tbsp chopped fresh flat-leaf parsley: Brings a pop of herbaceous brightness and freshness.
- ⅓ cup (20 g) panko breadcrumbs: Lightens the texture of the meat mixture while helping it bind together.
- 1 egg: The binding agent that keeps everything together during baking.
- 1 tsp chicken stock powder (bouillon): Enhances the savory richness in every bite.
- Freshly cracked black pepper: Adds a gentle heat that complements the mild chicken flavor.
- 1 tsp sweet paprika: Gives a warm, smoky undertone and vibrant color to the coating.
- ¾ cup (40 g) panko breadcrumbs: Used for the crispy outer coating to provide contrasting crunch.
- ⅓ cup (35 g) freshly grated parmesan: Adds nutty, salty depth enhancing the crust’s flavor.
- ¼ tsp sea salt flakes: Gives a delicate seasoning to balance all the flavors.
- ¼ tsp freshly cracked black pepper: Offers a final touch of spice in the coating mix.
- Lemon wedges (optional): Brighten the dish with a tangy freshness when squeezed over just before eating.
How to Make Baked Chicken Rissoles Recipe
Step 1: Preheat and Prepare
Start by preheating your oven to 220°C (425°F) or 200°C (400°F) if you’re using a fan-forced oven. Lightly spray a metal baking tray with olive oil spray so the rissoles won’t stick and can crisp up perfectly. This simple prep lays the groundwork for a smooth cooking process.
Step 2: Mix the Coating Ingredients
In a shallow bowl, combine the sweet paprika, ¾ cup panko breadcrumbs, freshly grated parmesan, sea salt flakes, and freshly cracked black pepper. This coating mix is where we get the golden crust that makes these rissoles so inviting. Setting it aside now means you’re ready to roll the rissoles shortly after the filling is prepped.
Step 3: Prepare the Rissole Mixture
In a large bowl, combine the minced chicken, grated onion, freshly minced garlic, chopped parsley, ⅓ cup panko breadcrumbs, egg, chicken stock powder, and freshly cracked black pepper. Use clean hands to mix everything well; this ensures the flavors are evenly distributed and the texture stays tender. This wet and sticky mixture holds the promise of moist and flavorful rissoles.
Step 4: Shape and Coat the Rissoles
Dip about ¼ cup of the mixture into the coating bowl, then shape it gently into a rissole. Because the mixture is sticky, wetting your hands or wearing gloves makes this step much easier and cleaner. Place the coated rissoles on the prepared tray, then repeat until you have formed around 12 pieces. Generously spray the tops with olive oil spray to help with browning in the oven.
Step 5: Bake to Golden Perfection
Slide your tray into the oven and bake the rissoles for 18 to 20 minutes. Halfway through, turn them over, and give another spritz of olive oil spray to ensure both sides become beautifully golden and crisp. The result will be rissoles that are cooked through but still tender on the inside, with a satisfyingly crunchy exterior.
Step 6: Serve and Enjoy
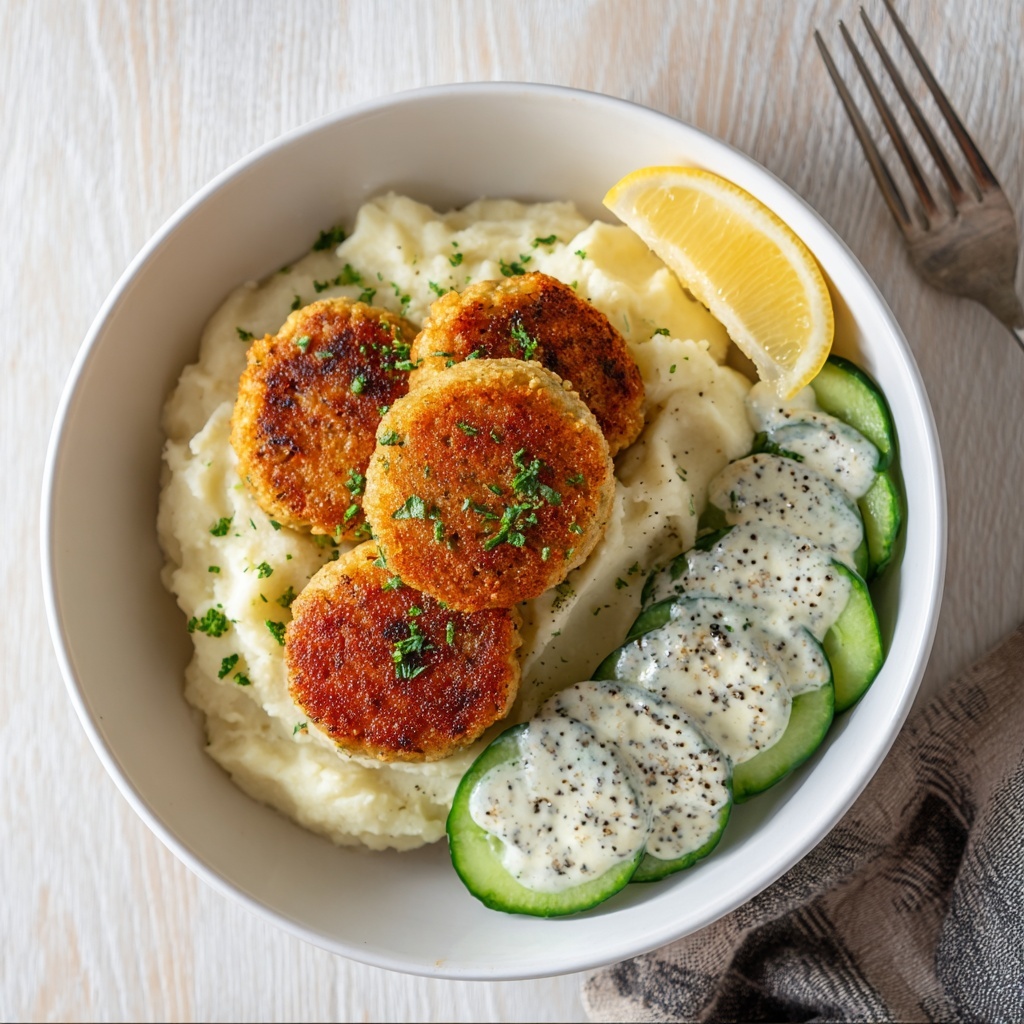
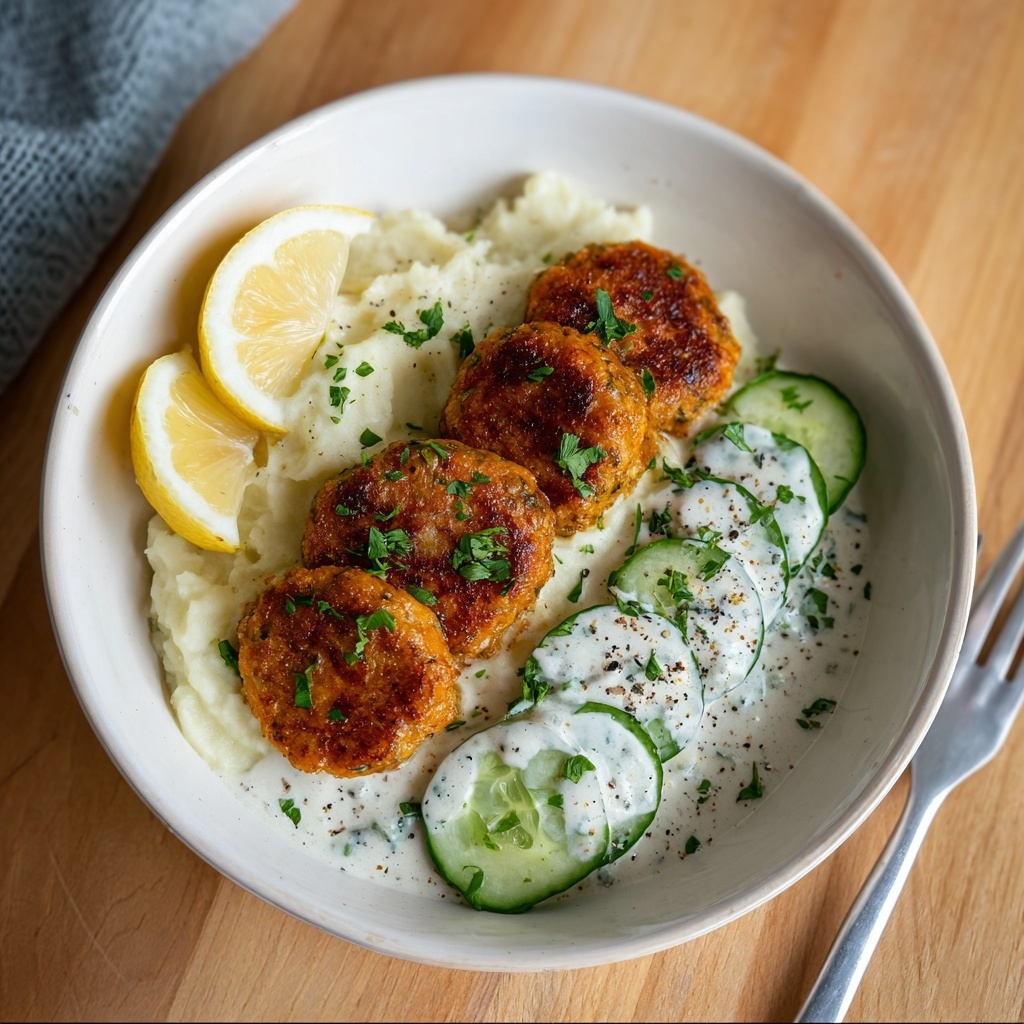
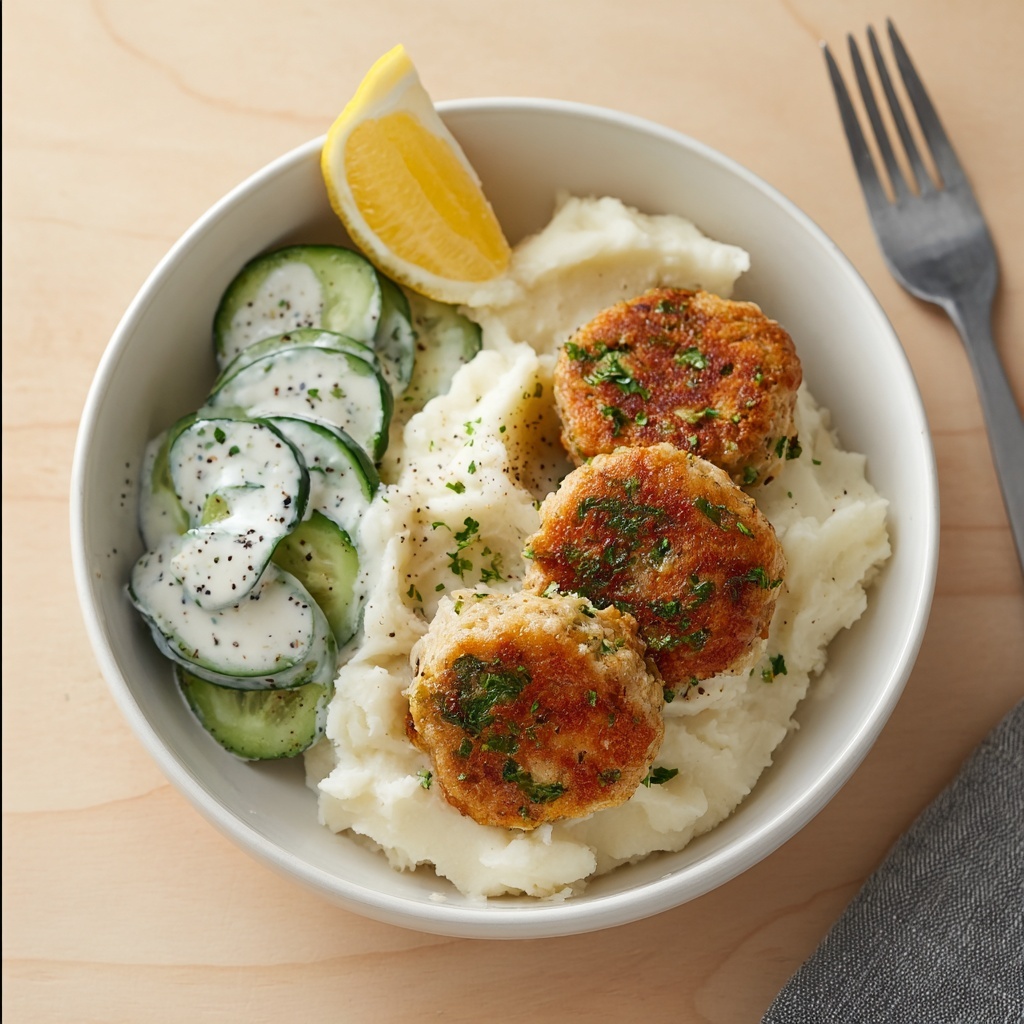
Once baked, serve your rissoles immediately for the best texture and taste. Adding lemon wedges and fresh parsley can lift the whole experience with brightness and freshness. Trust me, at this point, your kitchen will be filled with aromas that make this Baked Chicken Rissoles Recipe feel like a comforting hug in food form.
How to Serve Baked Chicken Rissoles Recipe
Garnishes
Simple garnishes can elevate the entire dish. A sprinkle of extra chopped parsley will add a fresh herbal touch, while lemon wedges bring a needed zing of acidity to cut through the richness of the rissoles. These little additions make the dish feel thoughtful and complete without extra fuss.
Side Dishes
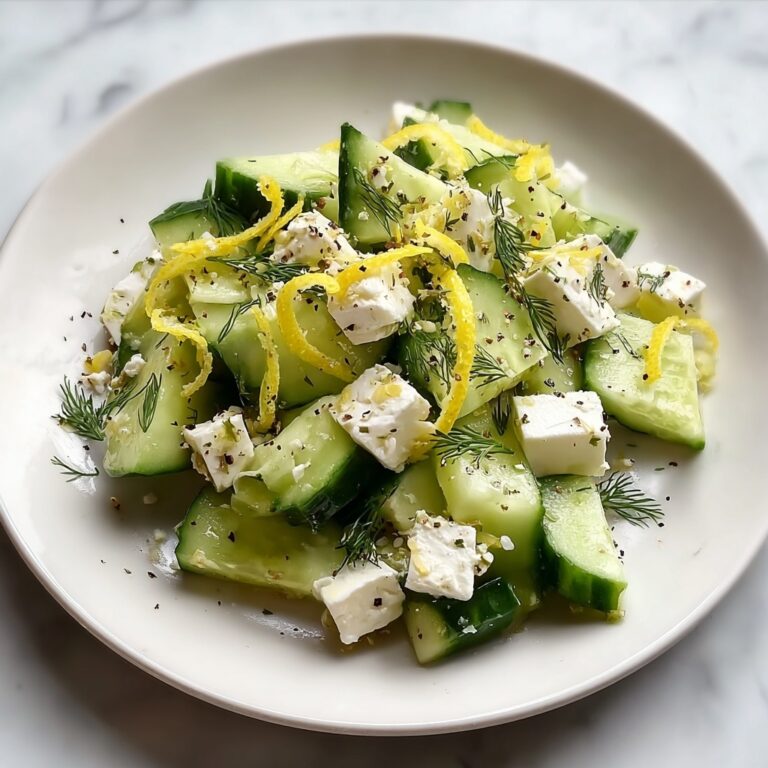
These rissoles pair wonderfully with creamy mashed potatoes, particularly freezer-friendly mashed potatoes if you like to have something quick on hand. For a palate-refreshing contrast, try serving sour cream garlic cucumbers alongside – their cool creaminess and crunch add a delightful textural balance. Alternatively, a crisp green salad or roasted vegetables make excellent accompaniments.
Creative Ways to Present
If you’re entertaining or want to add a bit of flair, try serving your rissoles as sliders with mini buns and a dollop of aioli or mustard. They also work wonderfully atop a bed of herbed rice or tucked into a warm pita with fresh greens for a handheld delight. The versatility of this Baked Chicken Rissoles Recipe means presentation can be casual or fancy, tailored to your occasion.
Make Ahead and Storage
Storing Leftovers
Leftover baked chicken rissoles can be kept in an airtight container in the refrigerator for up to 3 days. They maintain their flavor well, making them perfect for next-day lunches or quick dinners. Just remember to cool them completely before storing to keep that crispy exterior from turning soggy.
Freezing
You can freeze the rissoles either before or after baking. To freeze uncooked rissoles, place them on a baking tray lined with baking paper and freeze until solid, then transfer them to a freezer bag. Cooked rissoles should be wrapped tightly in foil or plastic wrap before freezing. They last up to 3 months in the freezer, making them a fantastic meal prep option.
Reheating
The best way to reheat your baked chicken rissoles is in the oven at 180°C (350°F) for 10 to 15 minutes until warmed through and crisp again. Avoid microwaving if you want to keep that gorgeous crunch intact. This reheating method brings back the freshly baked texture and flavor almost perfectly.
FAQs
Can I use turkey or pork instead of chicken?
Absolutely! This Baked Chicken Rissoles Recipe works wonderfully with turkey or pork mince. The flavor might shift slightly depending on the meat, but the result will still be juicy and delicious.
Are panko breadcrumbs necessary?
Panko breadcrumbs are preferred because they provide a lighter, crispier texture compared to regular breadcrumbs. However, if you don’t have panko, you can substitute with fresh bread crumbs or crushed crackers.
Can I make this recipe dairy-free?
Yes, you can omit the parmesan or replace it with a dairy-free alternative. Just keep in mind the cheese adds a nice depth to the coating’s flavor, so you might want to add a pinch of nutritional yeast or extra seasoning as a substitute.
Is it possible to bake these in an air fryer?
Definitely! You can bake the rissoles in an air fryer at 200°C (400°F) for about 10 to 12 minutes, turning halfway through. This method will deliver that same crispy finish with less oil.
How can I prevent the rissole mixture from being too sticky?
Wet your hands before shaping the rissoles to make handling the sticky mixture easier. You can also add a few more breadcrumbs to the mixture if it feels excessively wet, but be careful not to add too much and dry them out.
Final Thoughts
This Baked Chicken Rissoles Recipe truly shines as a hearty, flavorful meal that feels both homey and a little special. Whether you’re cooking for family or friends, these rissoles deliver irresistible taste with minimal fuss. Give this recipe a go—you’re going to love how easy it is to make something so satisfying and delicious!
Print
Baked Chicken Rissoles Recipe
- Prep Time: 10 minutes
- Cook Time: 20 minutes
- Total Time: 30 minutes
- Yield: 12 rissoles (serves 4)
- Category: Main Course
- Method: Baking
- Cuisine: Australian
Description
These Baked Chicken Rissoles are a flavorful and healthy twist on the classic favorite, featuring minced chicken mixed with onion, garlic, parsley, and spices, then coated in a parmesan and panko breadcrumb crust. Baked to golden perfection, they make a delicious and easy-to-prepare main dish that’s perfect for family dinners or meal prepping.
Ingredients
Rissoles
- 500 g (1 lb) minced (ground) chicken (can be substituted with turkey mince or pork mince)
- 1 small onion, grated
- 1 tsp freshly minced garlic
- 1 tbsp chopped fresh flat-leaf parsley, plus extra to serve
- ⅓ cup (20 g) panko breadcrumbs
- 1 egg
- 1 tsp chicken stock powder (bouillon)
- Freshly cracked black pepper, to season
Coating
- ¾ cup (40 g) panko breadcrumbs
- ⅓ cup (35 g) freshly grated parmesan
- ¼ tsp sea salt flakes
- ¼ tsp freshly cracked black pepper
- Olive oil spray
To Serve
- Lemon wedges (optional)
- Freezer-friendly mashed potatoes
- Sour cream garlic cucumbers (not dairy-free)
Instructions
- Preheat the oven: Preheat your oven to 220°C (425°F) or 200°C (400°F) fan-forced. Lightly spray a metal baking tray with olive oil spray to prevent sticking.
- Prepare the coating: In a shallow bowl, combine the ¾ cup panko breadcrumbs, grated parmesan, sea salt flakes, and freshly cracked black pepper. Set this coating mixture aside for later.
- Prepare the rissole mixture: In a separate bowl, combine the minced chicken, grated onion, minced garlic, chopped parsley, ⅓ cup panko breadcrumbs, egg, chicken stock powder, and freshly cracked black pepper. Mix thoroughly using clean hands until all ingredients are evenly incorporated.
- Form the rissoles: Take about ¼ cup of the chicken mixture and toss it into the coating mixture to coat it evenly. Shape each coated portion into a neat oval-shaped rissole. Because the mixture is sticky, washing your hands or wearing gloves helps. Place each formed rissole on the prepared baking tray. Repeat the process to make a total of 12 rissoles. Spray the tops generously with olive oil spray.
- Bake: Place the tray in the preheated oven and bake for 18 to 20 minutes until the rissoles turn golden brown and are cooked through. Halfway through baking, turn the rissoles over and spray the other side with olive oil spray for even browning.
- Serve: Serve the baked rissoles hot with optional lemon wedges and extra parsley for garnish. Pair them with freezer-friendly mashed potatoes and sour cream garlic cucumbers for a complete meal.
Notes
- The mixture can be quite wet and sticky, so wetting your hands or using gloves makes shaping easier.
- An air fryer method can be used as an alternative: cook at 200°C (400°F) for about 12-15 minutes, turning halfway through, until golden and cooked through.
- These rissoles can be stored in the freezer either before or after cooking for convenient meal prep.


