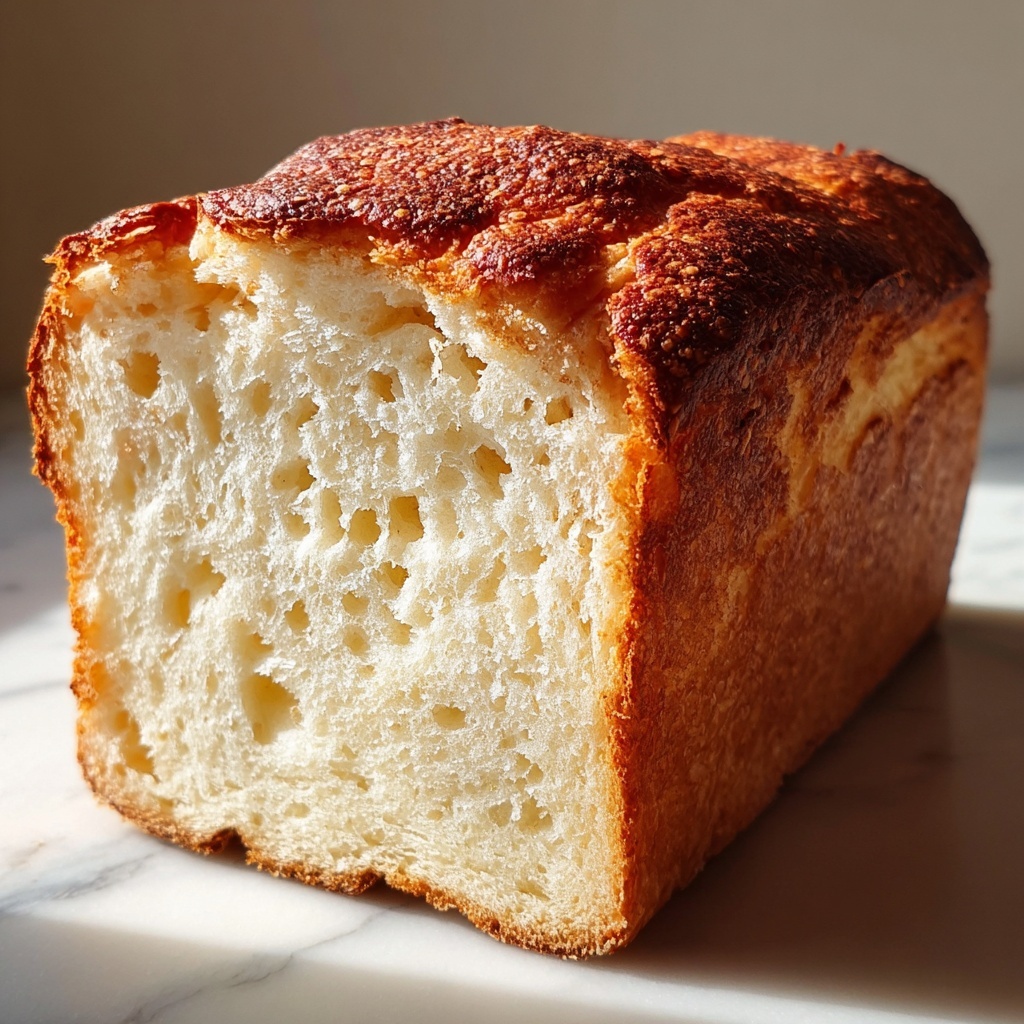
If you have ever longed for a soft, fluffy, and utterly delicious loaf that caters to your gluten-free lifestyle, then this Classic Gluten-Free White Sandwich Bread Recipe is about to become your absolute favorite. It captures all the comforting qualities of traditional white bread with a tender crumb and lovely golden crust, yet it’s carefully crafted without any gluten-containing ingredients. Whether you’re making sandwiches, toast, or simply savoring a warm slice fresh from the oven, this recipe promises the perfect balance of texture and flavor that truly feels like a classic staple in your kitchen.
Ingredients You’ll Need
These ingredients are wonderfully simple but thoughtfully chosen to bring out the best in your Classic Gluten-Free White Sandwich Bread Recipe. Each one plays an essential role, from lending structure to adding moisture and that hint of richness we all love in a good loaf of bread.
- 2 cups gluten-free all-purpose flour: The foundation of your bread, providing structure and a neutral flavor that lets other ingredients shine.
- 1 tablespoon sugar: A touch of sweetness to feed the yeast and create that beautiful browning on crust.
- 1 teaspoon salt: Balances flavor and enhances the overall taste of the bread.
- 1 tablespoon active dry yeast: The magic ingredient that makes your bread rise and gives it lovely fluffiness.
- 1 cup warm water: Activates the yeast and hydrates the dough for perfect texture.
- 2 tablespoons olive oil: Adds moisture and a subtle richness, ensuring a tender crumb.
- 2 eggs: Provide structure, help with leavening, and add a golden color to the bread.
How to Make Classic Gluten-Free White Sandwich Bread Recipe
Step 1: Preheat and Prepare Your Loaf Pan
Start by setting your oven to 375°F (190°C) so that it’s perfectly heated when your dough is ready. While the oven warms up, generously grease a loaf pan to ensure your bread won’t stick and will come out with ease and a nicely browned crust.
Step 2: Mix Dry Ingredients Together
In a large mixing bowl, combine the gluten-free all-purpose flour, sugar, salt, and active dry yeast. Stir them together thoroughly to evenly distribute the yeast and seasoning throughout the flour – this is key for a consistent rise and flavor.
Step 3: Add the Wet Ingredients and Form Dough
Pour the warm water, olive oil, and eggs into your bowl of dry ingredients. Mix everything until you achieve a smooth, cohesive dough. Don’t worry if it’s a bit wetter or stickier than traditional bread dough; this is perfectly normal for gluten-free recipes.
Step 4: Transfer Dough to Loaf Pan
Move your dough into the greased loaf pan, using a spatula to smooth the top evenly. This will help give you a uniform shape and that classic sandwich loaf look once it bakes.
Step 5: Bake to Golden Perfection
Place your pan in the preheated oven and bake for about 40 minutes. Look for a golden brown crust, and gently tap the loaf – it should sound hollow, indicating that it’s baked through and ready to come out.
Step 6: Cool Before Slicing
Allow the bread to sit in the pan for 10 minutes to set up nicely, then transfer it onto a wire rack to cool completely. This cooling step is crucial because it helps the crumb finish its texture development and makes slicing easier.
How to Serve Classic Gluten-Free White Sandwich Bread Recipe
Garnishes
This bread’s mild flavor makes it a perfect canvas for garnishes. Try spreading a thick layer of creamy butter or a drizzle of honey to bring out its soft texture. For a little more flair, sprinkle some sesame seeds or poppy seeds on top before baking for added crunch and visual appeal.
Side Dishes
Classic Gluten-Free White Sandwich Bread pairs wonderfully with warm soups, fresh salads, and hearty stews. It also makes a delightful companion to eggs and avocado for a comforting breakfast or lunch that leaves you feeling nourished and satisfied.
Creative Ways to Present
Slice it thickly for open-faced sandwiches topped with smoked salmon and cream cheese or thinly for neat tea sandwiches with cucumber and dill. You can toast slices to accompany your favorite jam or transform it into French toast for a cozy brunch treat.
Make Ahead and Storage
Storing Leftovers
Once completely cooled, store your bread in an airtight container or bread box at room temperature for up to two days. This keeps the bread moist and soft, perfect for next-day sandwiches or toast.
Freezing
If you want to extend the life of your Classic Gluten-Free White Sandwich Bread Recipe, slice it first, then freeze the loaf or individual slices in a resealable bag. This way, you can toast or thaw just the amount you need without wasting any.
Reheating
To revive frozen or day-old bread, toast slices directly from the freezer or warm the whole loaf in a preheated oven at 350°F (175°C) for about 10–15 minutes. Reheating brings back that soft interior and crisp crust you love.
FAQs
Can I substitute the olive oil with another fat?
Absolutely! You can use melted butter or a neutral oil like avocado or vegetable oil. Each will add a slightly different flavor and moisture level, but the bread will still turn out delicious.
Is it necessary to use warm water for activating the yeast?
Yes, warm water (around 100–110°F or 38–43°C) is important because it wakes up the yeast and encourages it to ferment, which makes your bread rise beautifully. Water that is too hot can kill the yeast, so be careful with the temperature.
Can I make this bread dairy-free?
Definitely! The recipe is already dairy-free if you use olive oil. Just ensure any additions or spreads are dairy-free to keep it suitable for those avoiding dairy.
How do I know when the bread is fully baked?
The crust should be golden brown, and tapping the loaf should create a hollow sound. Additionally, you can use a thermometer—fully baked bread should register about 200°F (93°C) in the center.
Will this recipe work with whole grain gluten-free flour?
Whole grain gluten-free flours will change the texture and density of the bread. While you can experiment, you may need to adjust liquid amounts or use a mix to maintain softness and rise similar to this Classic Gluten-Free White Sandwich Bread Recipe.
Final Thoughts
Baking your own Classic Gluten-Free White Sandwich Bread Recipe might just become one of your favorite kitchen adventures. It’s comforting, approachable, and endlessly versatile—perfect for anyone craving that classic white bread without gluten. Once you try it, you’ll understand why it has such a special place in my heart and, hopefully, on your table too!
Print
Classic Gluten-Free White Sandwich Bread Recipe
- Prep Time: 10 minutes
- Cook Time: 40 minutes
- Total Time: 55 minutes
- Yield: 1 loaf (about 8 slices)
- Category: Bread
- Method: Baking
- Cuisine: American
- Diet: Gluten Free
Description
This Classic White Sandwich Bread is a delicious gluten-free option perfect for sandwiches. Made with simple ingredients like gluten-free flour, sugar, and eggs, it bakes up to a soft, golden brown loaf with a tender crumb. Ideal for those seeking a homemade bread without gluten, this recipe yields a moist and flavorful bread ready to enjoy in under an hour.
Ingredients
Dry Ingredients
- 2 cups gluten-free all-purpose flour
- 1 tablespoon sugar
- 1 teaspoon salt
- 1 tablespoon active dry yeast
Wet Ingredients
- 1 cup warm water
- 2 tablespoons olive oil
- 2 eggs
Instructions
- Preheat Oven and Prepare Pan: Preheat the oven to 375°F (190°C). Grease a loaf pan thoroughly to prevent sticking and ensure easy removal of the bread once baked.
- Mix Dry Ingredients: In a large mixing bowl, combine the gluten-free all-purpose flour, sugar, salt, and active dry yeast. Make sure these ingredients are evenly distributed for a consistent dough texture.
- Add Wet Ingredients and Form Dough: Pour in the warm water, olive oil, and eggs into the dry mixture. Stir and mix until the dough becomes smooth and uniform, without lumps.
- Transfer Dough to Loaf Pan: Spoon the smooth dough into the prepared loaf pan. Use a spatula to smooth out the top evenly so that it bakes with a uniform shape.
- Bake the Bread: Place the loaf pan in the preheated oven and bake for about 40 minutes. The bread is done when its crust turns golden brown and it sounds hollow when tapped on the bottom.
- Cool the Bread: Remove the pan from the oven and let the bread cool inside the pan for 10 minutes. Afterward, transfer it to a wire rack to cool completely before slicing to maintain texture and avoid sogginess.
Notes
- Ensure water is warm, not hot, to activate yeast properly without killing it.
- You can substitute olive oil for another mild-flavored oil if preferred.
- Allow bread to cool completely before slicing to prevent crumbling.
- Store bread in an airtight container to maintain freshness for up to 3 days.
- For a softer crust, cover the bread with a clean kitchen towel while cooling.


