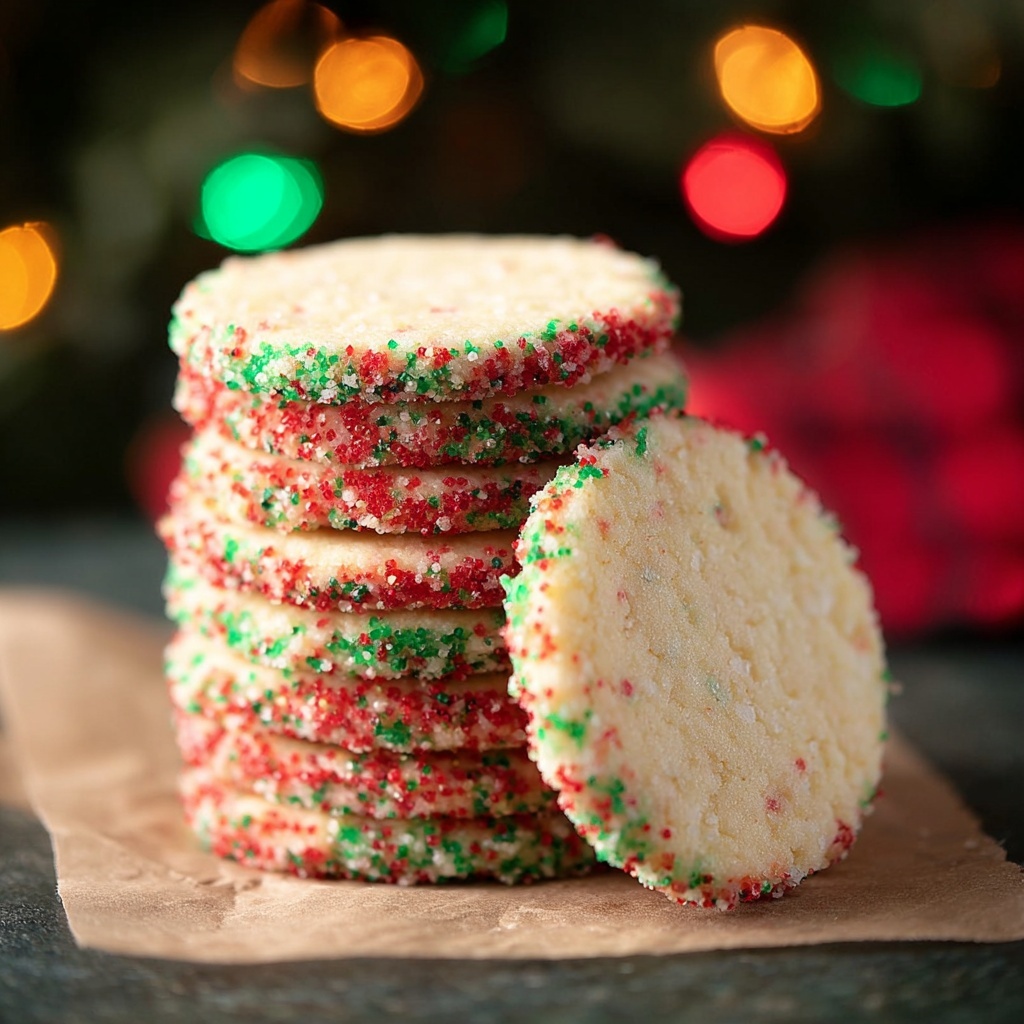
If you’re searching for a sweet treat that’s as fun to make as it is to eat, you’re going to adore this Slice-and-Bake Sprinkle Cookies Recipe. These colorful, crunchy-on-the-outside and tender-on-the-inside cookies are handmade with love but don’t demand the hours of mixing and chilling other recipes sometimes require. The best part is that these sprinkles add a joyful pop of color and texture, making every bite feel like a little celebration. Whether you’re baking with kids, prepping for a party, or just craving a classic cookie with a playful twist, this Slice-and-Bake Sprinkle Cookies Recipe will quickly become a beloved favorite in your kitchen.
Ingredients You’ll Need
Getting ready to bake? The beauty of this Slice-and-Bake Sprinkle Cookies Recipe lies in its simplicity. Each ingredient plays a vital role — from the creamy butter that gives richness, to the sprinkles that add that delightful crunch and color flare.
- Unsalted butter: Using room temperature butter ensures a smooth, creamy dough that’s easy to mix and yields tender cookies.
- Granulated sugar: Adds sweetness and contributes to a slight crunch in the cookie’s texture.
- Large egg: Binds the dough while adding moisture and richness.
- Vanilla extract: A classic flavor enhancer that deepens the overall taste.
- Almond extract: Brings a subtle nutty note, giving the cookies a unique aromatic lift.
- Salt: Balances sweetness and intensifies all the flavors.
- All-purpose flour: The foundation of the dough, giving structure while keeping the cookies soft.
- Sprinkles: Not just for looks, these create a delightful crunchy contrast and festive appearance.
How to Make Slice-and-Bake Sprinkle Cookies Recipe
Step 1: Cream the Butter and Sugar
This is where your cookie dough really starts to come together. Beat the room temperature butter with granulated sugar until the texture is perfectly smooth and creamy. This process traps air, helping your cookies bake up light with a wonderfully soft crumb.
Step 2: Add Egg and Flavorings
Next, introduce the egg, vanilla, and almond extract. These simple ingredients work their magic by adding rich flavor and moisture, which creates the soft, melt-in-your-mouth consistency you’re after.
Step 3: Incorporate Salt and Flour
Follow up by adding salt and flour, beating until the dough just comes together. Be careful not to overmix here — you want the dough thoroughly combined but still tender enough to slice easily after chilling.
Step 4: Shape the Dough into Logs
Divide your dough into two halves and wrap each in plastic wrap, shaping them into logs about 2 1/2 inches wide. Yes, the dough is a bit soft and slippery, but don’t worry, the chilling step coming up will firm it right up for slicing.
Step 5: Chill the Dough
Pop those logs into the refrigerator for at least 4 hours. This chilling step is crucial for perfect slices that hold their shape during baking while intensifying the flavors.
Step 6: Preheat Oven and Prepare Baking Sheets
When you’re ready to bake, heat your oven to 350°F and line your baking sheets with parchment paper or a silicone mat, ensuring a non-stick surface for baking your beautiful cookies.
Step 7: Roll the Dough in Sprinkles
Roll one log on the counter still in plastic wrap to smooth its shape, then remove the wrap. Next, pour your sprinkles onto a shallow plate and roll the dough log around to coat its exterior. This adds a festive, crunchy coating that looks as good as it tastes.
Step 8: Slice the Cookies
Cut the dough into 1/4-inch slices and space them evenly on the baking sheet. Feel free to shape any slices a bit more with your fingers if you want perfect rounds.
Step 9: Bake to Perfection
Bake for 10 to 12 minutes until the edges start turning a gentle golden hue. For a chewy interior, aim for the shorter bake time; for crispier cookies, leave them in a little longer. Either way, you’ll be rewarded with irresistible treats.
Step 10: Cool Completely
After baking, let the cookies sit on the sheet for 5 minutes to firm up, then transfer to a wire rack to cool fully. This final step ensures the best texture and keeps those sprinkles intact and looking gorgeous.
How to Serve Slice-and-Bake Sprinkle Cookies Recipe
Garnishes
While the cookies are already decked out with sprinkles, consider a light drizzle of melted white or milk chocolate to elevate their look and add a slight richness. A dusting of powdered sugar can also lend a subtle sweetness and gorgeous finish.
Side Dishes
These sprinkle cookies are fantastic alongside a frothy cup of coffee or a cold glass of milk. For a cozy touch, serve with warm vanilla chai or hot cocoa topped with marshmallows. Their buttery flavor pairs perfectly with creamy beverages.
Creative Ways to Present
Arrange the cookies on decorative plates layered with colorful napkins or serve them as a part of a dessert board with fruits, nuts, and cheeses for an unexpected twist. You can also pack them in mason jars tied with twine for easy gifting that friends and family will adore.
Make Ahead and Storage
Storing Leftovers
Your baked cookies can be stored in an airtight container at room temperature for up to two weeks. This lets you enjoy them fresh without worrying about them drying out or losing their vibrant sprinkle finish.
Freezing
Not done baking? The dough logs can be tightly wrapped and frozen for up to 12 months. When you want fresh cookies, just thaw a log in the fridge overnight, slice, and bake — easy and convenient anytime cookie cravings strike.
Reheating
If you’d like to warm your cookies, pop them in a preheated 300°F oven for 3–5 minutes. This gently revives their fresh-baked softness and brings out those buttery flavors without crisping them too hard.
FAQs
Can I use colored or nonpareil sprinkles for this Slice-and-Bake Sprinkle Cookies Recipe?
Absolutely! Both colored and nonpareil sprinkles work beautifully, adding irresistible color and crunch. Just make sure to press them gently onto the dough so they adhere well during baking.
What if I don’t have almond extract? Can I omit it?
Yes, almond extract can be skipped or swapped for an equal amount of vanilla extract if you prefer a more straightforward flavor. The cookies will still be delightful and flavorful.
Why is chilling the dough so important in this recipe?
Chilling firms up the dough so it slices cleanly and holds its shape while baking. It also allows the flavors to meld, giving you tastier, better-textured cookies.
Can I bake these cookies without sprinkles?
You certainly can. The dough itself is deliciously buttery and soft. However, sprinkles add that iconic fun look and extra bit of texture that make these cookies special.
How long will the baked cookies stay fresh?
Stored in an airtight container, these cookies stay fresh and tasty for up to two weeks at room temperature, making them fantastic for holiday gatherings or simply to enjoy over time.
Final Thoughts
There’s something truly magical about a cookie that’s both simple to make and bursting with joyful color and flavor. This Slice-and-Bake Sprinkle Cookies Recipe brings that magic right into your kitchen with minimal fuss and maximum fun. Whether you’re baking for a special occasion or just because, these cookies promise smiles and sweetness in every bite. Give it a try — I’m sure this will become your go-to recipe whenever you need a little sparkle in your day.
Print
Slice-and-Bake Sprinkle Cookies Recipe
- Prep Time: 15 minutes
- Cook Time: 12 minutes
- Total Time: 4 hours 27 minutes
- Yield: 36 cookies
- Category: Dessert
- Method: Baking
- Cuisine: American
Description
These Easy Slice and Bake Cookies are a delightful and simple homemade treat featuring a buttery, vanilla-almond flavored dough that can be customized by rolling in colorful sprinkles. The dough is chilled, sliced, and baked to perfectly tender, slightly crisp cookies, making them ideal for any occasion.
Ingredients
Cookie Dough
- 1 cup unsalted butter (room temperature)
- 1 1/2 cups granulated sugar
- 1 large egg
- 2 teaspoons vanilla extract or flavoring
- 1 teaspoon almond extract or flavoring
- 1/2 teaspoon salt
- 2 1/4 cups all-purpose flour
Optional Decoration
- Sprinkles or nonpareils, for coating
Instructions
- Cream Butter and Sugar: Use a mixer to cream the unsalted butter and granulated sugar together until the mixture is smooth and fluffy. This process ensures the cookies will have a tender texture.
- Add Flavorings and Egg: Mix in the large egg, vanilla extract, and almond extract thoroughly. These add rich flavor to the cookie dough.
- Combine Dry Ingredients: Add the salt and all-purpose flour to the wet mixture, beating until fully combined. Scrape down the sides of the bowl and mix again to ensure an even dough.
- Shape Dough Logs: Divide the dough roughly in half. Place each half on a large double layer of plastic wrap and use it to form the dough into logs approximately 2 1/2 inches wide. The dough will be soft, but keep shaping gently.
- Chill Dough: Wrap the logs tightly in the plastic wrap and refrigerate for at least 4 hours to firm up, which will help in slicing later.
- Preheat Oven: When ready to bake, preheat the oven to 350°F (175°C). Line a cookie sheet with parchment paper or a silicone baking mat for easy baking.
- Refine Dough Shape: Remove one dough log from the fridge and roll it on the counter while still wrapped to better define its round shape.
- Coat with Sprinkles (Optional): Pour sprinkles into a shallow plate. Remove the plastic wrap from the dough log and roll it in the sprinkles, coating the outside evenly for a festive look.
- Slice Cookies: Cut the dough into 1/4-inch thick slices. Place the slices on the prepared baking sheet spaced apart. Gently adjust each cookie shape with your fingers if necessary.
- Bake Cookies: Bake for 10 to 12 minutes or until the edges just start turning light golden brown. Baking less time yields a softer cookie; baking longer makes them crispier.
- Cool Cookies: Remove from the oven and allow them to cool on the baking sheet for about 5 minutes. Then transfer to a wire rack to cool completely.
- Store Cookies: Store baked cookies in an airtight container at room temperature for up to two weeks or freeze tightly wrapped for up to 12 months.
Notes
- The dough can be firmed up longer than 4 hours if needed; overnight chilling works well too.
- Rolling the dough log while wrapped helps maintain a neat round shape without sticking.
- Baking time affects cookie texture – shorter is softer, longer is crunchier.
- Sprinkles add fun color and texture but can be omitted for plain slice-and-bake cookies.
- Use parchment paper or silicone mats for easy cleanup and to prevent sticking.


