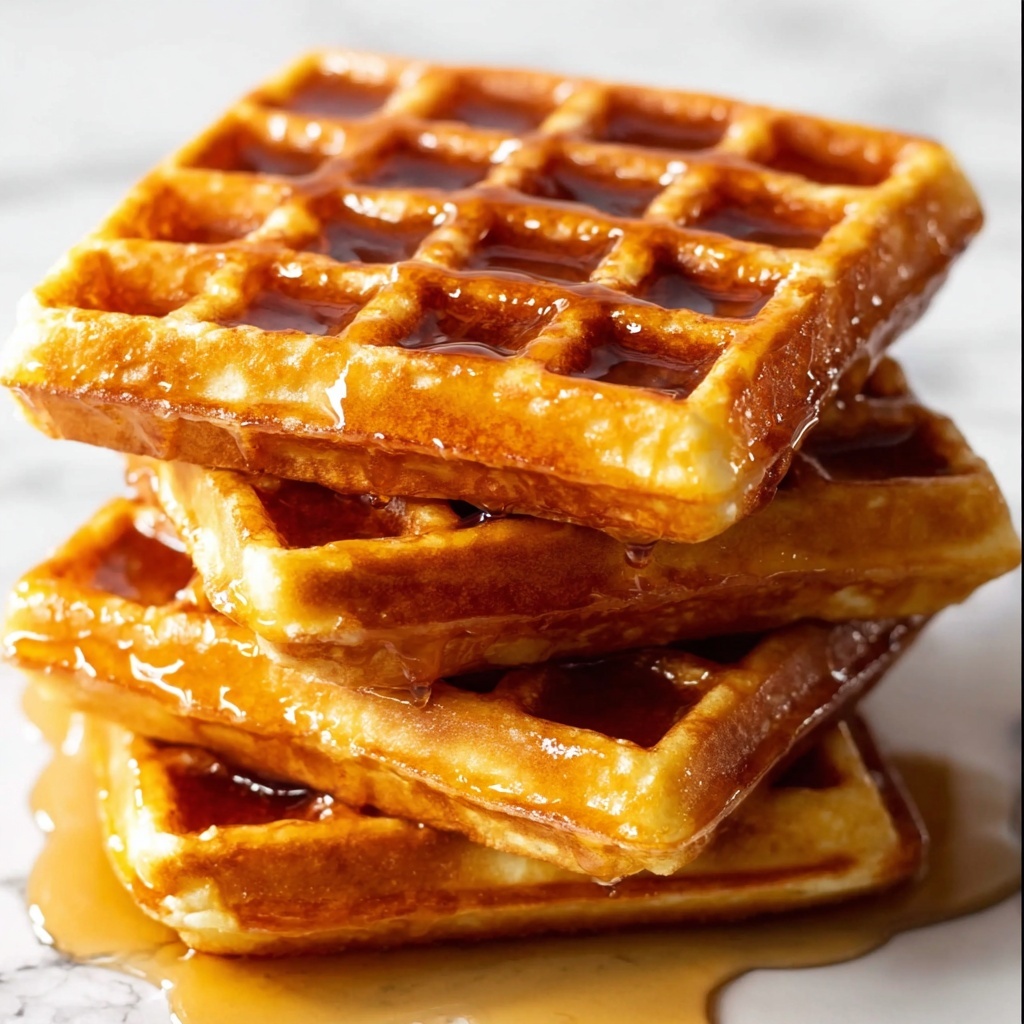
There is nothing quite like waking up to a warm, golden waffle with a crispy exterior and tender, fluffy inside, especially when it’s made with wholesome oats and completely gluten free. This Easy Gluten Free Oat Waffles Recipe is a dream come true for anyone seeking a delicious breakfast that’s both comforting and health-conscious. From the nutty aroma of oat flour to the subtle sweetness of maple syrup, these waffles combine simple ingredients that deliver fantastic flavor and texture. Whether you’re gluten-sensitive or simply love a hearty morning treat, this recipe will quickly become your go-to weekend staple.
Ingredients You’ll Need
To whip up these delightful waffles, you only need a handful of basic ingredients that work together to create the perfect balance of taste, texture, and color. Each component plays an important role in making these waffles irresistibly delicious and naturally gluten free.
- Oat flour (1 ½ cups): The base of our recipe, providing a tender, slightly sweet flavor and wonderful oat aroma.
- Baking powder (2 teaspoons): Helps the waffles rise beautifully and become light and airy.
- Salt (½ teaspoon): Enhances the overall flavor to keep everything balanced.
- Cinnamon (pinch): Optional, but adds a warm, inviting spice note.
- Milk of choice (¾ cup): Whether nut milk, coconut milk, or cow’s milk, it adds moisture and helps bind the batter.
- Melted coconut oil or unsalted butter (¼ cup + 1 tablespoon or 5 tablespoons): Adds richness and a delightful crispy edge.
- Eggs (2 large): Provide structure and help everything hold together perfectly.
- Maple syrup (2 tablespoons): Brings a natural, sweet depth that caramelizes when cooked.
- Vanilla extract (1 teaspoon): Infuses a subtle, fragrant warmth that rounds out the flavors.
How to Make Easy Gluten Free Oat Waffles Recipe
Step 1: Mix Dry Ingredients
Start by whisking together your oat flour, baking powder, salt, and optional cinnamon in a large bowl. This ensures the leavening is evenly distributed, giving your waffles a consistent rise and perfectly fluffy texture from the first bite to the last.
Step 2: Combine Wet Ingredients
Next, in a separate bowl, combine your milk, melted coconut oil or butter, eggs, maple syrup, and vanilla extract. Whisk everything until it’s completely smooth and blended. If your coconut oil solidifies, just warm the mixture gently in short intervals to make sure everything emulsifies nicely for a uniform batter.
Step 3: Combine Wet and Dry Mixtures
Pour the wet ingredients gradually into the bowl of dry ingredients and stir gently. It’s important not to overmix; having a few lumps in the batter is totally fine. Then, let the batter rest for about 10 minutes. This rest time is crucial because it allows the oat flour to absorb the liquid fully, resulting in a waffle that is tender and not gummy.
Step 4: Preheat Waffle Iron
While the batter is resting, plug in your waffle iron to preheat it. For the best waffles, aim for a medium-high heat setting. Getting your waffle iron nice and hot ensures a crispy golden exterior that contrasts beautifully with the soft interior.
Step 5: Cook Waffles
Give your batter a quick stir after resting and then ladle enough onto the preheated waffle iron to cover the cooking surface. Close the lid and cook until the waffles are deeply golden brown and crispy on the outside. This usually takes a few minutes, and your kitchen will start to smell absolutely irresistible.
Step 6: Cool and Serve
Transfer the cooked waffles to a wire rack or baking sheet to cool slightly. Avoid stacking the waffles to keep them crispy. You can keep them warm in a 200°F oven until ready to serve, but trust me—they are best enjoyed fresh off the iron with your favorite toppings!
How to Serve Easy Gluten Free Oat Waffles Recipe
Garnishes
One of the joys of this Easy Gluten Free Oat Waffles Recipe is how versatile it is with toppings. Think fresh berries, a drizzle of maple syrup, a smear of nut butter, or even a dollop of whipped coconut cream. These garnishes not only add flavor but also brighten each bite with contrasting textures and colors.
Side Dishes
Complement your waffles with fresh fruit salad, crispy bacon, or a fluffy scrambled egg for a complete and satisfying breakfast. The waffles’ gentle nuttiness pairs especially well with savory sides, creating a harmonious balance on your plate.
Creative Ways to Present
Get creative by stacking multiple waffles layered with yogurt and fruit compote in between for a show-stopping brunch centerpiece. You can also cut the waffles into bite-sized squares and serve them as waffle “bites” at a party, perfect for dipping into chocolate or fruit sauces.
Make Ahead and Storage
Storing Leftovers
If you happen to have any leftovers (which might be unlikely!), store them in an airtight container in the refrigerator for up to two days. This helps maintain freshness and prevents them from drying out.
Freezing
For longer storage, freeze the waffles in a single layer on a baking sheet until solid, then transfer them to a resealable freezer bag. This way, you can enjoy your Easy Gluten Free Oat Waffles Recipe anytime without losing that perfect texture.
Reheating
To reheat, pop the waffles into a toaster or oven at 350°F for about 5-7 minutes until they regain their crispness. Avoid microwaving if you want to keep them delightfully crunchy on the outside.
FAQs
Can I use regular oat flour if I am not gluten-free?
Yes, you absolutely can. Just keep in mind that if you have gluten sensitivities, make sure your oat flour is certified gluten free to avoid cross-contamination.
What milk alternatives work best for this recipe?
Any milk of your choice works great here, whether it’s almond, soy, light coconut milk, or traditional cow’s milk. Just be sure it’s at room temperature for easy mixing.
Can I substitute the eggs in this recipe?
Eggs provide structure and moisture, but you could try flax or chia egg substitutes if needed. Keep in mind this might slightly affect texture and rise.
How do I make my waffles extra crispy?
Using melted coconut oil or butter and preheating the waffle iron properly helps. Also, letting cooked waffles cool on a rack keeps them from steaming and getting soggy.
Is this recipe suitable for vegans?
With a few substitutions like using flax eggs and a plant-based milk plus vegan butter or coconut oil, this recipe can be easily adapted for a vegan diet.
Final Thoughts
There is something truly magical about pulling a batch of these Easy Gluten Free Oat Waffles Recipe out of the waffle iron and sharing them with the people you love. They’re cozy, satisfying, and packed with wholesome ingredients that make breakfast feel like a little celebration. I can’t wait for you to try this recipe and make it your own, whether you top them with berries, nuts, or a drizzle of syrup. Happy waffle making!
Print
Easy Gluten Free Oat Waffles Recipe
- Prep Time: 10 minutes
- Cook Time: 15 minutes
- Total Time: 25 minutes
- Yield: 6 servings
- Category: Breakfast
- Method: Baking
- Cuisine: American
- Diet: Gluten Free
Description
This Easy Gluten Free Oat Waffles recipe offers a wholesome and delicious breakfast option that’s naturally gluten-free and packed with flavor. Made with oat flour, cozy spices, and a touch of maple syrup, these waffles come together quickly and bake up golden, crisp, and fluffy. Perfect for a family brunch or an anytime treat, these waffles pair beautifully with your favorite toppings from fresh fruit to nut butters.
Ingredients
Dry Ingredients
- 1 ½ cups (128 grams) oat flour, certified gluten-free if necessary
- 2 teaspoons baking powder
- ½ teaspoon salt
- Pinch of cinnamon (optional)
Wet Ingredients
- ¾ cup room temperature milk of choice (light coconut milk, nut milk, or cow’s milk)
- ¼ cup + 1 tablespoon melted coconut oil, or 5 tablespoons unsalted butter, melted
- 2 large eggs
- 2 tablespoons maple syrup
- 1 teaspoon vanilla extract
Instructions
- Mix Dry Ingredients: In a large mixing bowl, whisk together the oat flour, baking powder, salt, and cinnamon if using, ensuring even distribution of all dry ingredients.
- Combine Wet Ingredients: In a separate bowl, whisk the milk, melted coconut oil or butter, eggs, maple syrup, and vanilla extract until fully combined. If the coconut oil solidifies, gently warm the mixture in short microwave bursts until smooth.
- Combine Wet and Dry Mixtures: Pour the wet ingredients into the dry ingredient bowl. Stir gently with a large spoon until just combined; the batter may be slightly lumpy. Let the batter rest for 10 minutes to allow the oat flour to absorb the liquid.
- Preheat Waffle Iron: While the batter rests, preheat your waffle iron. Set the temperature or browning dial to medium-high for best results if available.
- Cook Waffles: Stir the batter briefly after resting. Pour enough batter onto the preheated waffle iron to cover the center and much of the surface. Close the lid and cook until waffles are deeply golden and crisp.
- Cool and Serve: Transfer cooked waffles to a cooling rack or baking sheet to keep them crisp, avoiding stacking. To keep waffles warm, place them in a 200°F oven until serving. Repeat with remaining batter and serve hot with maple syrup, nut butter, or your favorite toppings.
Notes
- Resting the batter is crucial for better texture as it helps the oat flour absorb moisture.
- If you don’t have a waffle iron, this batter could be adapted slightly to make pancakes instead.
- Use certified gluten-free oat flour if you need to remain gluten-free.
- Adjust sweetness by adding more or less maple syrup based on preference.
- Keep cooked waffles crisp by avoiding stacking and using a low oven to keep them warm.


