
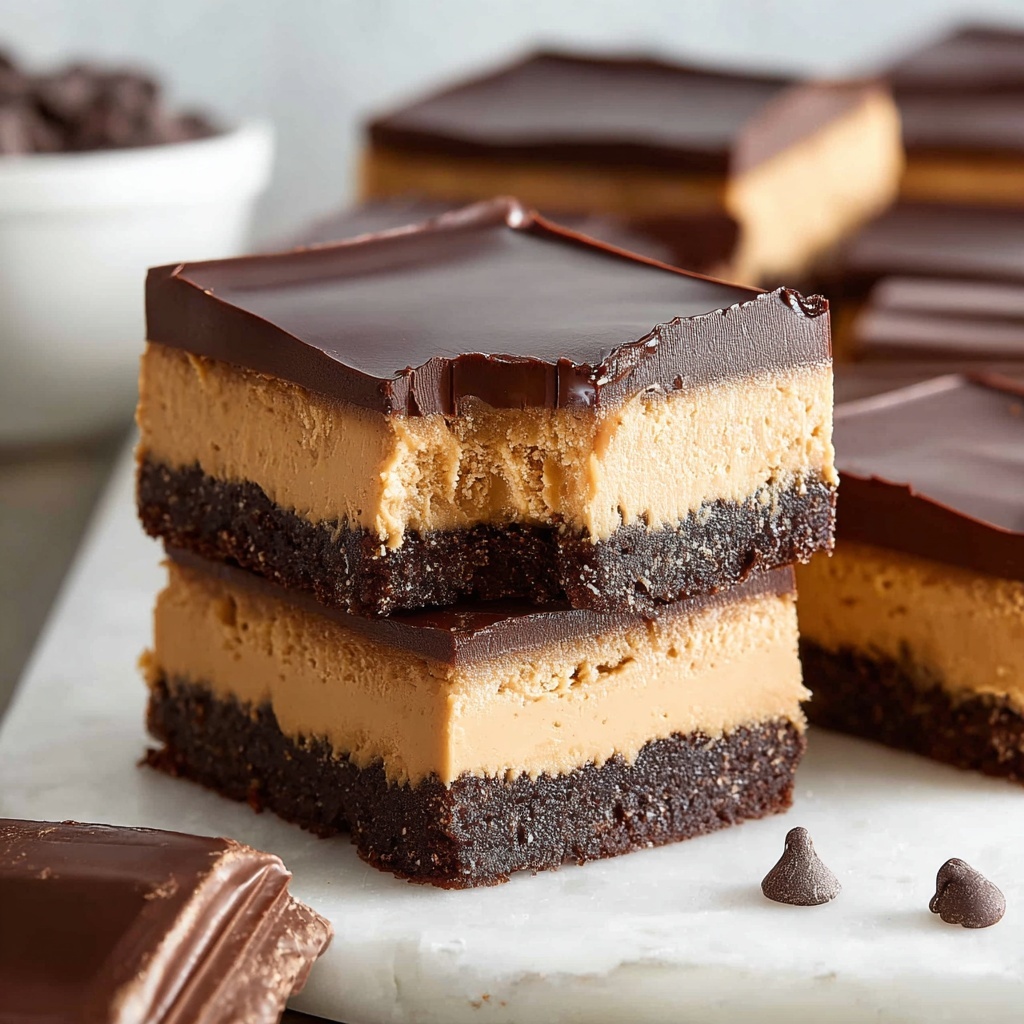
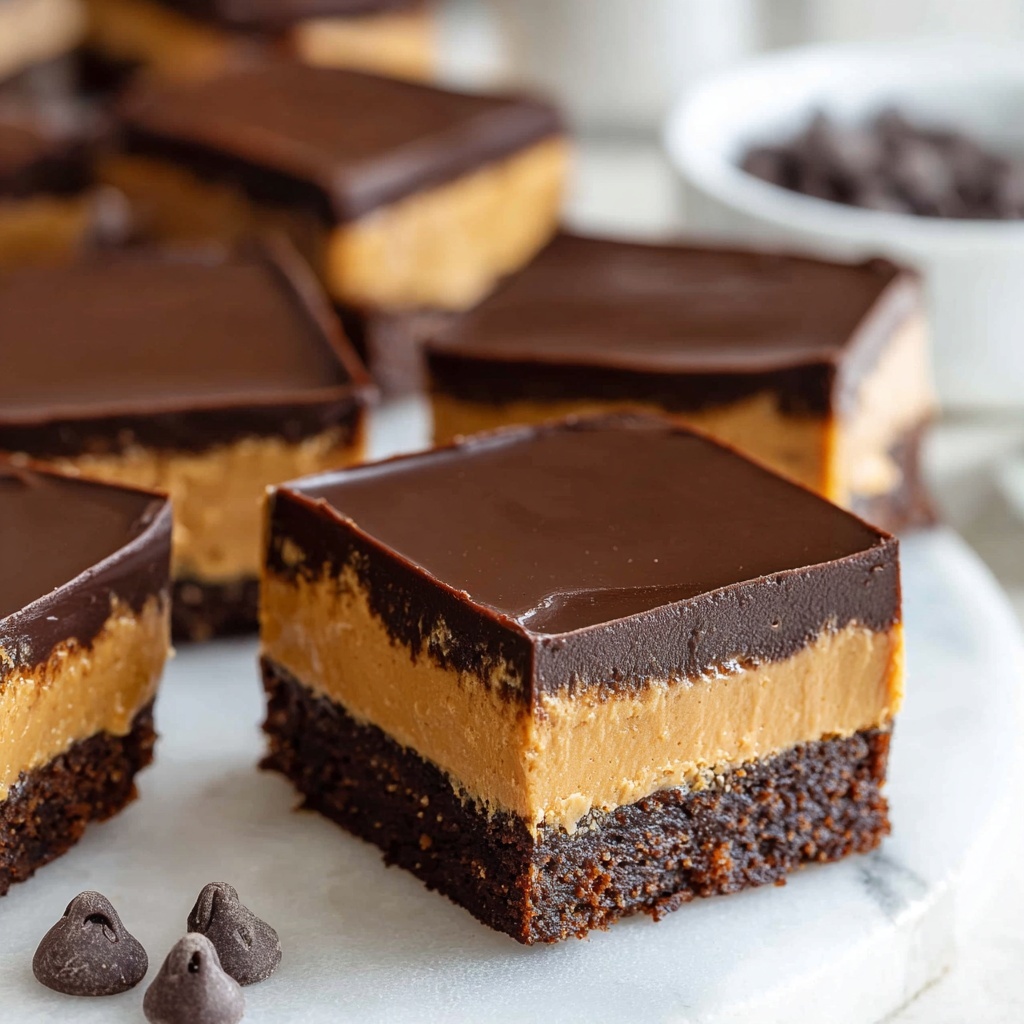
If you’re on the hunt for a dessert that brings together rich chocolate and creamy peanut butter in the most irresistible way, the Buckeye Brownies Recipe is about to become your new obsession. Imagine fudgy brownie layers that practically melt in your mouth, topped with a luscious peanut butter filling and finished off with a silky chocolate ganache — this trio of textures and flavors creates a dream dessert that’s perfect for sharing or savoring all to yourself. It’s a decadent treat that’s surprisingly simple to make, and once you try this Buckeye Brownies Recipe, you’ll see why it’s a standout favorite at any gathering or cozy night in.
Ingredients You’ll Need
This Buckeye Brownies Recipe uses straightforward, pantry-friendly ingredients that play crucial roles in creating the perfect balance of texture and flavor. Each one enhances the layers in its own special way, whether it’s the chocolatey base or the creamy peanut butter topping.
- Brownie mix or homemade brownie batter: The foundation of this dessert, providing rich cocoa flavor and a fudgy texture.
- Eggs, oil, and water: Essential for binding and giving structure to the brownie layer.
- Creamy peanut butter: Adds that classic nutty, creamy richness that pairs perfectly with chocolate.
- Unsalted butter (softened): Helps create a smooth, luscious peanut butter filling.
- Powdered sugar: Sweetens and thickens the peanut butter layer for an irresistible taste and consistency.
- Vanilla extract: A subtle flavor booster that rounds out the peanut butter layer beautifully.
- Pinch of salt: Balances sweetness and enhances the overall flavor profile.
- Semi-sweet chocolate chips: Used in the ganache topping for the perfect glossy finish and rich chocolate punch.
- Heavy cream: Brings that silky smoothness to the ganache, making it shine both in taste and texture.
How to Make Buckeye Brownies Recipe
Step 1: Prepare and Bake the Brownie Layer
Start by preheating your oven to 350°F and lining a 9×13-inch baking pan with parchment paper or lightly spraying it to prevent sticking. Whip up your brownie batter—either using a boxed mix or your favorite homemade recipe—mixing in eggs, oil, and water as directed. Pour this rich batter into your prepared pan and bake until the brownies are just set but still fudgy. Let them cool completely; patience here pays off as it helps the layers stay distinct and prevents the peanut butter layer from melting.
Step 2: Make the Peanut Butter Layer
Next, gather your peanut butter, softened butter, powdered sugar, vanilla extract, and a pinch of salt. Beat these ingredients together in a medium bowl until the mixture is smooth and fluffy. This velvety filling is the star that bridges the intense chocolate base with the silky ganache on top. Once ready, spread this creamy layer evenly over your cooled brownies. Pop your pan into the fridge for 15 to 20 minutes—this chilling step firms up the peanut butter layer, making the bars easier to slice later on.
Step 3: Create and Add the Chocolate Ganache
For that show-stopping finish, combine semi-sweet chocolate chips with heavy cream in a microwave-safe bowl. Heat in 20-second intervals, stirring between each, until you achieve a smooth, glossy ganache. Let it cool slightly so it thickens without setting, then pour it over the peanut butter layer, spreading it evenly to coat the entire surface. This ganache offers a luscious, shiny topping that will make your Buckeye Brownies Recipe look as amazing as they taste.
Step 4: Chill and Slice
Refrigerate your masterpiece for 1 to 2 hours until everything is set and firm. When it’s time to cut, use a sharp knife dipped in warm water for clean slices that show off each delicious layer perfectly. Whether you serve these chilled or at room temperature, the combination of fudgy brownie, creamy peanut butter, and rich ganache makes every bite memorable.
How to Serve Buckeye Brownies Recipe
Garnishes
While these brownies are stunning all on their own, adding a sprinkle of crushed peanuts or a light drizzle of melted peanut butter across the top can give an extra pop of texture and visual appeal. You could also dust a little cocoa powder or sprinkle flaky sea salt for a delightful contrast, enhancing both appearance and flavor.
Side Dishes
A scoop of vanilla ice cream pairs beautifully with Buckeye Brownies Recipe, balancing sweetness with creamy coldness. Fresh berries can add a bright, slightly tart counterpoint as well. For a beverage, try rich coffee or a glass of cold milk to complement the peanut butter and chocolate goodness.
Creative Ways to Present
If you’re bringing these brownies to a party or gift-giving, consider stacking them neatly in a decorative tin lined with parchment paper. You could also cut them into small, bite-sized squares and serve on a platter with toothpicks in each, making them perfect for snacking. Layering the brownies with a dollop of whipped cream and a cherry on top makes a charming dessert cup variation.
Make Ahead and Storage
Storing Leftovers
Buckeye Brownies Recipe keeps beautifully in an airtight container in the refrigerator for up to five days. Keeping them chilled maintains the integrity of the peanut butter layer and rich ganache, ensuring each bite stays just as delicious as the first.
Freezing
If you want to save these brownies for later indulgence, wrapping them tightly in plastic wrap and foil and then freezing for up to two months works wonderfully. Thaw them overnight in the fridge before serving for best texture.
Reheating
These brownies are best enjoyed cold or at room temperature. However, if you prefer a warm treat, briefly microwave an individual piece for 10 to 15 seconds—just until the ganache softens slightly but beware not to overheat, or the peanut butter layer may lose its texture.
FAQs
Can I use crunchy peanut butter in this Buckeye Brownies Recipe?
Yes, you can substitute crunchy peanut butter if you prefer some extra texture in the peanut butter layer, though creamy peanut butter will yield a smoother filling.
Do I have to use a boxed brownie mix?
Not at all! Homemade brownie recipes work wonderfully and give you more control over ingredients, but the boxed mix keeps this recipe quick and simple without sacrificing flavor.
Can I make these brownies vegan?
To make a vegan version, look for vegan brownie mixes or recipes, use a plant-based butter alternative, and swap heavy cream for coconut cream when making the ganache.
What’s the best way to cut these brownies for clean slices?
Dipping your knife in warm water and wiping it clean between cuts helps create neat, defined layers without dragging or crumbling the peanut butter layer.
How long do these brownies need to chill?
For best results, chill the peanut butter layer for 15 to 20 minutes before adding ganache, and then refrigerate the whole dessert for 1 to 2 hours until fully set.
Final Thoughts
Once you experience the magic of the Buckeye Brownies Recipe, you’ll wonder why you ever settled for a plain brownie. This harmonious blend of chocolate and peanut butter with its distinct layers and dreamy textures turns any occasion into a celebration. So grab your ingredients, invite a friend, and start baking — these brownies are destined to be a beloved classic in your dessert rotation.
Print
Buckeye Brownies Recipe
- Prep Time: 20 minutes
- Cook Time: 30 minutes
- Total Time: 2 hours (including chilling time)
- Yield: 24 brownies
- Category: Dessert
- Method: Baking
- Cuisine: American
- Diet: Vegetarian
Description
Delightfully rich and fudgy Buckeye Brownies featuring a luscious peanut butter layer sandwiched between a classic chocolate brownie base and topped with a smooth chocolate ganache. Perfectly balanced in flavors and textures, these layered brownies are an irresistible dessert treat loved by chocolate and peanut butter fans alike.
Ingredients
For the Brownie Layer:
- 1 box brownie mix (plus eggs, oil, and water as directed on the box) or your favorite homemade brownie recipe
For the Peanut Butter Layer:
- 1 cup creamy peanut butter
- ½ cup unsalted butter, softened
- 2 cups powdered sugar
- 1 teaspoon vanilla extract
- Pinch of salt
For the Chocolate Ganache Topping:
- 1 cup semi-sweet chocolate chips
- ½ cup heavy cream
Instructions
- Prepare the Brownie Layer: Preheat your oven to 350°F (175°C) and line a 9×13-inch baking dish with parchment paper or grease it with nonstick spray. Prepare the brownie batter according to the box instructions or your homemade recipe. Pour the batter evenly into the pan and bake for the recommended time, usually around 25-30 minutes, until a toothpick inserted in the center comes out with moist crumbs. Allow the brownies to cool completely in the pan before proceeding.
- Make the Peanut Butter Layer: In a medium mixing bowl, beat together the creamy peanut butter, softened unsalted butter, powdered sugar, vanilla extract, and a pinch of salt until the mixture becomes smooth, fluffy, and well combined. Spread this peanut butter filling evenly over the cooled brownie base. Place the pan in the refrigerator and chill for 15 to 20 minutes to help the layer firm up.
- Prepare the Chocolate Ganache Topping: In a microwave-safe bowl, combine the semi-sweet chocolate chips with the heavy cream. Microwave in 20-second intervals, stirring between each, until the chocolate is fully melted and the mixture is smooth and glossy. Allow the ganache to cool slightly so it thickens slightly but remains pourable.
- Assemble and Chill: Pour and spread the ganache evenly over the chilled peanut butter layer. Return the pan to the refrigerator and let the brownies chill for 1 to 2 hours or until the ganache is set and firm to the touch.
- Serve: Once set, use a sharp knife dipped in warm water to slice the brownies into 24 squares. Serve chilled or at room temperature for best flavor and texture.
Notes
- For clean and precise slices, dip your knife in warm water before cutting each time.
- These brownies can be made ahead and stored in the refrigerator for up to 5 days.
- For longer storage, freeze the brownies well wrapped, then thaw before serving.
- You can use your favorite homemade brownie recipe instead of boxed brownie mix for a more personalized touch.

