
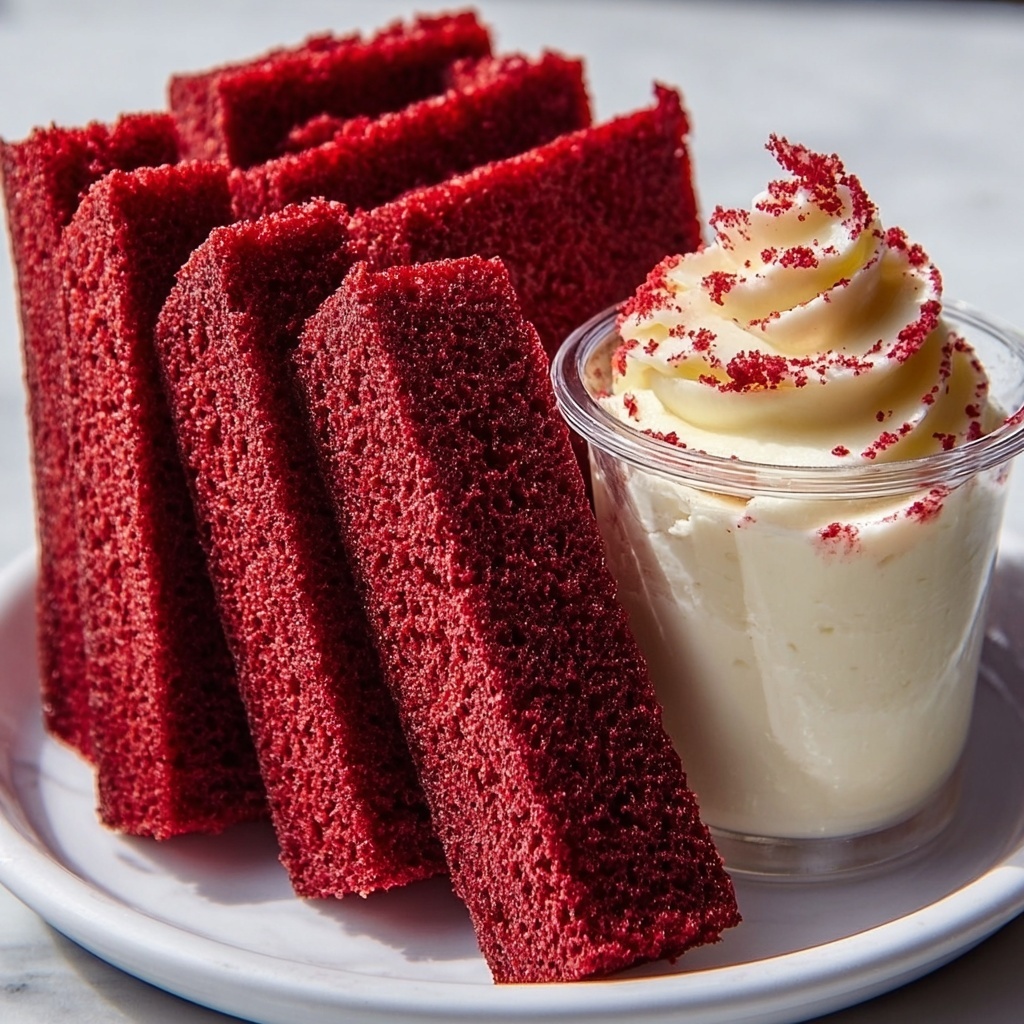
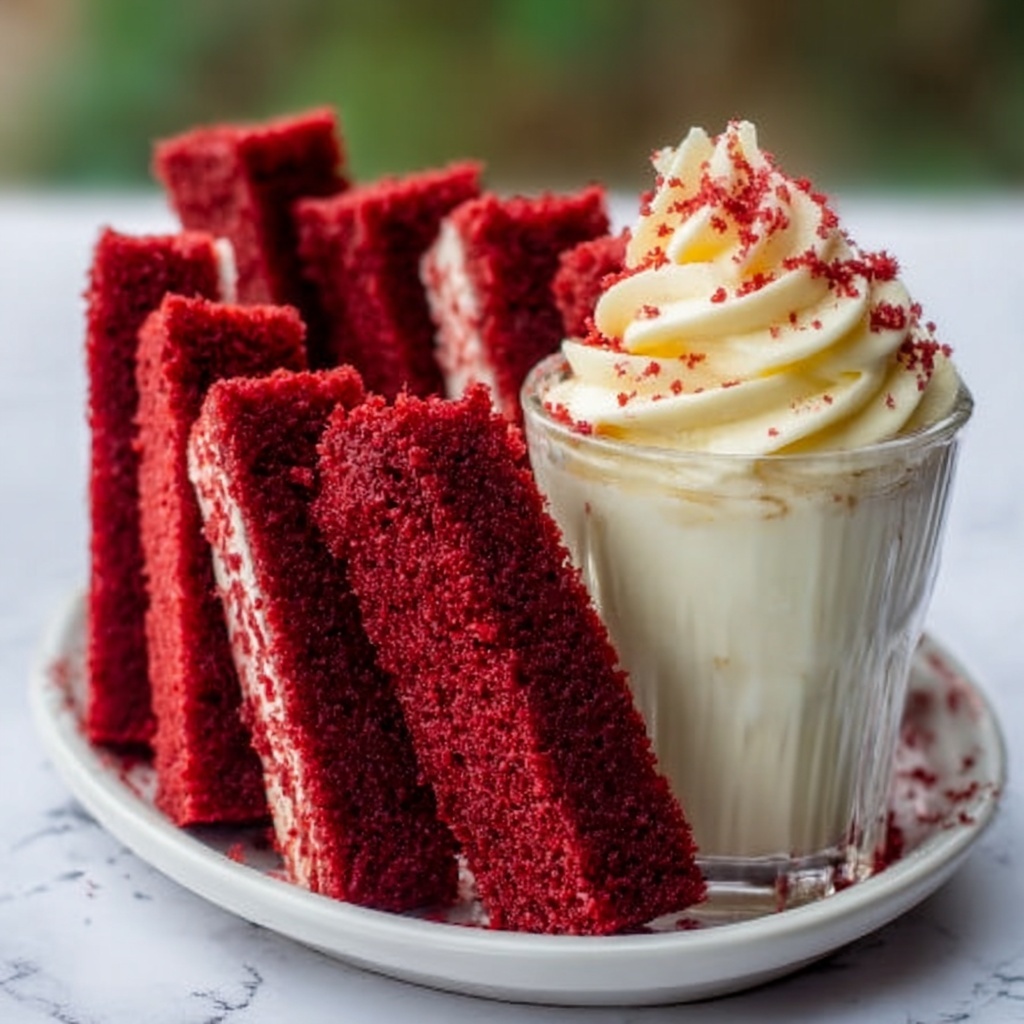
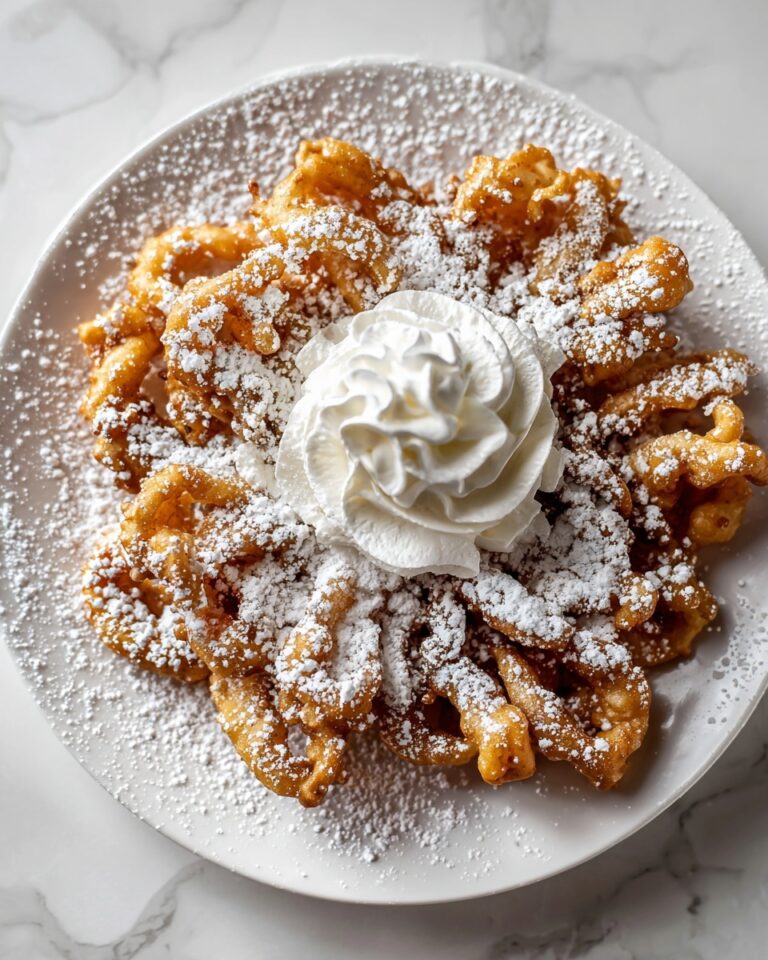
If you adore the rich, vibrant taste of red velvet and the fudgy decadence of brownies, then the Homemade Red Velvet Brownie Dippers Recipe is about to become your new obsession. These delightful, slender brownie sticks bring everything you love about classic red velvet cake, but in a fun, bite-sized form that’s perfect for dipping, sharing, or simply enjoying on their own. With each tender, cocoa-kissed bite bursting with a hint of tangy vinegar and that irresistible splash of red color, these dippers transform any dessert moment into an unforgettable treat.
Ingredients You’ll Need
Gathering the right ingredients is the first step to baking up this flawless batch of red velvet brownie dippers. Each component plays a special role, from creating the perfect moist texture to enhancing that iconic red hue and subtle cocoa flavor.
- Unsalted butter (1/2 cup): Melted to add richness and a fudgy texture to the batter.
- Granulated sugar (1 cup): Sweetens the brownies evenly and helps create a tender crumb.
- Large eggs (2): Bind the ingredients together and add structure while keeping the dippers moist.
- Vanilla extract (1 teaspoon): Provides a warm, gentle aroma that rounds out the flavor profile.
- Red food coloring (1 tablespoon): Gives the brownies their iconic vibrant red color without overpowering taste.
- Unsweetened cocoa powder (1/4 cup): Adds a subtle chocolate depth that balances the sweetness beautifully.
- All-purpose flour (3/4 cup): The backbone ingredient that gives the brownies their chewy, dense bite.
- Salt (1/4 teaspoon): Enhances all the flavors and counters the sweetness.
- White vinegar (1/2 teaspoon): Reacts with the baking process to lift the texture and provide that classic red velvet slight tang.
- White chocolate chips (1/2 cup, optional): Folded in for little pockets of creamy, sweet surprise inside.
How to Make Homemade Red Velvet Brownie Dippers Recipe
Step 1: Prep Your Pan and Oven
Start by preheating your oven to 350°F (175°C) and lining an 8×8-inch baking pan with parchment paper, leaving a bit of overhang on the sides. This will make it super easy to lift the brownies out once baked — a small trick that saves lots of frustration!
Step 2: Combine Wet Ingredients
In a large bowl, whisk together the melted butter and granulated sugar until the mixture is smooth and glossy. Next, whisk in the eggs one at a time, followed by vanilla extract, red food coloring, and white vinegar, making sure everything is fully incorporated. This colorful, velvety batter brings all the essential flavors together before the dry ingredients join in.
Step 3: Add Dry Ingredients
Sift the cocoa powder, all-purpose flour, and salt together. This step ensures a smooth, well-mixed batter without any lumps. Gently fold these dry ingredients into your wet mixture until just combined — be careful not to overmix to keep your brownie dippers tender and delightfully chewy.
Step 4: Fold in Optional White Chocolate Chips
If you’re using white chocolate chips or chunks, now’s the time to fold them into the batter. These sweet pockets melt during baking, adding little bursts of creamy sweetness in every bite.
Step 5: Bake and Cool
Pour the batter into your prepared pan and smooth the surface evenly. Bake for about 25 to 28 minutes, or until a toothpick inserted into the center comes out with just a few moist crumbs. Remove from the oven and allow the brownies to cool completely in the pan — this cooling time is crucial for easy slicing.
Step 6: Cut Into Dippers
Once cooled, use the parchment paper overhang to lift the brownies out. Cut into thin sticks about 3/4-inch wide for perfect dippers. If you want cleaner cuts, you can chill the brownies for 20-30 minutes before slicing.
How to Serve Homemade Red Velvet Brownie Dippers Recipe
Garnishes
Dipping your red velvet brownie dippers in melted white chocolate or vanilla wafers is an absolute game-changer. Add a sprinkle of festive, colorful nonpareils or edible glitter while the chocolate is still wet to jazz up the presentation. These little touches make your dessert platter pop and feel extra special for any occasion.
Side Dishes
Pair these dippers with a scoop of vanilla or cream cheese ice cream for a heavenly dessert duo. Fresh berries or a simple bowl of mixed nuts create fun textures and flavors that complement the richness and sweetness of the brownie sticks without overwhelming them.
Creative Ways to Present
Serve the dippers upright in a tall glass or mug filled with sprinkles, crushed peppermint, or even popcorn for an interactive dessert experience. For parties, arrange them on a tiered tray alongside marshmallows and fruit skewers to create a decadent dessert charcuterie board that everyone will love exploring.
Make Ahead and Storage
Storing Leftovers
Store any leftover brownie dippers in an airtight container at room temperature for up to three days. Keep them away from moisture to maintain their chewy texture. If you’ve dipped them in chocolate, store them in a cool, dry place to prevent melting.
Freezing
These dippers freeze wonderfully! Place them in a single layer on a baking sheet to flash freeze for about an hour, then transfer to a freezer-safe container or zip-top bag. They’ll keep their flavor and texture for up to two months. Thaw at room temperature before serving or dipping.
Reheating
If you like your brownie dippers warm, pop them in a microwave for just 10-15 seconds. Be careful not to overheat, especially if you’ve added white chocolate chips inside, as they can melt out quickly. You can also warm them gently in a 300°F oven for about 5 minutes for a fresh-baked feel.
FAQs
What gives red velvet brownies their signature color?
The vibrant red hue in these brownie dippers comes from the addition of red food coloring, which enhances the visual appeal without altering the flavor much. The combination of cocoa powder and vinegar also helps deepen the color slightly through a chemical reaction.
Can I make these brownies gluten-free?
Absolutely! Substitute the all-purpose flour with a gluten-free baking blend one-to-one. Just be sure the blend contains xanthan gum or another binder to keep the texture just right. The overall flavor and richness stay deliciously intact.
Is there a way to make these less sweet?
If you prefer a less sweet treat, you can reduce the granulated sugar by a couple of tablespoons. Keep in mind this may slightly affect the moisture and texture, but the cocoa and vinegar flavors will still shine through beautifully.
Are these brownie dippers suitable for kids?
Definitely! The fun size and sweet, approachable flavors make them perfect for little hands and palates. Just remember to adjust or omit the white vinegar if your kids are sensitive to tangy notes, although most won’t notice this subtle flavor.
Can I skip the dipping step?
Of course! The dippers are utterly delicious on their own, fudgy and flavorful. Dipping just adds an extra layer of fun and sweetness but is totally optional depending on your mood or occasion.
Final Thoughts
This Homemade Red Velvet Brownie Dippers Recipe is one of those magical finds that feels special yet is simple to make. Whether you’re sharing them at a party, enjoying a cozy night in, or looking to impress your dessert crowd, these red velvet sticks are sure to light up smiles. Don’t wait too long to whip up a batch and see just how quickly they disappear — you’ll be reaching for the recipe again and again!
Print
Homemade Red Velvet Brownie Dippers Recipe
- Prep Time: 15 minutes
- Cook Time: 28 minutes
- Total Time: 45 minutes (plus cooling time)
- Yield: 16–20 dippers
- Category: Dessert, Snack
- Method: Baking
- Cuisine: American
- Diet: Vegetarian
Description
Delicious homemade red velvet brownie dippers that are moist, rich, and perfect for parties or dessert platters. These brownie sticks are easy to make, baked to perfection, and can be dipped in white chocolate with sprinkles for an extra festive touch.
Ingredients
Brownie Batter
- 1/2 cup unsalted butter, melted
- 1 cup granulated sugar
- 2 large eggs
- 1 teaspoon vanilla extract
- 1 tablespoon red food coloring
- 1/4 cup unsweetened cocoa powder
- 3/4 cup all-purpose flour
- 1/4 teaspoon salt
- 1/2 teaspoon white vinegar
- 1/2 cup white chocolate chips or chunks (optional)
Dipping (Optional)
- 1 cup white chocolate or vanilla melting wafers
- Sprinkles for decoration
Instructions
- Preheat the oven: Preheat your oven to 350°F (175°C) and line an 8×8-inch baking pan with parchment paper, ensuring some overhang for easy removal of the brownies.
- Mix wet ingredients: In a large bowl, whisk together the melted butter and granulated sugar until the mixture is smooth. Then add the eggs, vanilla extract, red food coloring, and white vinegar. Mix thoroughly until fully combined.
- Add dry ingredients: Sift in the unsweetened cocoa powder, all-purpose flour, and salt to the wet mixture. Stir gently until just combined to avoid overmixing. Fold in the white chocolate chips if you decide to use them.
- Bake the brownies: Pour the batter evenly into the prepared baking pan and smooth the top with a spatula. Bake in the preheated oven for 25 to 28 minutes or until a toothpick inserted into the center comes out with a few moist crumbs.
- Cool and cut: Allow the brownies to cool completely in the pan to set properly. Once cooled, use the parchment paper overhang to lift the brownies out and cut them into thin sticks about 3/4-inch wide.
- Optional dipping: Melt the white chocolate or vanilla melting wafers according to package instructions. Dip one end of each brownie stick into the melted chocolate and place on parchment paper. Add sprinkles if desired and allow them to set completely before serving.
Notes
- Chill brownies before slicing for cleaner cuts and easier handling.
- These brownie dippers are excellent for parties, dessert platters, or perfect for dunking in milk or coffee.
- For extra flair, customize dipping toppings such as crushed nuts or colored sugars.
