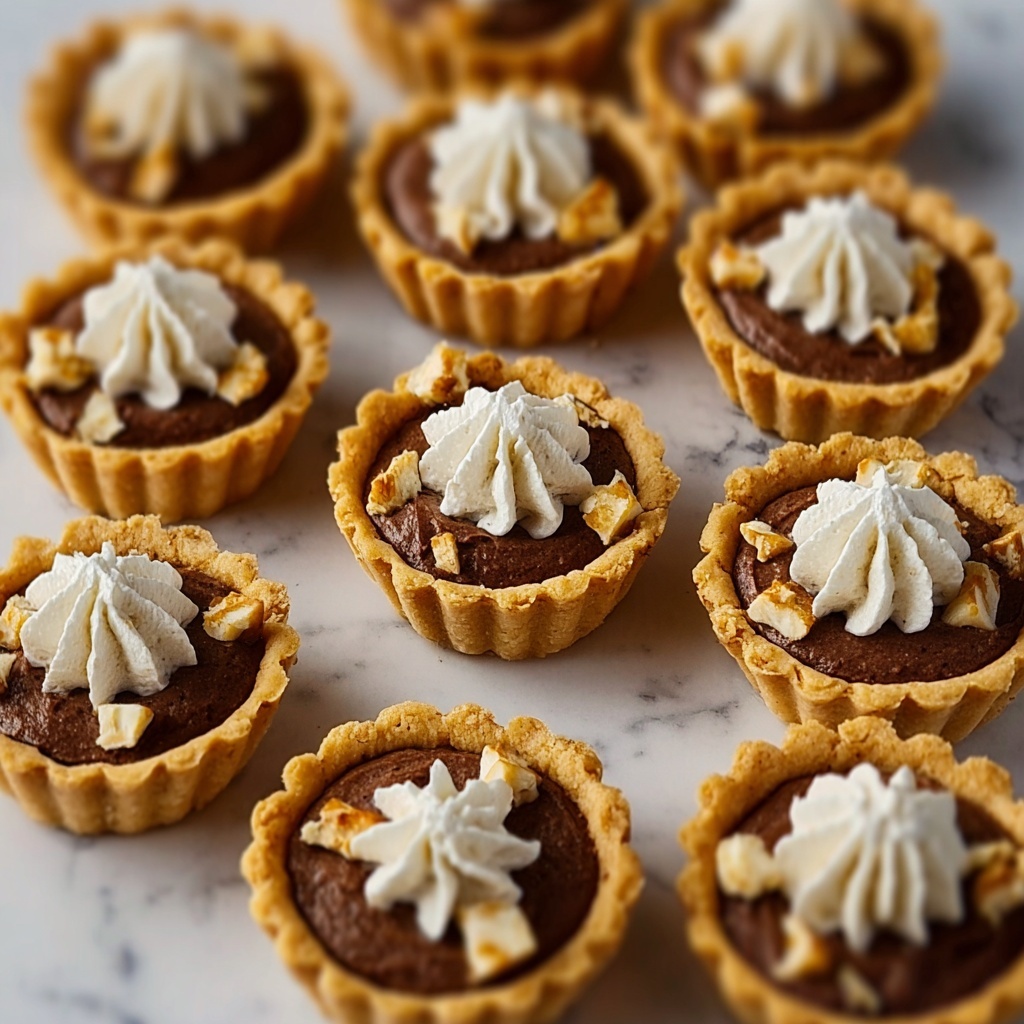
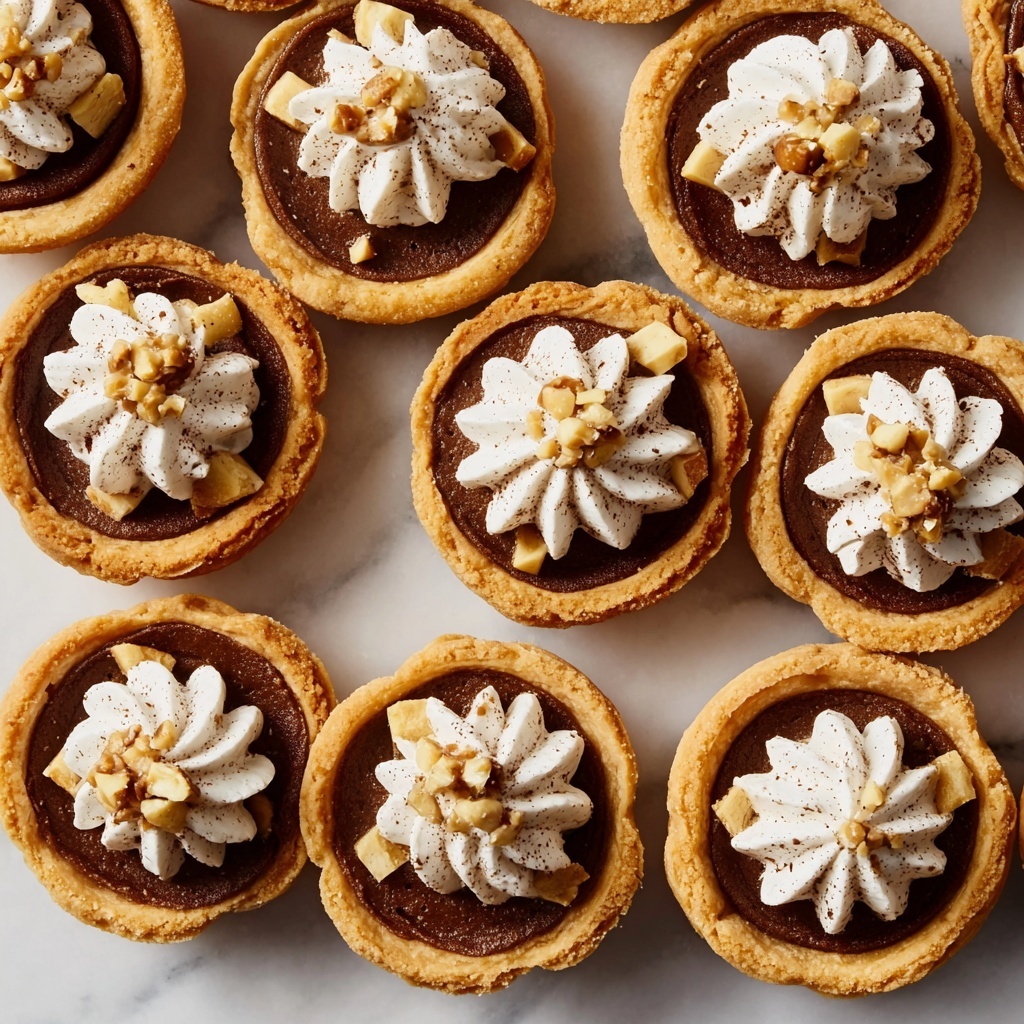
If you adore the rich, velvety charm of chocolate desserts, then you are absolutely going to fall head over heels for this Mini French Silk Pies Recipe. These adorable little pies pack all the luxurious flavor and silky texture of classic French silk pie into a perfectly bite-sized treat. Each mini pie features a crisp chocolate crust, a luscious, creamy filling that practically melts on your tongue, and a heavenly whipped cream topping crowned with chocolate shavings. Whether you’re serving them for a special occasion or just treating yourself, these tiny indulgences make chocolate bliss dangerously easy to enjoy.

Ingredients You’ll Need
The secret to these Mini French Silk Pies lies in their simplicity. Every ingredient plays a crucial role in building flavor, texture, and that irresistible chocolate allure. From the chocolate cookie crumbs in the crust to the creamy, dreamy filling, and the light whipped cream topping, each component is essential to make your mini pies simply unforgettable.
- Chocolate graham crackers or chocolate cookie crumbs (1 cup): This provides the perfect chocolatey, crumbly base for the crust with a hint of crunch.
- Unsalted butter (4 tablespoons melted for crust, ½ cup softened for filling): Butter adds richness and helps bind the crust and filling together for a luscious texture.
- Granulated sugar (1 tablespoon for crust, ¾ cup for filling): Sweetness that balances the deep, bittersweet chocolate flavor perfectly.
- Unsweetened chocolate (2 ounces melted and cooled): The star of the show—delivers an intense chocolate punch in the silky filling.
- Vanilla extract (1 teaspoon for filling, ½ teaspoon for topping): Enhances and rounds out the chocolate flavor with its warm aroma.
- Large eggs (2, pasteurized): Eggs lighten the filling, giving it that elegant, airy silkiness so prized in French silk pie.
- Heavy cream (1 cup): Whipped into soft peaks to create a light, fluffy topping that perfectly trims each mini pie.
- Powdered sugar (2 tablespoons): Sweetens the whipped cream topping delicately without overpowering the chocolate.
- Chocolate shavings or curls: A final, decorative flourish that adds a festive and indulgent touch.
How to Make Mini French Silk Pies Recipe
Step 1: Prepare the Chocolate Crust
Start by preheating your oven to 350°F. In a small bowl, combine your chocolate crumbs, melted butter, and sugar. Stir until everything resembles wet sand—a bit like a sandy beach but made entirely of chocolate goodness. Press about 1 to 2 tablespoons of this crumbly mixture into the bottom of each cup in your mini muffin or tart pan. Pop them into the oven for 5 to 7 minutes until lightly firm. Let them cool completely; this will help your filling set beautifully on a sturdy base.
Step 2: Whip Up the Silky Filling
In a medium bowl, cream the softened butter and sugar together using a hand mixer for 2 to 3 minutes until the mixture becomes light and fluffy. Now it’s time to add your melted, cooled chocolate and vanilla extract, mixing until fully combined into a rich chocolate dream. Add the pasteurized eggs one at a time, beating for 2 to 3 minutes after each addition. This step is key—it incorporates air, making the filling velvety smooth and luxuriously silky.
Step 3: Assemble the Mini Pies
Using a spoon or piping bag, fill each cooled mini crust with the velvety chocolate filling. The contrast of the firm crust and the airy filling is what makes these pies truly special. Once filled, place them in the refrigerator to chill for at least 2 hours, allowing the filling to fully set and hold its shape.
Step 4: Create the Whipped Cream Topping
Time to add that airy, sweet finish! Beat the heavy cream with powdered sugar and vanilla extract until stiff peaks form—the perfect fluffy clouds to crown your pies. Pipe or dollop generous amounts onto each mini pie and finish with elegant chocolate shavings or curls for a stunning presentation that says, “Enjoy me!”
How to Serve Mini French Silk Pies Recipe
Garnishes
A swirl of freshly whipped cream with chocolate curls is classic, but don’t be afraid to get creative! A dusting of cocoa powder, a sprinkle of crushed peppermint candy in the winter, or even a few fresh raspberries on top can provide a lovely pop of color and flavor contrast.
Side Dishes
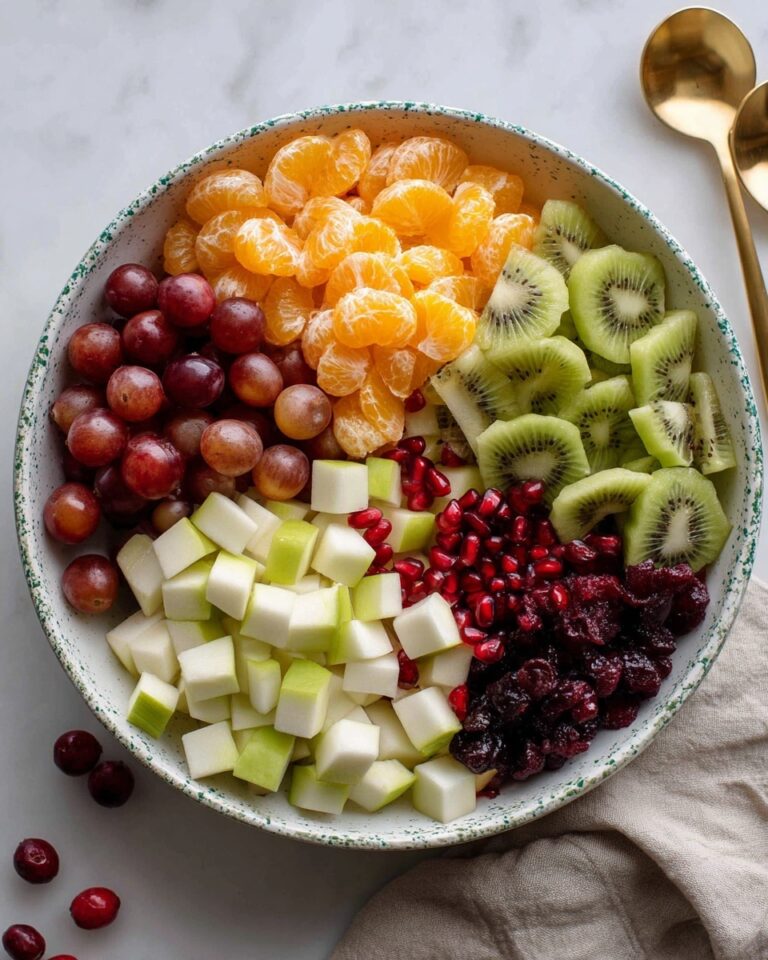
Since these Mini French Silk Pies are rich and decadent, pairing them with something light balances the dessert experience beautifully. A refreshing mixed berry salad or a scoop of vanilla bean ice cream works wonders to complement the intense chocolate flavor without overwhelming your palate.
Creative Ways to Present
Mini pies are made for sharing and impressing! Serve them on a tiered dessert tray for a beautiful display at parties or package them individually in small clear boxes tied with a ribbon for charming gifts. You can even serve them with mini forks or spoons on sweet doilies to elevate the presentation and make each bite feel extra special.
Make Ahead and Storage
Storing Leftovers
Keep your mini pies refrigerated in an airtight container to maintain that silky texture and prevent the crust from getting soggy. They’ll stay fresh and delicious for up to 3 days, giving you plenty of time to enjoy them again and again.
Freezing
If you want to save these treats for later, they freeze well. Pop the mini pies into a freezer-safe container with parchment paper layers to prevent sticking, and freeze for up to one month. Thaw overnight in the refrigerator to preserve the delicate texture before serving.
Reheating
Because these pies are best served chilled, reheating isn’t necessary. Just remove them from the fridge about 10 minutes before serving to take the chill off and allow their full flavors to shine through beautifully.
FAQs
Can I use store-bought mini tart shells instead of making the crust?
Yes! Using pre-made mini tart shells or phyllo cups is a convenient shortcut that saves time and still tastes fantastic. Just fill and chill as directed in the recipe.
Is it safe to use raw eggs in the filling?
This recipe uses pasteurized eggs to ensure safety since the filling is not baked. Pasteurized eggs are treated to reduce the risk of bacteria, making them safe for no-bake desserts.
Can I substitute the unsweetened chocolate with cocoa powder?
While you could try substituting cocoa powder, unsweetened chocolate provides a richer, smoother texture and deeper flavor that’s key to achieving the classic French silk silkiness.
How long do Mini French Silk Pies keep in the refrigerator?
They stay delicious and fresh for up to 3 days when stored properly in an airtight container in the fridge.
Can I make these pies dairy-free or vegan?
This recipe relies on butter, heavy cream, and eggs, so it’s not naturally dairy-free or vegan. However, you can experiment with plant-based butters, coconut cream, and vegan egg substitutes, but results may vary in texture and flavor.
Final Thoughts
Making this Mini French Silk Pies Recipe is like wrapping yourself in a warm chocolate hug that’s rich, silky, and utterly delightful in every bite. These tiny treasures are as fun to make as they are to eat, bringing elegance and indulgence to any occasion. So grab your mixing bowl and give them a try—you won’t regret sharing these chocolate silk morsels with your favorite people, or savoring one (or two) all to yourself!
Print
Mini French Silk Pies Recipe
- Prep Time: 25 minutes
- Cook Time: 7 minutes
- Total Time: 2 hours 30 minutes
- Yield: 12 mini pies
- Category: Dessert
- Method: No-Cook
- Cuisine: American
- Diet: Vegetarian
Description
Delight in these Mini French Silk Pies—bite-sized chocolate mousse tarts with a buttery crumb crust, a rich silky chocolate filling made with softened butter and melted unsweetened chocolate, topped with fluffy vanilla whipped cream and elegant chocolate shavings. Perfect for elegant entertaining or a decadent treat!
Ingredients
For the Crust:
- 1 cup crushed chocolate graham crackers or chocolate cookie crumbs
- 4 tablespoons unsalted butter, melted
- 1 tablespoon granulated sugar
For the Filling:
- ½ cup unsalted butter, softened
- ¾ cup granulated sugar
- 2 ounces unsweetened chocolate, melted and cooled
- 1 teaspoon vanilla extract
- 2 large eggs, pasteurized
For the Topping:
- 1 cup heavy cream
- 2 tablespoons powdered sugar
- ½ teaspoon vanilla extract
- Chocolate shavings or curls, for garnish
Instructions
- Prepare the crust: Preheat your oven to 350°F. In a small bowl, mix the crushed chocolate crumbs, melted butter, and sugar until the texture resembles wet sand. Press approximately 1–2 tablespoons of this mixture firmly into the bottom of each cup in a mini muffin tin or mini tart pan. Bake the crusts for 5–7 minutes until set, then remove and allow to cool completely.
- Make the filling: In a medium bowl, use a hand mixer to cream the softened butter and granulated sugar together for 2–3 minutes until light and fluffy. Add the melted and cooled unsweetened chocolate along with vanilla extract, beating until fully incorporated. Add the pasteurized eggs one at a time, beating each addition for 2–3 minutes to incorporate air and achieve a silky texture.
- Assemble and chill: Spoon or pipe the chocolate filling into the cooled mini crusts evenly. Place the assembled pies in the refrigerator and chill for at least 2 hours until set firmly.
- Prepare the topping: While the pies chill, beat the heavy cream, powdered sugar, and vanilla extract together until stiff peaks form. Once the pies are set, top each mini pie with a dollop or piped swirl of whipped cream and garnish with chocolate shavings or curls for an elegant finish.
Notes
- Use pasteurized eggs to ensure safety since the filling is not baked.
- For quicker preparation, pre-made mini tart shells or phyllo cups can be used instead of making the crust from scratch.
- Ensure the melted chocolate is cooled before mixing to prevent curdling the butter and eggs.


